
Save Money by Using SnapMat to Cut Your Craft Scraps
We may earn a small commission for purchases made through affiliate links in this post. For more information go to our Privacy Policy.
The Cricut SnapMat feature on the mobile Design Space apps is a dream come true.
Do you hoard paper scraps that are anywhere from 2 x 2 inches on up to a full sheet that has one corner cut out of it?
What do you do with all those scraps?!
Especially when there are new colors and patterns being released all the time.
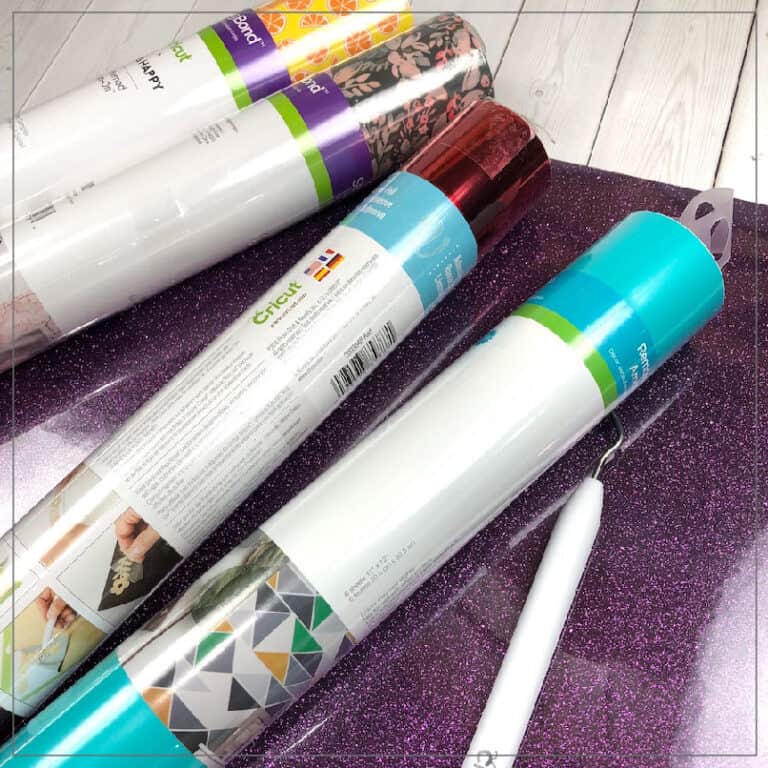
I don’t know about you, but I have two drawers in a Rubber Maid roller cart that are full of paper scraps. One drawer has every color imaginable of cardstock. The other drawer is loaded with chunks of pattern paper.
How This Tool Can Help You Use up Your Paper Scraps!
When the Silhouette Cameo first came out, I was so excited to design my own SVG cut files and use them for paper piecings on scrapbook pages and cards.
I can’t even tell you how long it would take me to load up a cutting mat with all the colors of cardstock that I needed and then rearrange all the cut files on the screen.
Most of the time, it worked out ok.
Occasionally, I would have a piece that cut on the wrong color or that overlapped onto a second color and was ruined.
SnapMat is a genius way to place all those paper scraps on your Cricut cutting mat and then arrange your cut objects so they are placed properly!
Requirements to Use:
- A Cricut Cutting Machine (sorry Silhouette users…I still haven’t figured out a good trick for this).
- An Apple Device with Photo Capabilities (sorry Android users…it looks like your app does not have the same feature as the iOS app.)
- Cricut Design Space on a mobile device (iPad, iPhone).
- Paper Scraps (of course)
- A Cricut cutting mat (it might work with others…but it might be color sensitive. I need to play with it a little more).
Okay.
Are you ready for this?
Upload your cutting file and size it the way you want for your final piece.
Pull apart the different colors. Move them around on the screen so they are close to an inch line and they are not overlapping other objects and their “paper space”.
You can do all this work on your computer in Cricut Design Space. Just save it when this part is done and then move over to your mobile device.
Once you have them all arranged, take a screenshot of your layout (unless you have something else that will help you remember what element is which color).
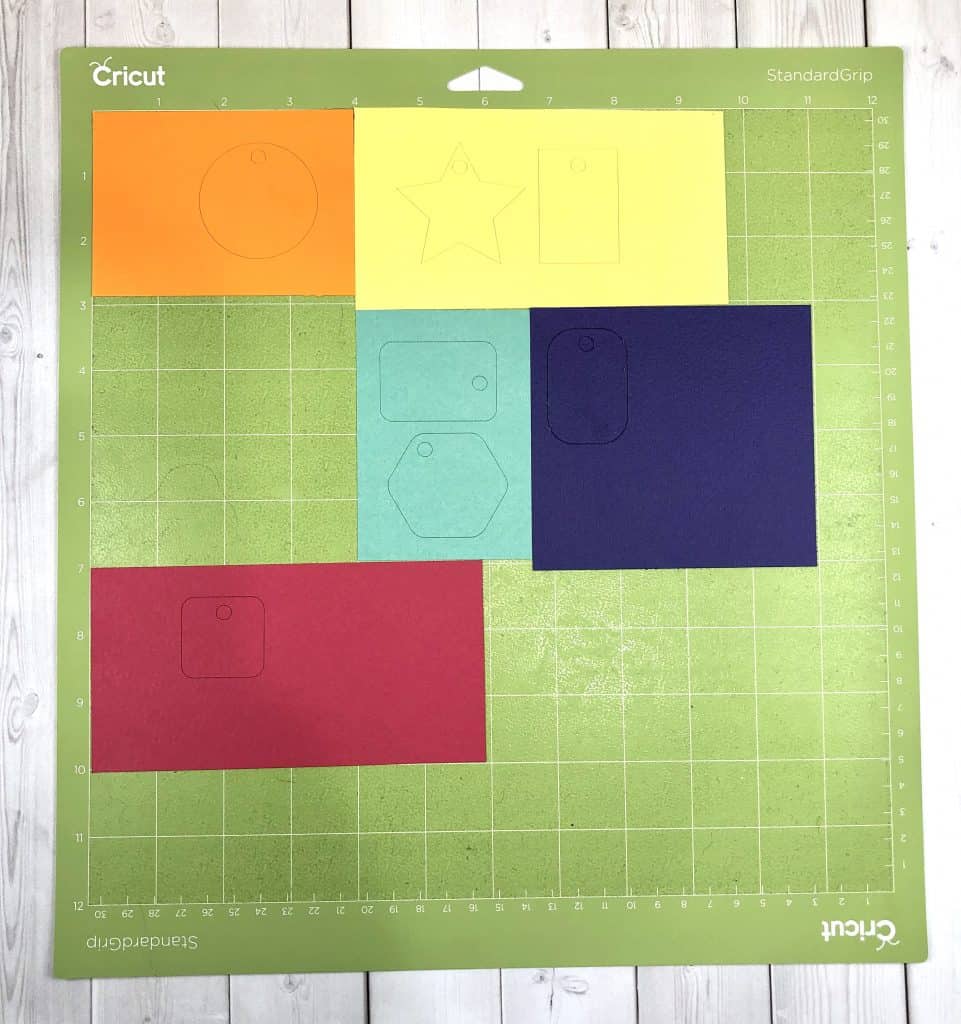
Next, take out your Cricut mat and add your scraps of paper. Put the colors where they correspond with the shape you are cutting out. If you have a yellow tag, make sure the yellow paper is large enough for the tag to cut and then place it where you want on the mat.
You don’t have to be exact with this part. We will fine tune it in a later step. Just get enough paper scraps on your mat to cut the elements you need. You will see how I have mine added in the next image.
The Power of This Tool
Here it is. This is the part you have been waiting for. It’s where the magic happens with this feature.
Place your cutting mat somewhere that you can get a full picture of it. My benches are pretty tall so I just place the mat on the floor.
Open up your Cricut Design Space App. (if you were designing this all on your computer first). If you are in the app already you can skip down to where we highlight all of our cut paths.
Navigate to your project (under the dropdown where it says CATEGORIES). Click that and select My Projects in the Cloud.
Select your project.
Click CUSTOMIZE.
Now click on MAKE IT.
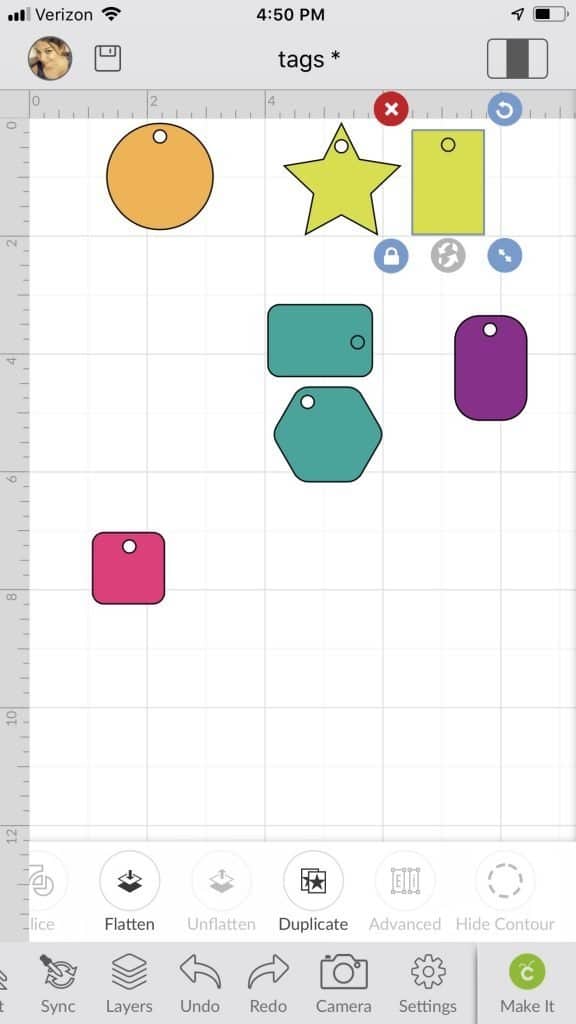
Highlight all of your cut paths or elements. Click on ACTIONS and then click on ATTACH.
All of your elements are now the same color. If you don’t remember what color you wanted them to be, you can refer to that screenshot you took or if you have another image of the project, you can use that.
Tap on the whole project and click DE-TATCH. I’ll explain why we do this in a few minutes.
In the lower left, click on the SNAPMAT icon (it’s a camera in a circle).
You need to line the mat up inside the clear window so that both of the blue guide dots are centered. One at the top and one on the right.
A green outline will appear when you have the right distance from the mat and then it will automatically take the photo.
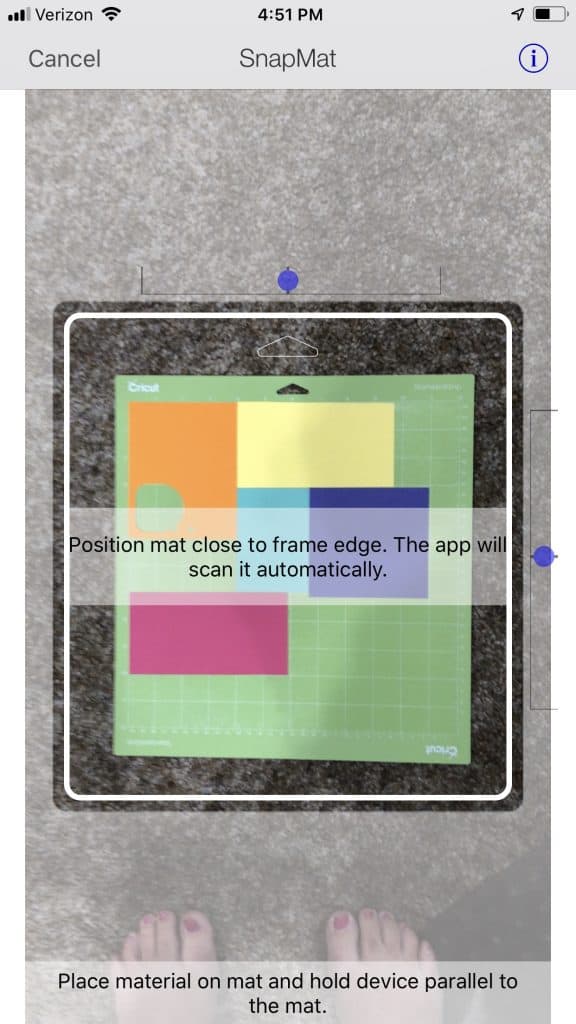
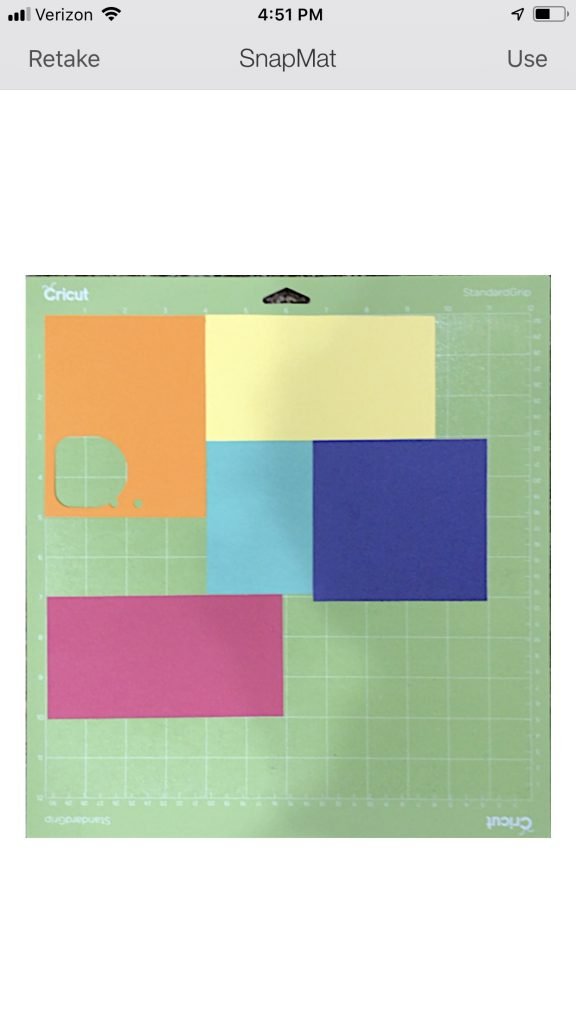
The next screen will be a photo of your mat and all the paper scraps that you have placed on it. If it’s a little blurry, don’t worry about retaking the photo.
Click USE.
You just need the basic outline of where the papers are. As long as you don’t place anything too close to an edge it will still work perfectly.
We are now ready to move our cut path elements around so they cut where we want on the mat. Remember when we changed the color of each element by attaching them all together?
Pro Tip: If at any time you missed a step or you need to go back to your canvas, you can click the 3 rectangles in the top right (under the battery icon) and select where you want to navigate to.
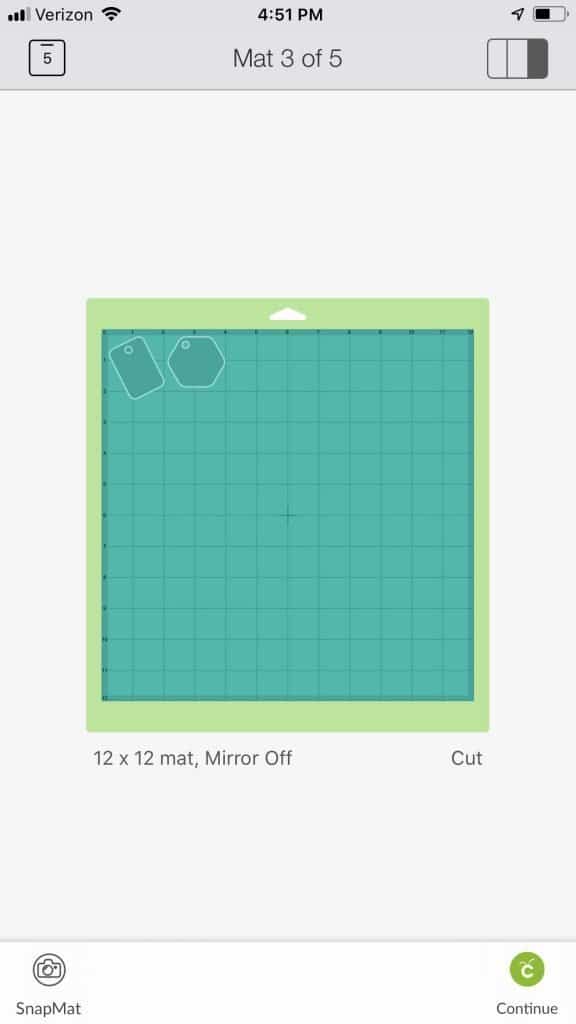
If we hadn’t done that step, then the program would give us a separate mat screen for each color. Something like this. Notice the 5 in the left top corner? That is saying my project will need 5 different mats to complete the cuts. Yikes!
By making each element the same color, we only need one cutting mat and we can view each element on one screen. This gives us the ability to move them around on our mat so they cut out of the appropriate paper scraps.
Now, click on an element. You will get a bounding box and you will be able to drag it around on your screen. Place it over the corresponding color for that shape.

Once you have all your elements placed where you want them, click on the green Cricut CONTINUE.
The app will walk you through the final cut steps just like it normally does on your device or computer.
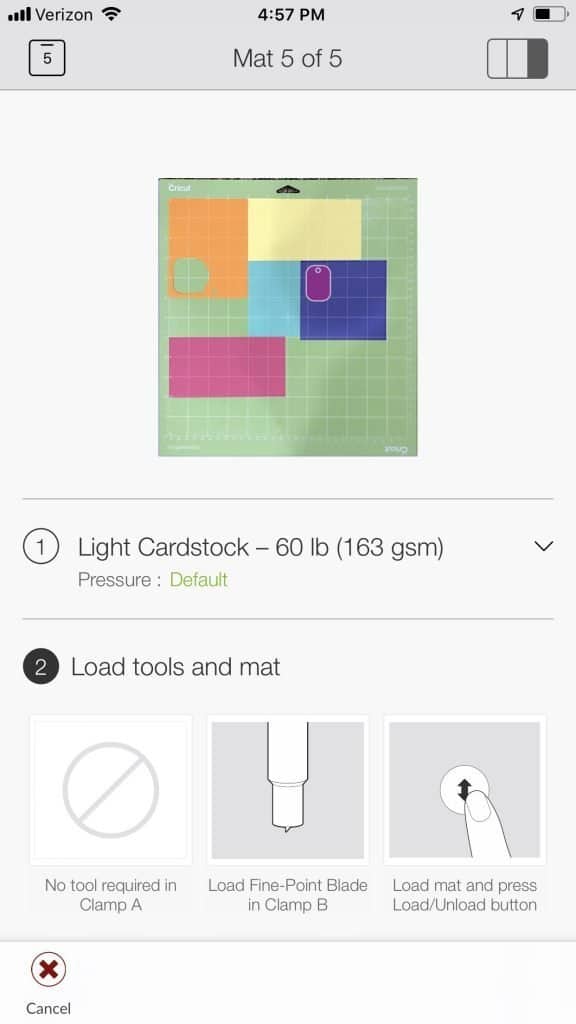
First, it will locate your cutting machine, then it will ask you what material you are cutting from, and then it will request that you load the cutting mat. Lastly, you will hit that flashing cut button and watch as the magic unfolds!
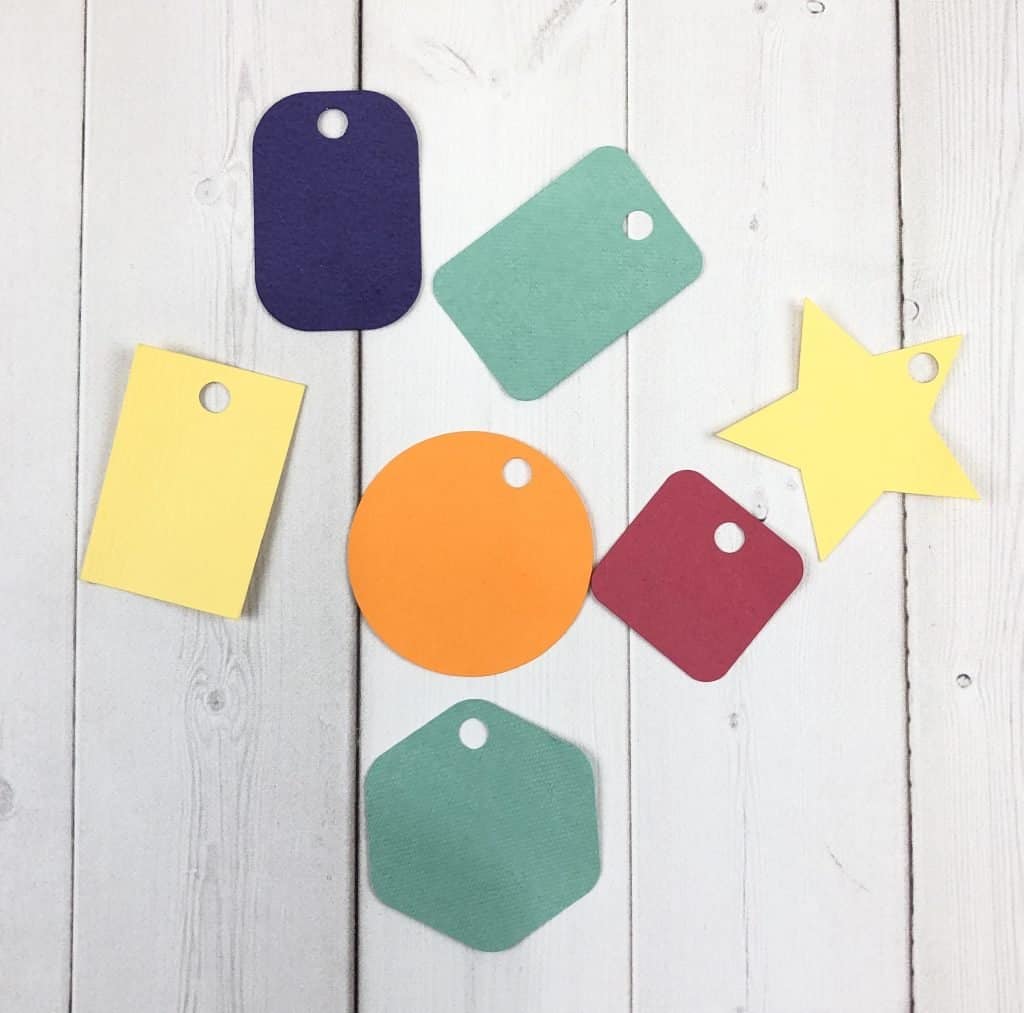
Here is my scrap paper cut when I made a set of multi-colored tags as an example for my SVG file course.
I hope that after following this tutorial you have a better understanding of how to use the Cricut SnapMat feature. It is a great way to use up all your paper scraps and not waste a full sheet of paper or vinyl when you just need to cut one small thing.
Let me know if you have any questions or would like to see a specific tutorial. I’m happy to help!


Can you use Snapmat with Cricut
Maker 3? I am thinking of asking for Christmas and debating which one to get. Or, wait later, for another model to come out. Perhaps, get maybe hypothetically speaking, a “Cricut Maker 4” and get Cricut Joy for now.
You can. Snapmat is a function in the iOS app. As long as the machine talks to the app, then you can use the snapmat function. I’m sure the newer machines will also be compatible with the Cricut App.