Learn How Illustrator Artboards and Layers Work with a Simple Tutorial
We may earn a small commission for purchases made through affiliate links in this post. For more information go to our Privacy Policy.
Figuring out Illustrator Artboards and all the different tools can be a little overwhelming. If you are interested in making your own printables you have probably looked at different design programs and fiddled with making a page or two.
Illustrator is a great program for making graphics and printables. I started learning how to navigate the program in 2011.
There isn’t a single day that my computer is on without this program open. That’s how often I use it!
Starting with the basics is the best way to learn the program and become a whiz at creating printables, designing planners, printable home decor, bullet journal templates, and SVG files that you can use with your Cricut cutting machine.
Artboards and Layers are the beginning foundation of any project. Learning those first is essential…
Once you have learned to use this program, you will have the freedom to design any vinyl or paper pattern you need for your crafts!
No matter what you are designing, you need to learn the ins an outs of your design program. Learning to make digital downloads starts with knowing about Illustrator Artboards and Layers.
Let’s Talk About Illustrator
Artboards are the “pages” in Illustrator. It’s the canvas that you create your printable or artwork on.
The size of your ARTBOARD is determined by the dimensions you added when you created the new document.
It can be changed to fit your graphics, the printable of your choice, or it can be multiple sizes to fit different needs once you have the document started.
The easiest way to think of an ARTBOARD is as a piece of paper.

The white rectangle on the screen is the ARTBOARD for this document. I have set it to 8.5 x 11 for printable documents.
You will want to learn these keystrokes so you can work faster and more efficiently.
You can ZOOM in or out on your document. The easiest keystrokes for that are:
COMMAND (CMD) + or – (MAC)
CONTROL (CTRL) + or – (PC)
The ARTBOARD Tool
On the left-hand toolbar, you will see a square that has a folded edge. This is your ARTBOARD tool. You will have different options for your workspace when you click this button.
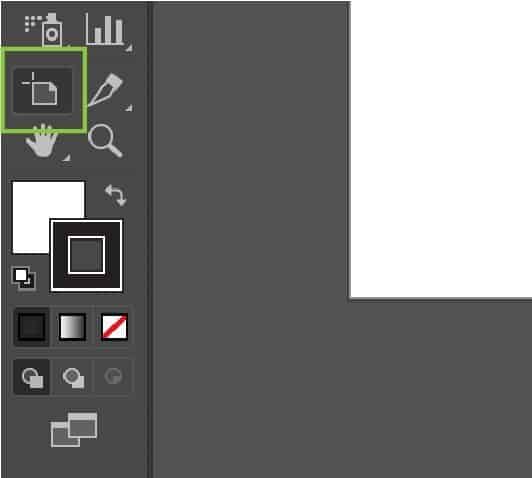
To return to your regular options you will click on the top left ARROW. This is your SELECT tool.It’s like home row on your keyboard. It’s where you always want to be if you are not using a specific tool.To add multiple ARTBOARDS you can open the panel on your right-hand toolbar. It looks like two overlapping rectangles (two pieces of paper: one in portrait and one in landscape).Click on the STICKY NOTE icon. This will give you a new ARTBOARD. You can click this as many times as you need to make a new artboard.The TRASH can next to it is used to delete an artboard if you get too many. 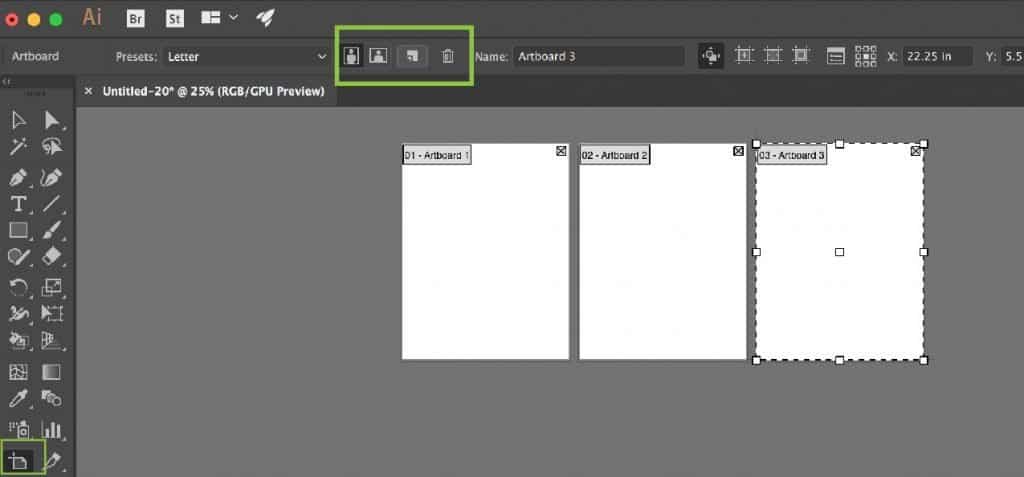
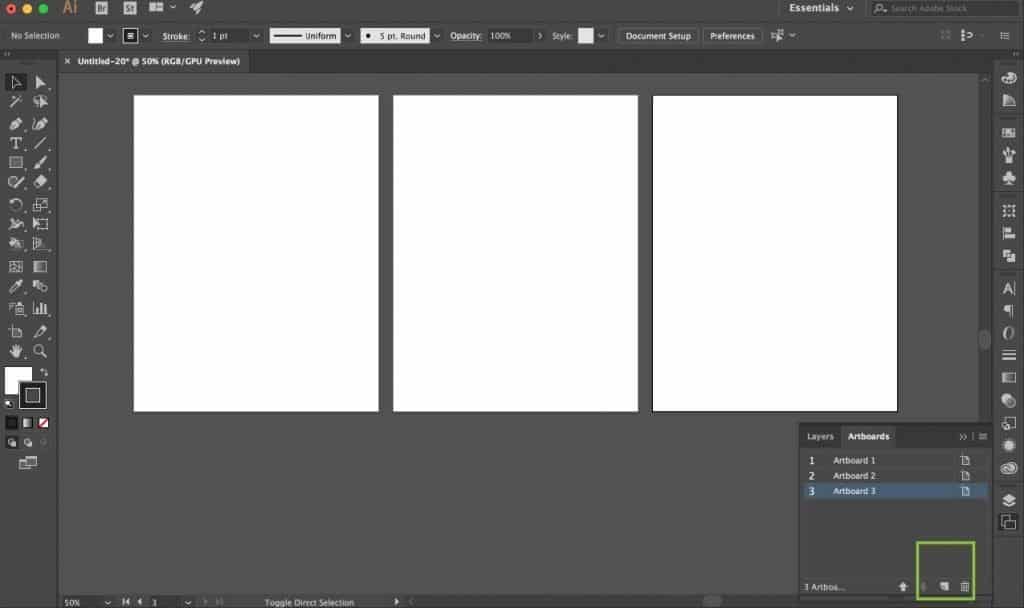
A second way to add more ARTBOARDS is by clicking on the ARTBOARD TOOL on the left-hand toolbar.At the top of the screen, you will see your layout options for the current workspace and a similar STICKY NOTE and TRASH icon.The dashed line around the 3rd ARTBOARD is showing that it is currently the selected board.You can also see the names of each ARTBOARD in the upper left corners. These can be changed in the panel. I’ll show you how to do that in a moment.
This window shows you where the next ARTBOARD can be placed.
When you use the ARTBOARD tool you can choose where you want to the ARTBOARD to go on your workspace.
You can put it under a row of current boards, along the side, or offset. Whatever works for your design process.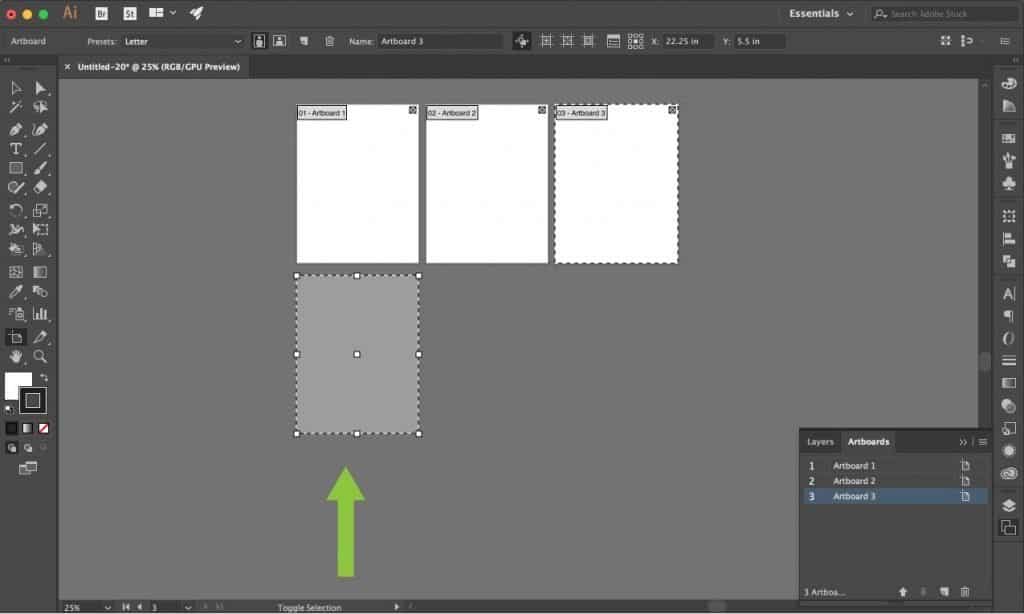
When you open the ARTBOARD panel you can see the number of ARTBOARDS in your workspace. You can also see their titles.
If you double click on the title, it will become an editable box. You can rename your ARTBOARDS to keep track of your document’s pages.
The two arrows in the bottom of the panel are for moving the ARTBOARD and its position in the document. Maybe you need to move a page to the top or bottom of the document.
You can use the ARROWS or you can click and hold on the layer and then drag it to the spot you want so your document is in the proper order.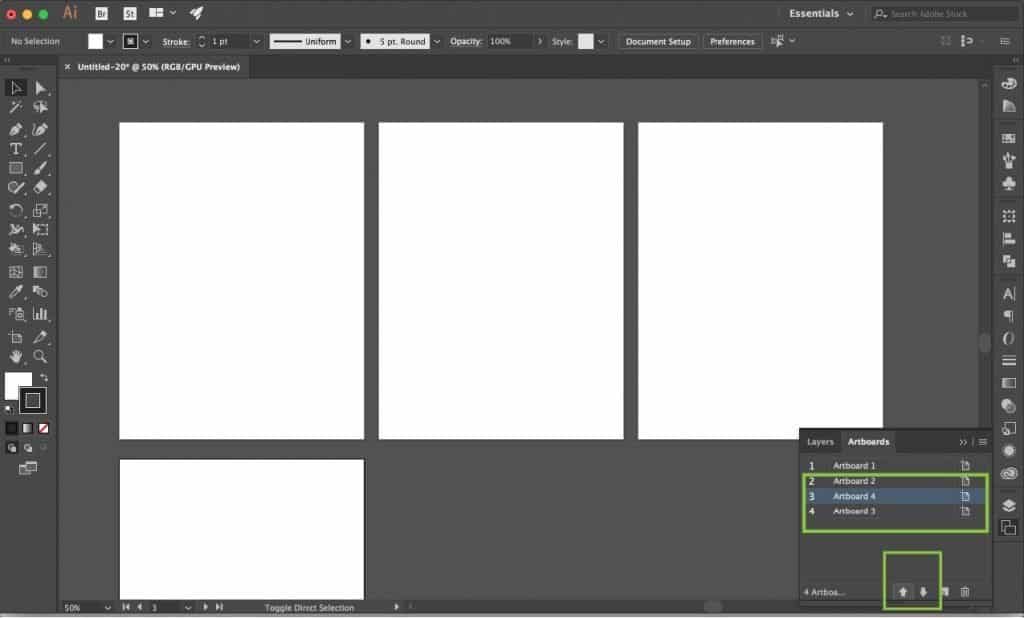
Managing Your Artboards
If you add too many ARTBOARDS you will get a warning that the pages no longer fit in your workspace.
When this happens, you can manually move around your ARTBOARDS or you can let the program do it for you.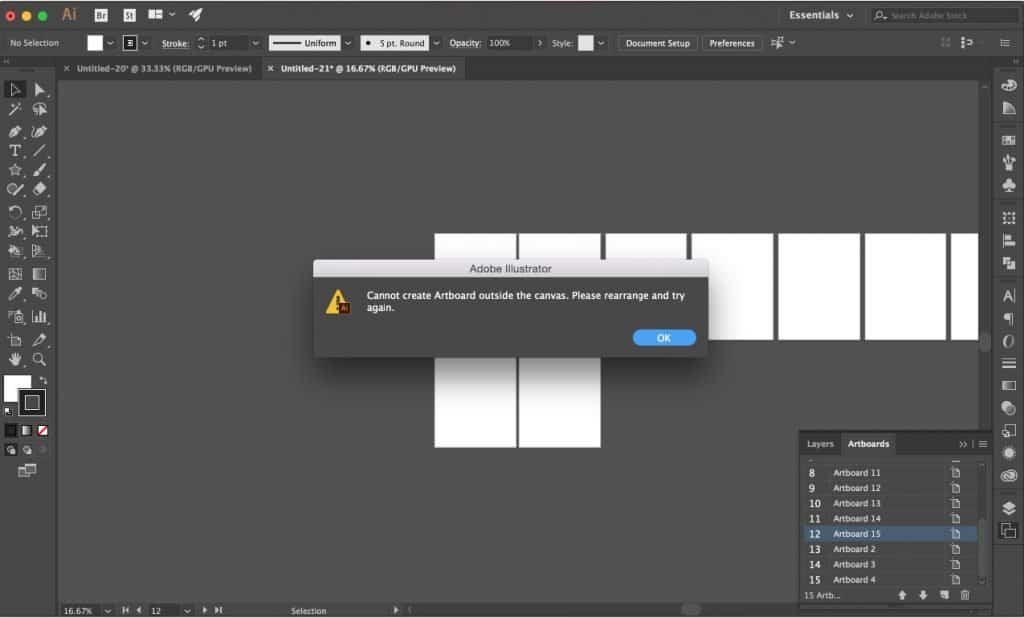
Click on OBJECT. Scroll down to ARTBOARDS. In the sub-menu that opens click on REARRANGE.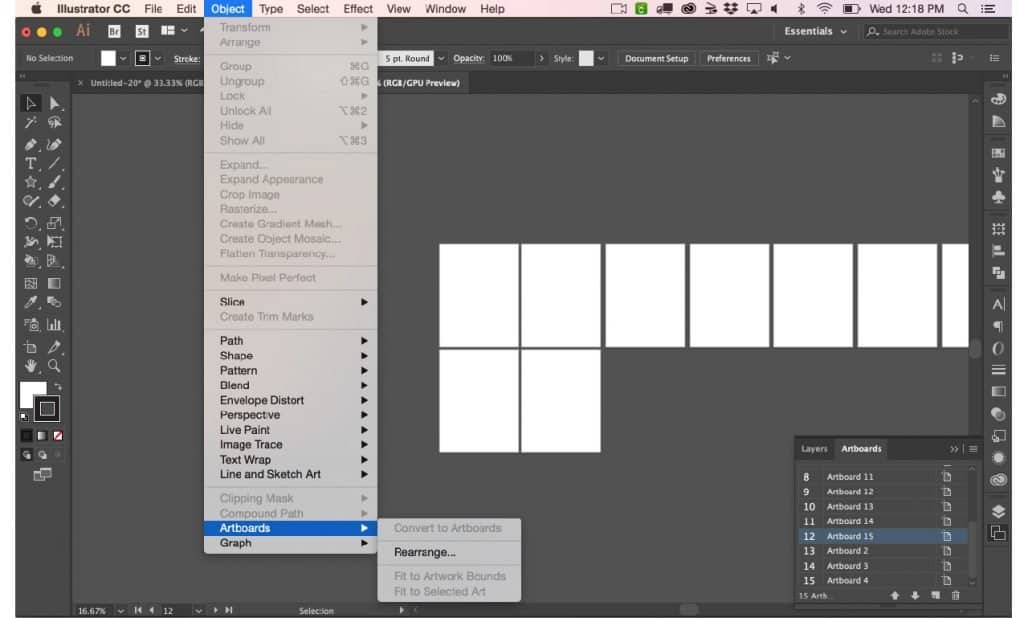
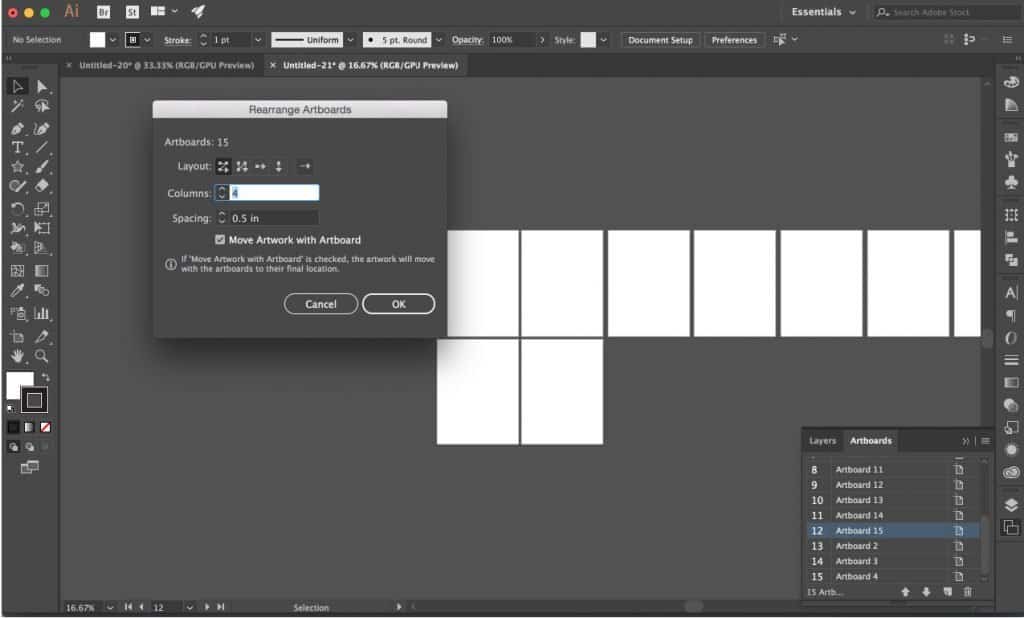
- You will get a menu with options for REARRANGING ARTBOARDS.
- Choose how many boards across you want.
- Choose how far apart you want them spaced in your workspace.
- Mark the box to have your ARTWORK (any work that is on that page) to move with your ARTBOARD. If you don’t’ select this…the board will move but all its elements will stay where they are!
- The layout is showing you how your boards will be arranged…select the map/version that you like best.
This screen shows how the ARTBOARDS that were spreading across my workspace are now in an array that is 4 across and then it added as many rows as it needed to so that all the boards are organized.
Zooming out is a great way to see the whole document. Then you can zoom back in to work on a specific page.
Using Adobe Layers to Make Printables
Let’s discuss the layers panel or the layers tool. Over on the right-hand panel where you view your artboards, you can also view your layers.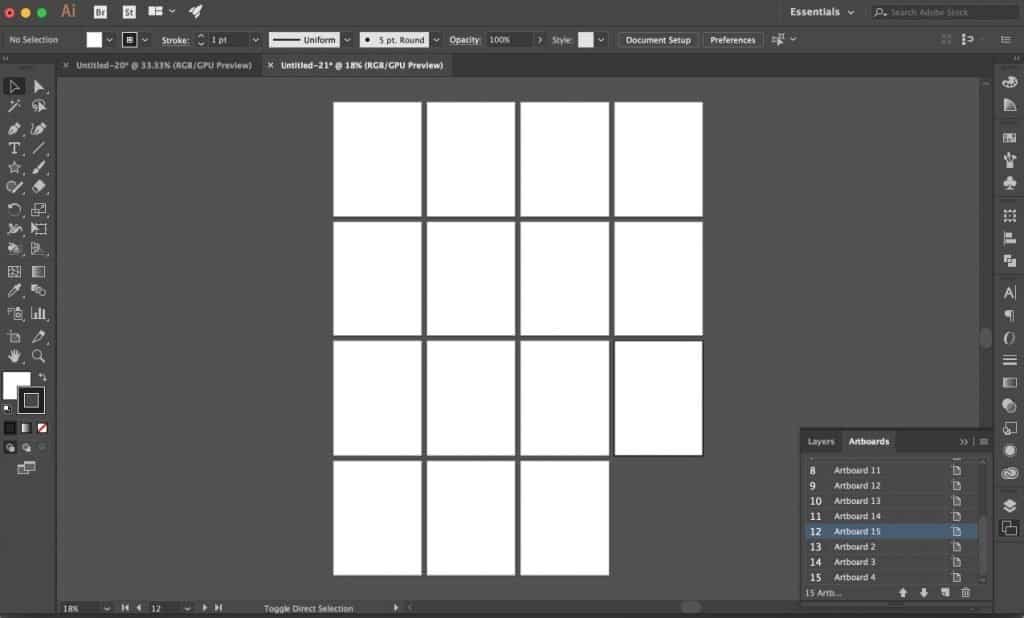
It is the tool right above the artboards panel, where you’ve got two layers of paper that look like they overlap each other or they’re stacked on top of each other.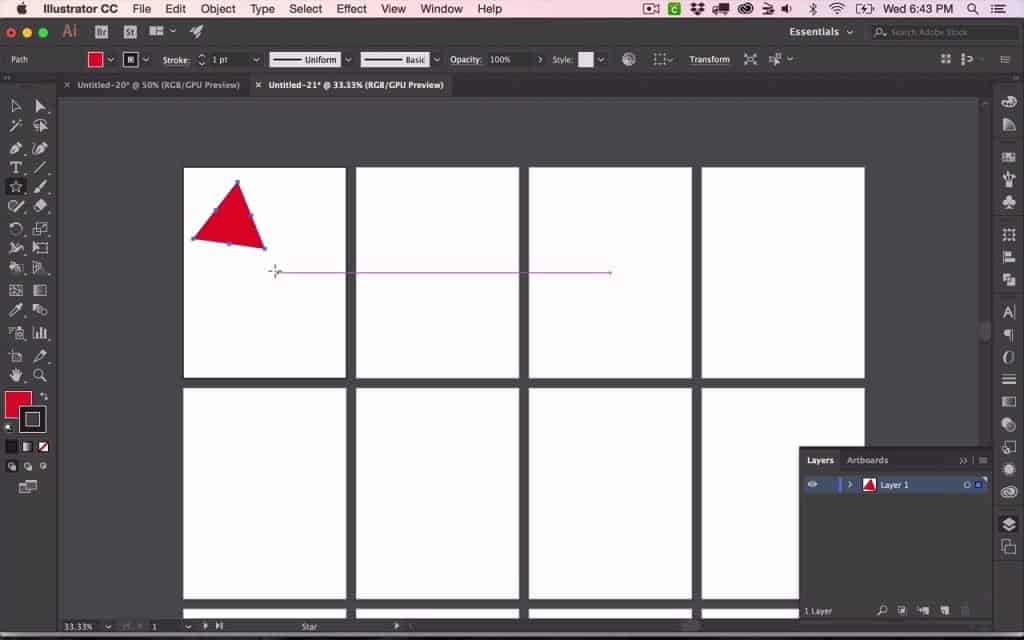
Layers are used to organize the elements that we put onto the artboard. The easiest way to think about a layer is to think of it as a piece of glass. Every time you put a layer down, you’re putting down another piece of glass and your object or your element is on top of that glass.
I have added this red triangle on my artboard.
To rename the layer then double click on the layer and rename it just like you would on an artboard.
There is a blue line around the triangle as well as a blue bounding box. That is showing you that the object is selected and that it belongs on that “blue” layer.
Let’s add another layer. You do that by clicking on the little sticky note with a folded edge on it. 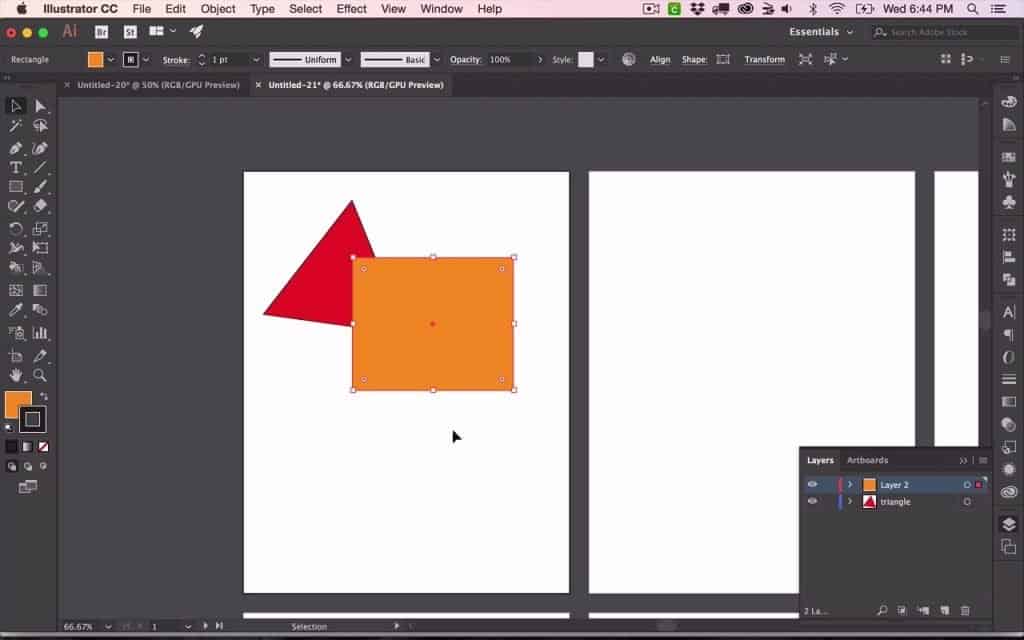
Once you have another layer (make sure it is selected by clicking on it), add another shape to it.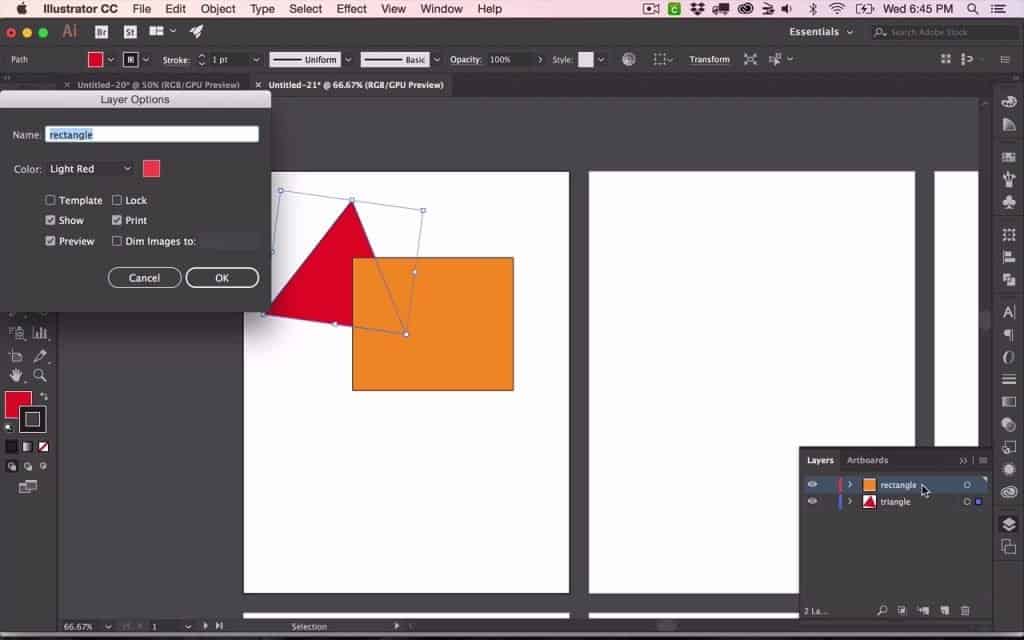
Change the color of the shape. My example is orange. You can choose the same color to follow along or the color of your choice.
The orange rectangle is now on layer two and we can double click on that layer and rename it “rectangle”.Notice the bounding box for this layer is red and you can tell that it’s on the red layer because of the red line next to the layer name and the small red square at the end of the layer name.If you wanted to change those colors, you can double click on the layer, it will give you the layer options.
You can rename it in this options panel, you can change its color and then you can lock it if you want to. We will learn about locking layers in a future lesson.
Let’s add one more layer so you can see what happens when you have multiple layers and you move them around with your artwork. Click the sticky note to add your third layer. Then add another shape and color it green (or a color of your choice). 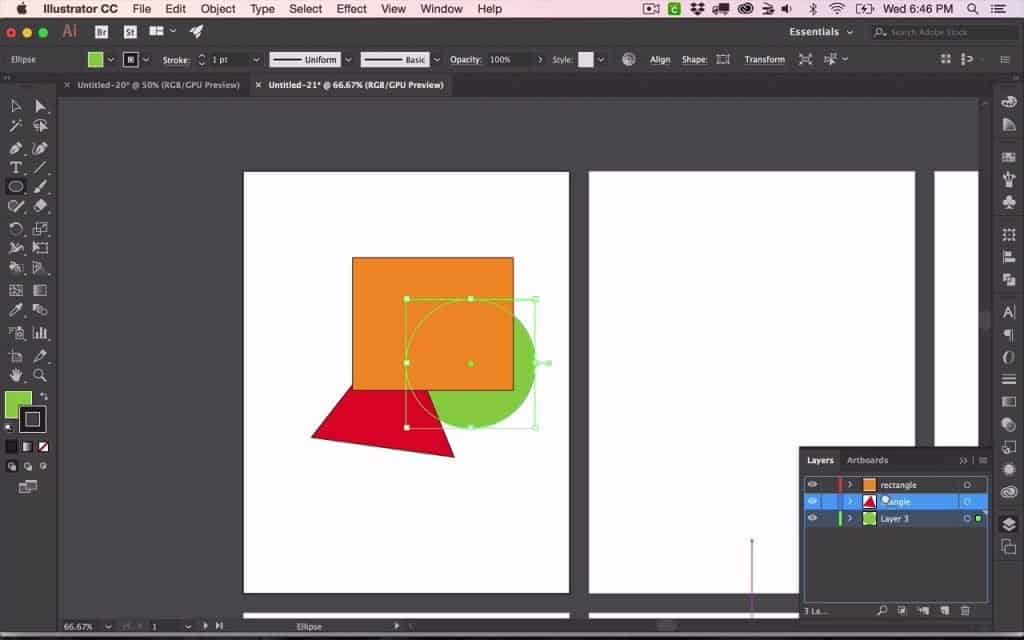
You can drag and drop the order of your layers clicking and holding on on the layer. Then drag it to where you want it in the layer panel and then drop it by releasing the click.You can move it up to the top, somewhere in the middle, or to the bottom.You can see where it’s going to go based on that blue line that shows in your layers panel. Notice that the order of the shapes changes when you drag your layers and reorder them.
If you want to select all the items on a layer, you can click on the square at the end of the layer and it selects every single object on that layer. 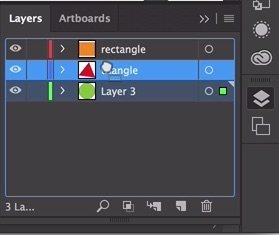
You can use the trash can on the bottom right of the layers panel to delete a layer.
If you want to delete multiple layers at once, click on a layer and then hold down the SHIFT key and click the other layers you want to delete. Then click on the TRASH icon.
If there is artwork on that layer when you click the TRASH you will get a warning that tells you there is artwork or objects on that layer.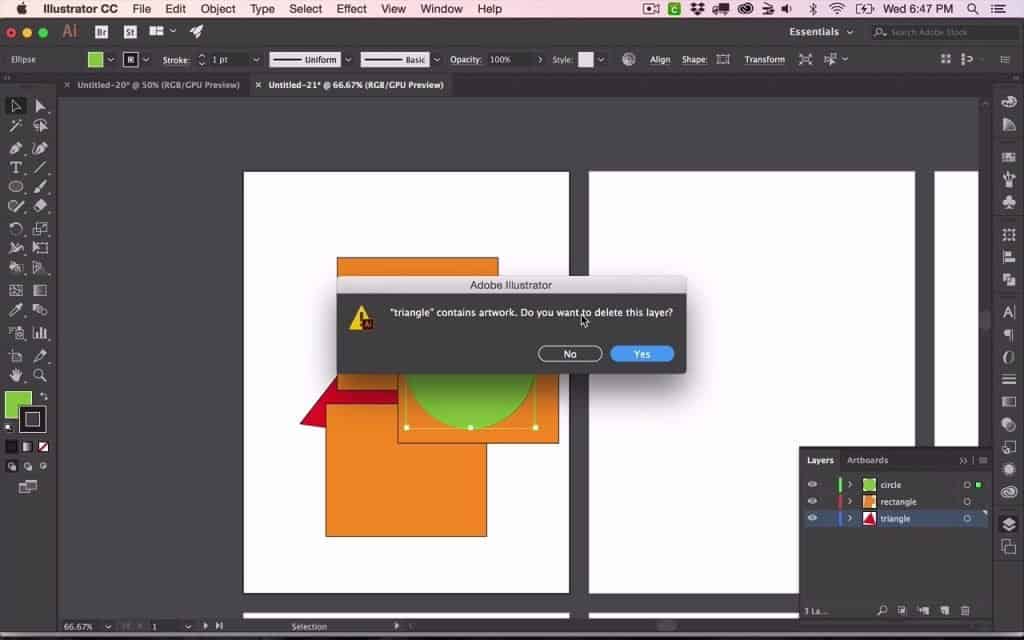
It will want you to confirm your choice to delete. To undo deletion you can click COMMAND/CONTROL Z.
Learning the basic language and set-up of Adobe Illustrator is the best place to start learning how to make printables for yourself or to sell.
Now that you know how to use Illustrator artboards and layers you can move on to learning the other basic tools of Illustrator.
You need to be familiar with the ins and outs of your design program to know what is possible and to make your best design ideas come to life.
There is so much more to learn about making printables and I will be happy to help you with that!
No time to learn how to make worksheets and printables from scratch? I’ve created a set of Illustrator templates that you can use for your opt-ins, printables, products, and planners.