
5 Super Quick Ways to Design Stylish Circle Monograms and More with Cricut
We may earn a small commission for purchases made through affiliate links in this post. For more information go to our Privacy Policy.
Understanding the Basics of a Monogram
A monogram is a design created by combining two or more letters, usually initials, to form a single symbol or logo. Monograms are often used for personalizing items such as clothing, accessories, and home decor. Cricut machines can be a fantastic tool for creating custom monograms with ease. Here’s a brief overview of monogram basics to get you started:
- Types of Monograms: Monograms can consist of a single letter, a first/last initial combo, or a first/last/middle initial combo. They can represent an individual or a couple, making them great gifts for weddings and anniversaries.
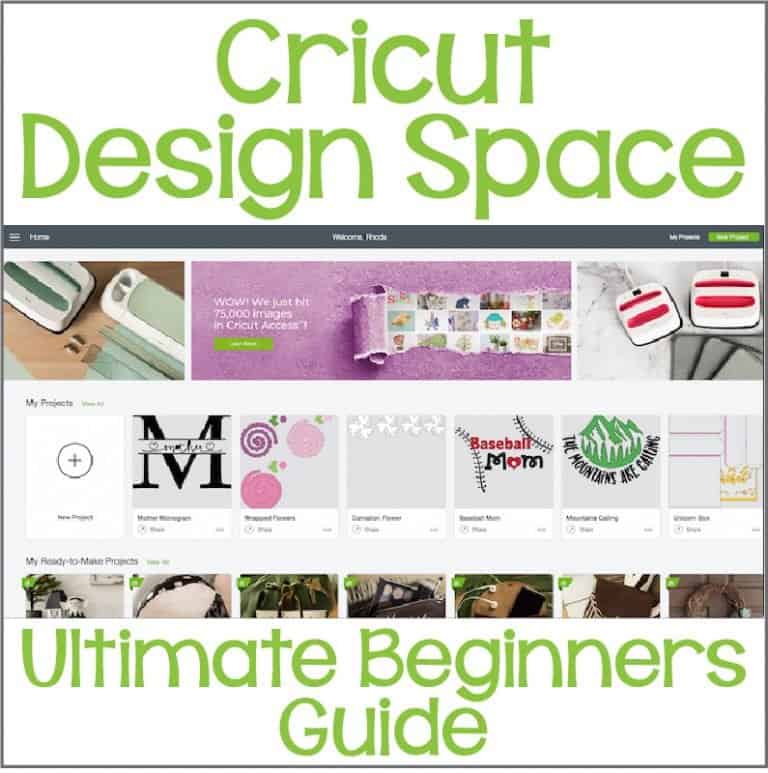
- Cricut Design Space: To create a monogram with your Cricut, you’ll be using the Cricut Design Space software. This user-friendly platform allows you to input your desired initials, choose a text style, and select a frame style for your monogram.
- Styles and Themes: There are various styles and themes available for monograms, such as classic, thematic, and more. Be sure to explore the subcategories in the Cricut Design Space to find the perfect text and frame style for your project.
- Text and Frame Optimization: When selecting text and frame styles, keep in mind the number of initials you’re using. Some styles work better for single letters, while others are more suitable for multiple initials.
Remember, practice makes perfect. Don’t be afraid to experiment with different styles and combinations to create the perfect Cricut monogram for your project.
If you are handy with a design program you can create a circle monogram design with any font that you wish.
What is a Monogram?
A monogram is a design element that combines up to four letters or initials to represent an individual person or a couple. These letters can be displayed in a variety of ways, such as a single initial, a combination of first and last initials, or a combination of first, middle, and last initials. Monograms are often used to personalize items, making them perfect for wedding gifts or other special occasions.

Cricut monogram refers to the use of a Cricut cutting machine and its Design Space to create and customize monogram designs. With Cricut’s Monogram Maker, you have access to various styles and options, allowing you to create a unique and personal monogram for your project. Here are a few steps to create a monogram using Cricut Design Space monogram fonts and tools:
- Select Monogram: Choose the Monogram option from the design panel.
- Input Initials: Enter up to four initials of the person or couple you’re creating the monogram for.
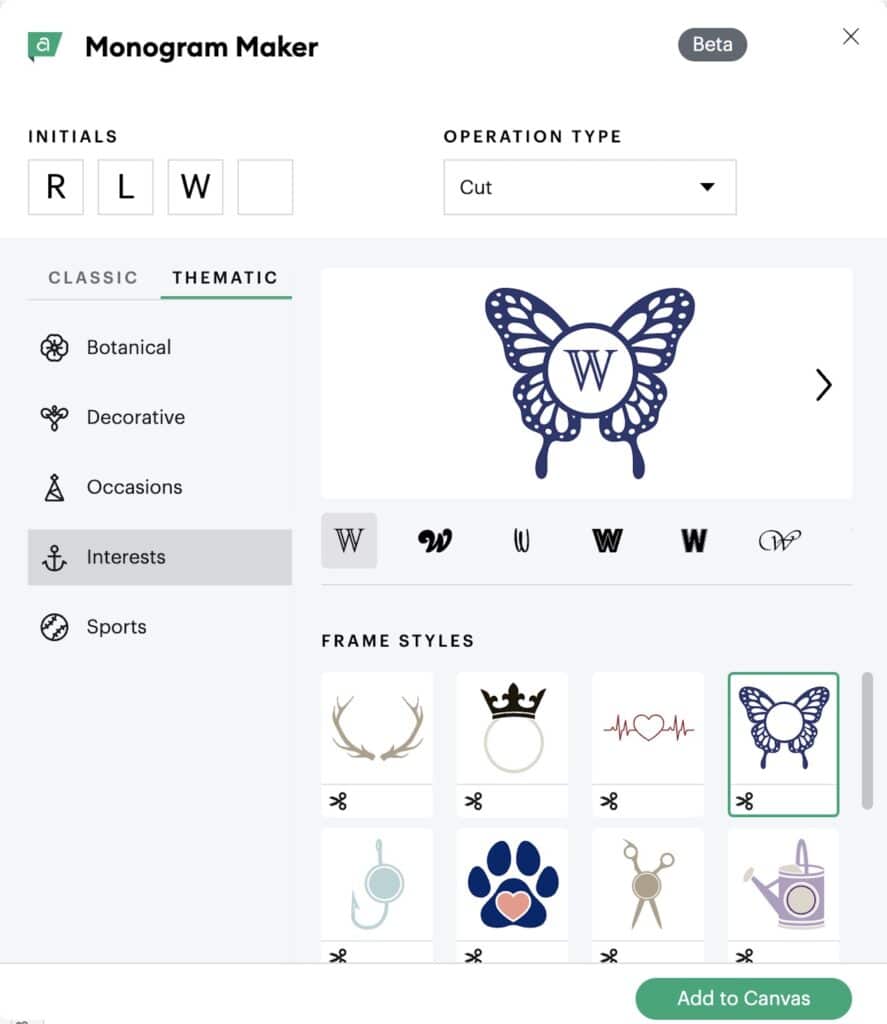
- Choose Monogram Style: Pick between Classic and Thematic monogram types and find a suitable text style and frame style for your monogram.
Remember, there is no one-size-fits-all approach to creating a monogram with Cricut Design Space. Be creative, explore different styles and designs, and have fun personalizing your monogram to fit the project or individual it’s meant for.
Different Styles of Monograms
Circle Monograms
Circle monograms are designed with letters enclosed in a circular shape. They’re popular for their elegant and timeless appeal. It’s especially great for crafts such as vinyl stickers, personalized gifts, and home decor. To create circle monograms with your Cricut, you can use design software like Cricut Design Space and fonts like Blocky Monogram or Monogramus.
Heart Monograms
Heart monograms are a romantic option, perfect for personalizing gifts for loved ones, wedding items, or Valentine’s Day crafts. They incorporate letters within a heart shape for a sweet and sentimental touch. There are various free fonts available online for heart monograms that can be used with Cricut Design Space, such as Finegramos and Constance.
Vine Monograms
Vine monograms, also known as interlocking or old-fashion monograms, feature ornate swirls with the letters interlacing or touching each other. They have a classic and sophisticated appearance, making them ideal for various applications, including clothing, home decor, and invitations. Keep in mind that vinyl vine monograms can be challenging to transfer. Popular fonts for vine monograms include Caston Swash.
Fishtail Monograms
Fishtail monograms showcase a unique letter style that resembles a fishtail, providing a modern and whimsical touch to personalize your Cricut projects. They’re perfect for making custom t-shirts, tote bags, and accessories. To create a fishtail monogram with your Cricut, you can find a variety of free fonts online that are compatible with Cricut Design Space.
How to Design a Monogram in Cricut Design Space
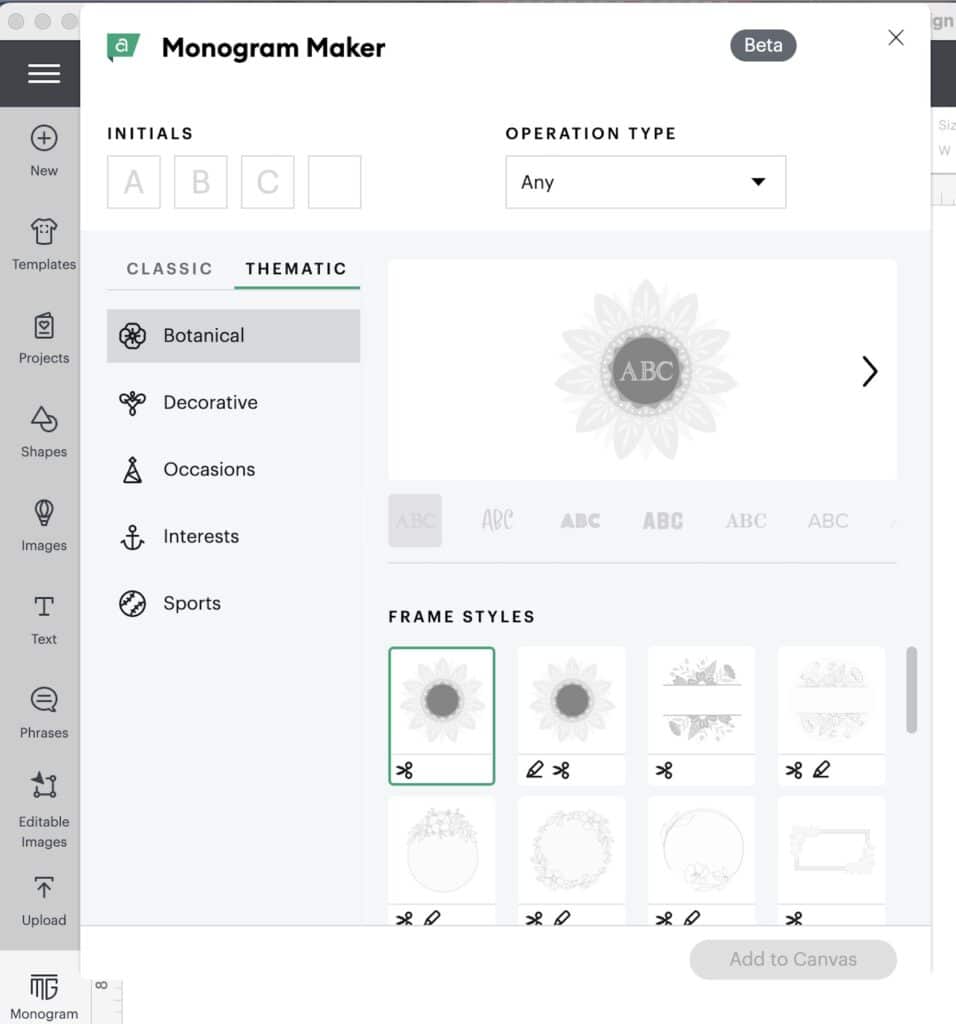
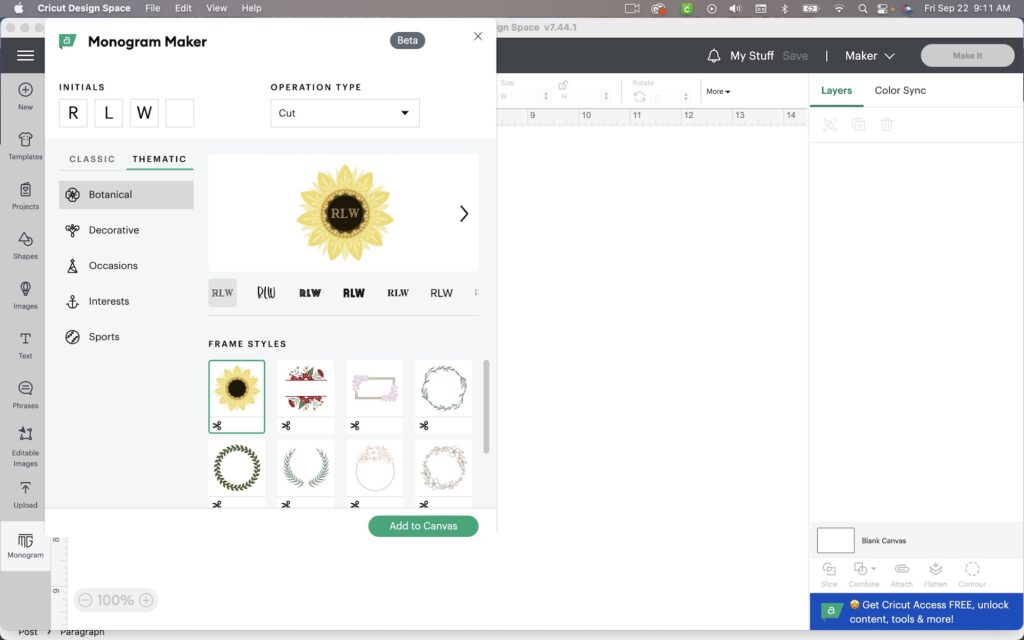
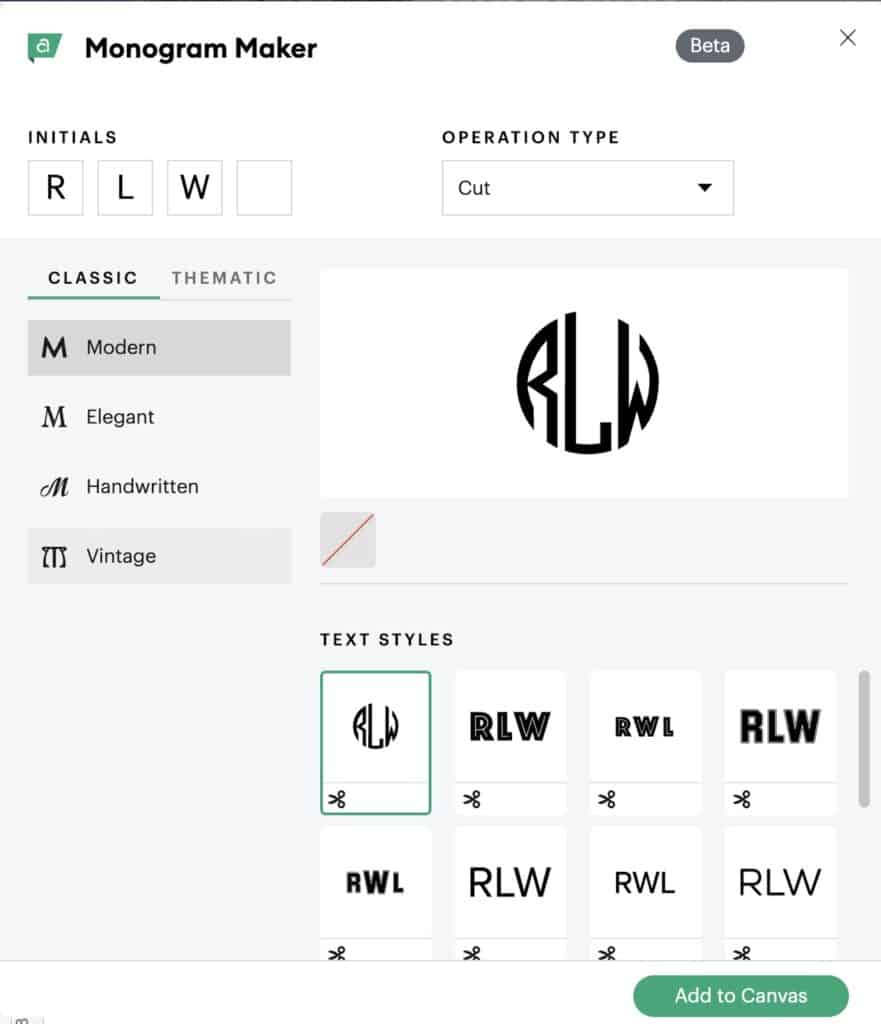
Using Cricut Design Space Monogram Maker
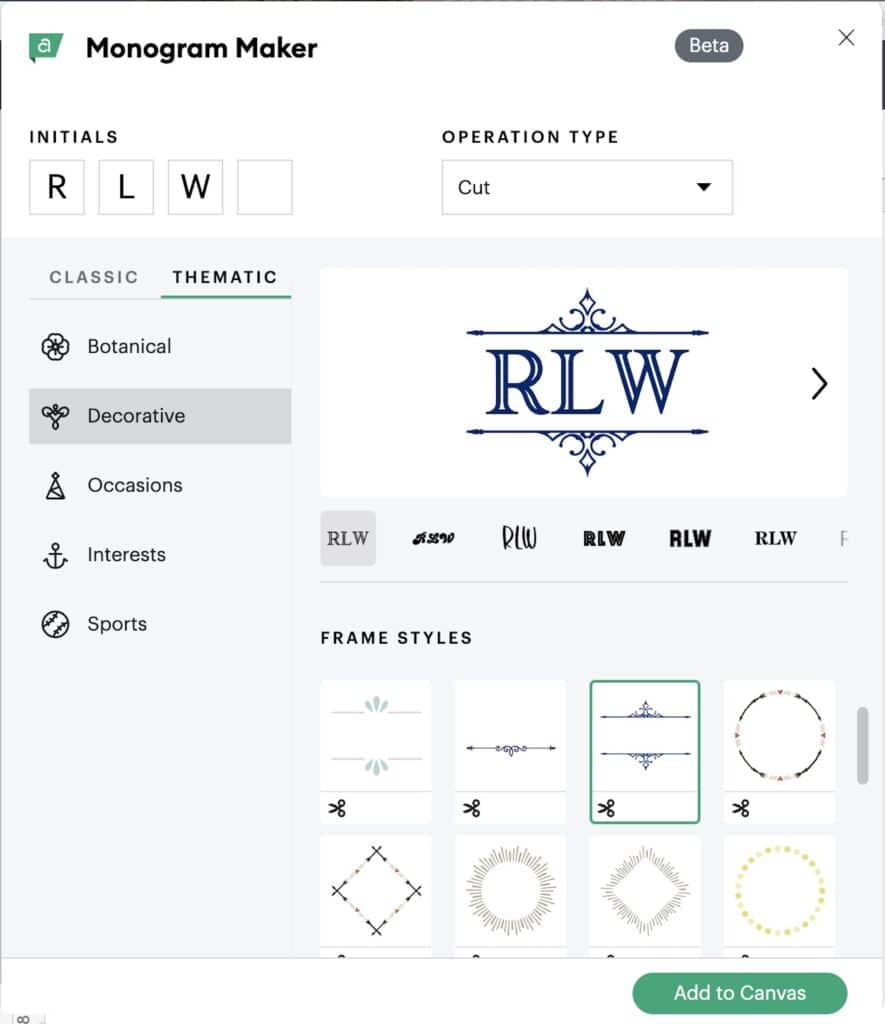
- Click on the Monogram tool in the Design Panel on the left side of the Design Space canvas.
- Enter up to four initials in the text box.
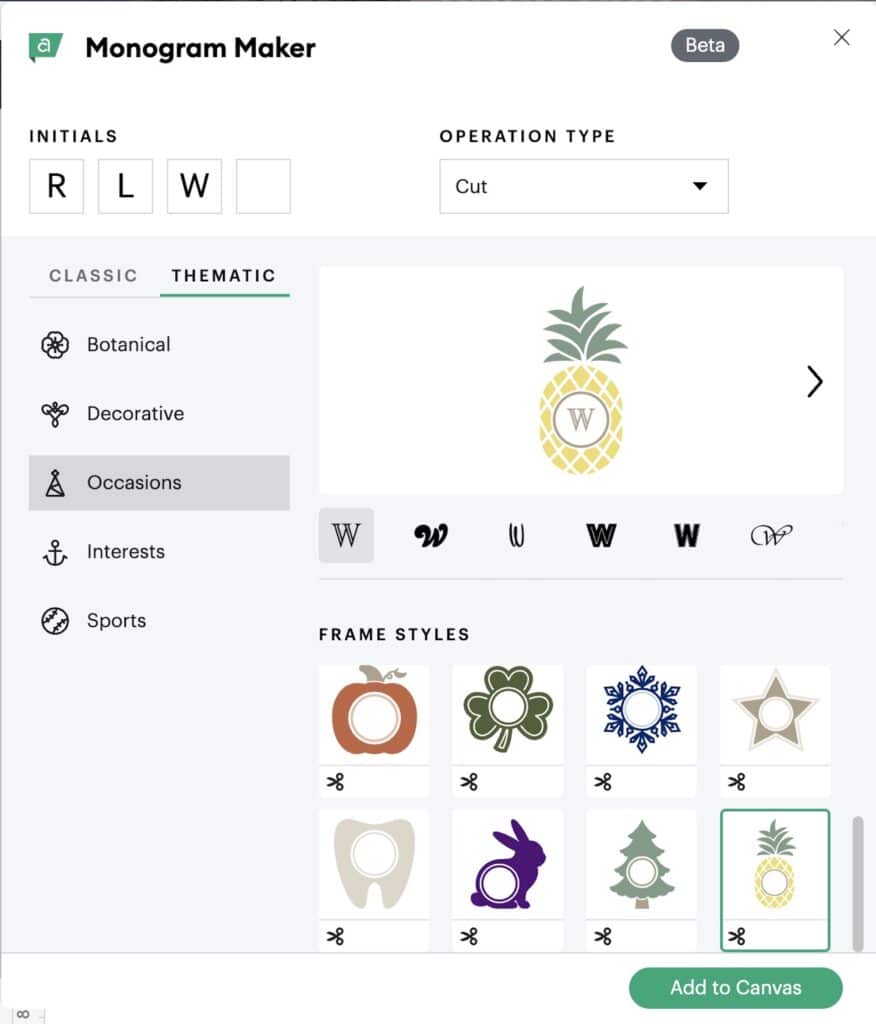
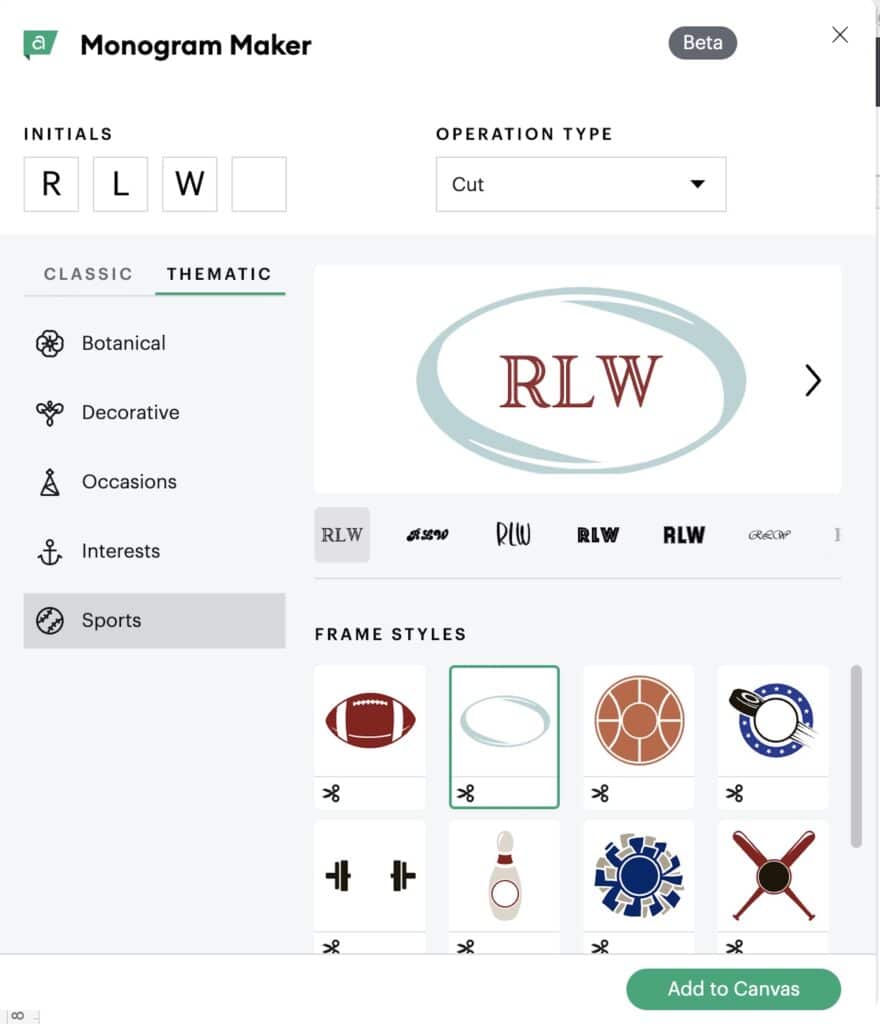
- Choose between Classic and Thematic monogram types, and then select from subcategories to find a text style and frame style for your monogram.
- Text styles and frame styles are optimized for different quantities of initials. Look through the initial monogram generator to see which style or theme you like best.
Using Editable Images in Cricut Design Space for Monograms
- Start a new project in Cricut Design Space.
- Click the “Upload” button and import an editable monogram image or template.
- Customize the image by changing the text, font, and style to match your personal taste.
- Resize, rotate or adjust the position of the image to create your desired monogram design.
Creating Your Own Monogram from Scratch in Cricut Design Space
- Open a blank canvas in Cricut Design Space.
- Use the Text Tool to type your initials individually, selecting the desired font for each initial.
- Size and position your initials appropriately to create the desired monogram style.
- Add a frame or decorative elements to your monogram, if desired, using the shapes, icons, or images provided in Cricut Design Space.

Making a quick and easy circle monogram with a downloadable font is a great way to save yourself some headache!
When you have a minute, you can check out this tutorial on YouTube to make a split-letter monogram as well. Don’t forget to hit subscribe.
Making a circle monogram without a specific monogram on the Cricut is hard. Unlike the Silhouette design software, you cannot grab the edges of your font and pull them into a circle shape.
So what happens when making a circle monogram with any old font in Cricut, is you get a really cruddy looking monogram.
Let’s fix that and make a well-designed circle monogram, shall we?
Start by downloading this free font here on DaFont.com: Monogram Font
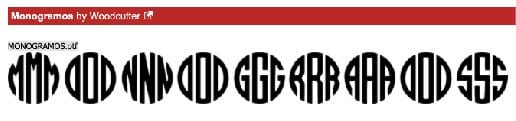
Pro Tip: If you are using this font for commercial use (ie. you plan to sell your designs or the products you make with these designs) you need to buy the font.
Closeout of your Cricut Design Space if you had it open. When you install fonts while the program is open, it will not recognize newly installed fonts. It’s best to just have it closed while you install a font and then open it up to work.
DON’T forget to save your work if you have other elements on the canvas!
Once you have the font downloaded to your system, we are ready to get started making the circle monogram. Launch your Cricut Design Space and start a new project (or open an existing one).
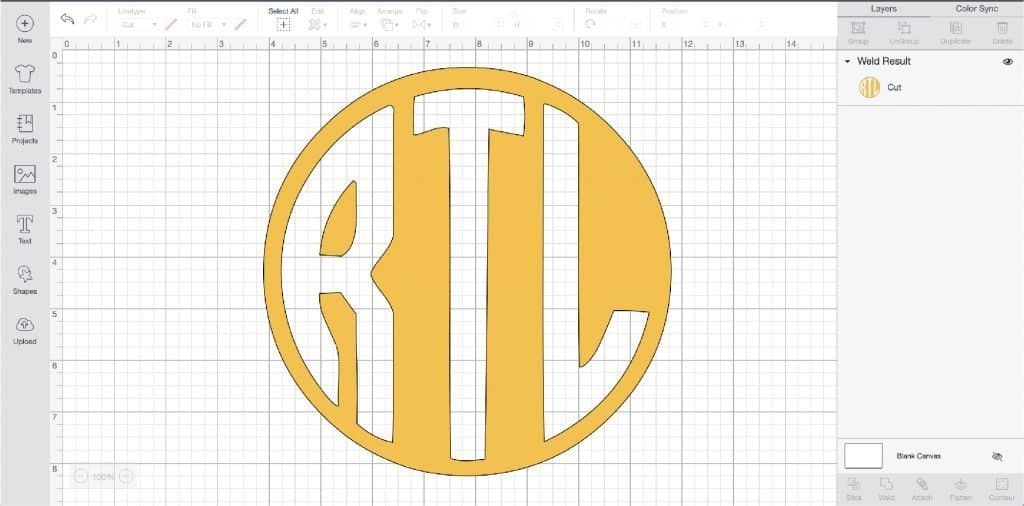
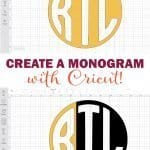
Type the first letter of your monogram. My initials are RLT so I am going to type my monogram so the T is in the center. It will be the largest letter and the other two will be on the outside edges: RTL.
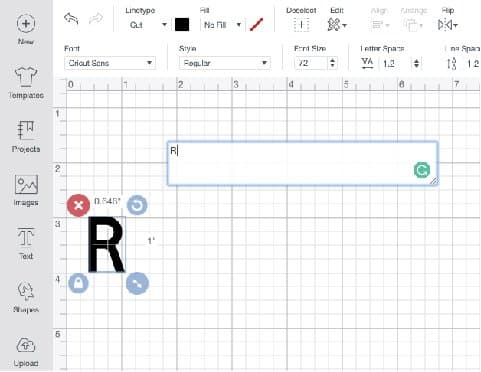
Once you have your first letter typed, select it (so there is a bounding box around the letter) and go up to the font selection menu.
Click on SYSTEM and then start typing in the name of the circle monogram font (MONOGRAM). When it pops up into your list, select it.
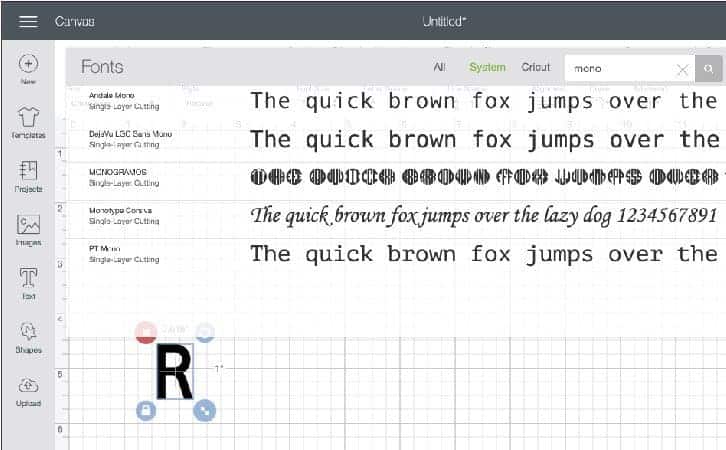
You now have a circle monogram that is filled with just one letter. We have some work to do!
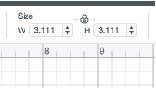
Size the monogram so it is a measurement you will remember. 4 or 5 inches is good. This gives you some room to work and you can see your design better!
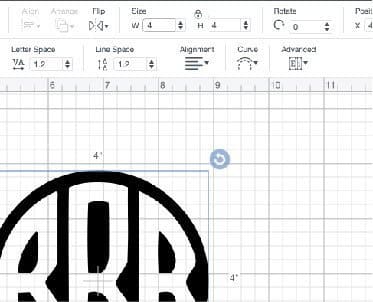
Pro Tip: You can size the design by clicking on W for width or H for height and typing in the measurement you want.
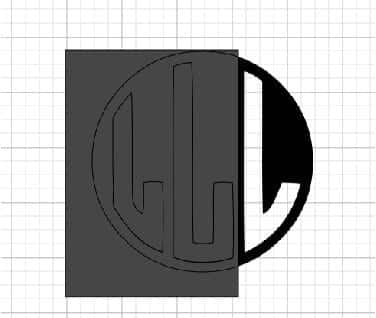
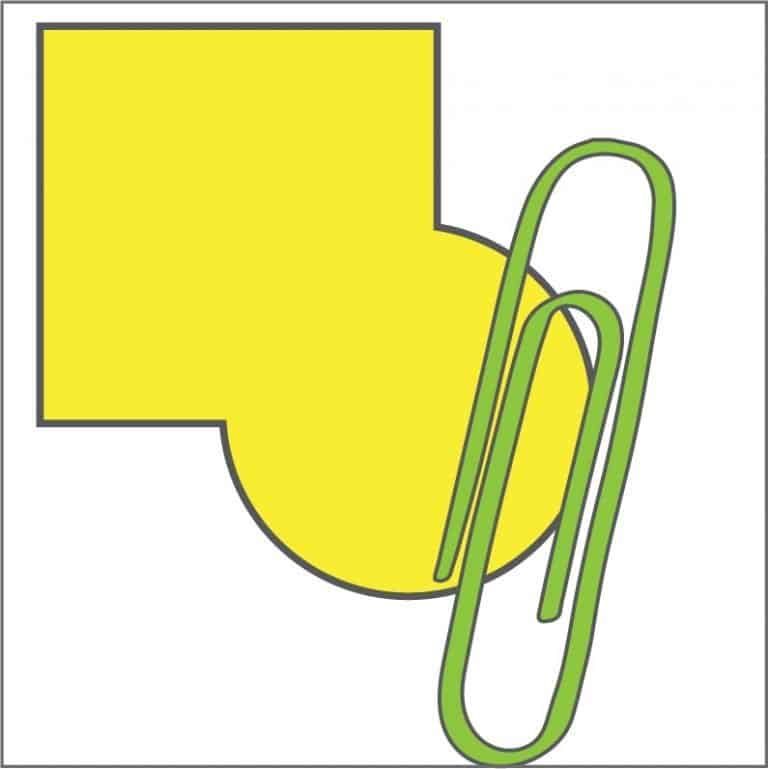
Click on the SHAPES tool and create a square the covers the right-hand side of your monogram. You only want the left letter to be showing.
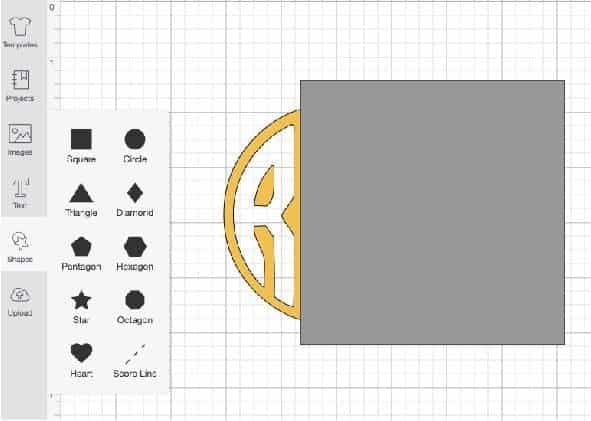
NOTE: Try to divide the space between the two letters the best you can. The more accurate this part is, the better all 3 pieces will go together at the end to make a new circle.
Now select the two objects and click on the SLICE tool at the bottom of your right-hand toolbar.

Delete the rectangle and the two right-hand letters. You should have one-third of a monogram. We are going to repeat the process for the other two letters.
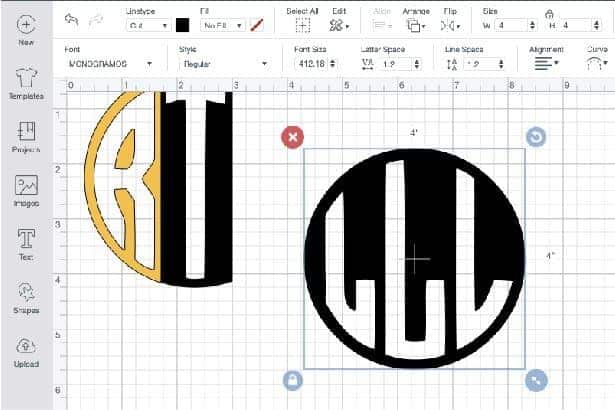
Click on the TEXT tool and type your middle letter.
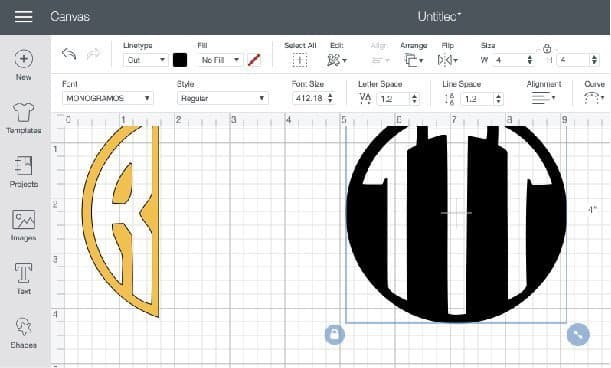
Resize the monogram the same way you did the first time (4 or 5 inches).
Click on the SHAPE tool and create two squares this time. One for each side of the circle monogram.

Pro Tip: Click on the padlock above the WIDTH and HEIGHT. This will let you make a tall skinny rectangle instead of a square.
You can only select two items to SLICE at a time. Select one rectangle and the monogram circle.
Click the SLICE tool. Then click the second rectangle and the monogram and click SLICE again. Delete everything except the middle letter.
Pro Tip: if you had both of your rectangle created before you clicked the slice tool the first time, it will move your design in front of the second rectangle. You CAN still slice with the rectangle in the background!
Move this second circle monogram piece over to the corner and click on the T for TEXT one more time. Type in the last letter for your monogram.
Resize the letter to 4 or 5 inches and then click on the SHAPE tool for your rectangle. Select the two objects and then click on the SLICE tool.
Delete the left-hand letters this time and move the right-hand letter up with your other monogram letters. It is time to put them together in a circle!
Putting Together the Pieces
If you lined up your rectangle in the center between each letter before you sliced it, then this part will go really easily.
Line up each letter to make a complete circle.
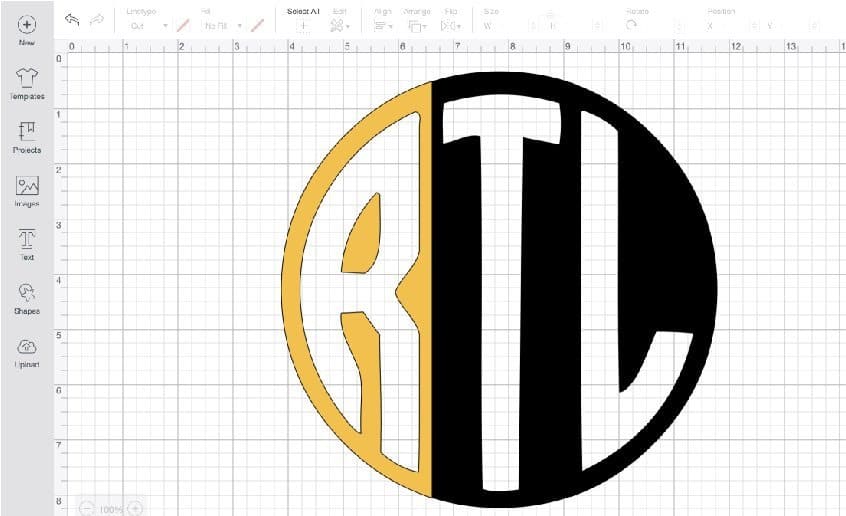
Pro Tip: If you need a guide, you can click on the SHAPE tool and make a 4 or 5-inch circle. Send it to the background (by clicking ARRANGE at the top) and overlay your monogram pieces to make sure they are all lined up.
Once all your pieces are lined up and make a complete circle, SELECT all three pieces and click WELD.
This will put all 3 pieces together and make just one cutting shape out of them. Once you save this project, a weld cannot be undone. Make sure you are happy with it!
Useful Tools and Features for Monogram Designing in Cricut
Using Monogram Fonts in Cricut Design Space
Cricut Design Space offers a variety of monogram fonts to help you create custom designs. To use monogram fonts in Cricut Design Space:
- Open Cricut Design Space and start a new project.
- Click on the Text tool on the left panel.
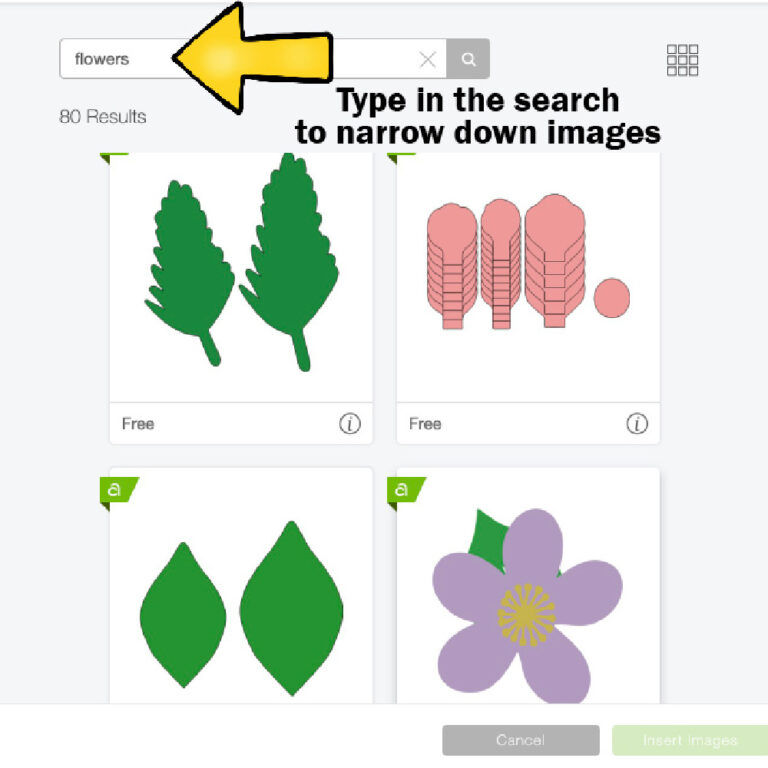
- Choose a font from the Fonts menu, or search for “monogram” to find monogram-specific fonts.
- Type your initials or desired text and resize or reposition the letters as needed.
- Select all letters and click on the Weld tool to join them into a single, connected design.
- Continue to customize your monogram with shapes, frames, or other elements as desired.
(Free) Monogram Generators
If you prefer to create a monogram quickly and easily, several free online monogram generators are available. These generators require no design experience, and they can provide a downloadable monogram for importing into Cricut Design Space. A few popular options for free monogram makers include:
- Mark and Graham Monogram Maker: Offers a variety of monogram styles to choose from, along with live previews.
- Chicfetti Monogram Generator: Provides customizable monograms with options for initials, backgrounds, colors, and styles.
- MonogramFrames: Specializes in framed monogram designs in various themes and accents.
To use the free monogram generator:
- Visit the monogram generator website.
- Enter your initials or desired text.
- Choose a monogram style, frame, and any customization options offered.
- Download the monogram as an image or SVG file.
- Import the downloaded file into Cricut Design Space, and place it on your canvas to work with alongside other design elements.
Remember, combining your creative intuition and these tools will help you design unique and personalized monograms for your projects!
Cutting Your Monogram with Cricut
Guide to Cutting Your Monogram Successfully
To cut your monogram with Cricut, follow these steps:
- Design your monogram: Use Cricut Design Space and select Monogram from the design panel. Input up to four initials and choose a text style and frame style for your monogram.
- Prepare your materials: Place your chosen material on the cutting mat. Ensure that the mat is clean and free of debris for the best results.
- Select settings: In Cricut Design Space, set the material type, pressure, and blade settings according to your chosen material. If you are unsure about the settings, refer to Cricut’s recommended cutting settings chart.
- Load the mat: Insert the mat into the machine, ensuring it is aligned correctly, and press the Load button.
- Begin cutting: Press the Cut button after your design and settings are in place. Monitor the cutting progress to ensure the process is smooth and successful.
- Unload and remove: Once your monogram is cut, unload the mat and carefully peel away the excess material, leaving your cut monogram on the mat.
Putting Together the Pieces
After cutting your monogram with Cricut, it’s time to put the pieces together. Here are some helpful tips to make a monogram:
- Weeding: Use a weeding tool to remove any unwanted parts of the cut design. Be gentle to avoid damaging the design.
- Transfer tape: If you’re using vinyl or iron-on material, apply transfer tape to the monogram. Press firmly and smooth out any bubbles.
- Placement: Position your monogram on the desired surface, whether it’s a mug, shirt, or gift item. Ensure it is aligned correctly before applying.
- Application: Depending on your material and surface, use an appropriate method to apply your monogram. For vinyl, gently press and smooth; for iron-on, use a heat press or iron according to the recommended settings.
Now that your monogram is cut and applied, you can enjoy your personalized creation! Remember to always follow the Cricut guidelines for the best results, and keep experimenting to master this fun crafting technique.
Enhancing Your Paper Crafts with Cricut Monogram Maker
Monograms on Handmade Cards
Cricut Monogram Maker allows you to personalize your handmade cards effortlessly. With various text styles and frame styles, you can create unique monograms that match your card design. Dress up birthday cards, wedding cards, anniversary cards, and more. Use a monogram as the main design focal point or as an embellishment.
Monograms on Scrapbook Layouts
Adding monograms to your scrapbook layouts is another excellent way to enhance your paper crafting projects. Personalize your scrapbook pages with the Cricut Monogram Maker to create custom designs. If you have ever wondered how to monogram initials, Cricut has just made it super simple and easy.
Make letter outlines and fill in the monograms with pattern paper or photos. Design a monogram to put in a corner with other embellishments. Family reunions, camping trips, weddings, birthdays, new babies, and more.
Creative Monogram Project Ideas with Cricut
DIY Monogrammed Gift Ideas
1. Iron-on monogrammed clothing: Using iron-on vinyl, personalized t-shirts, hoodies, or baby bodysuits for the perfect gift for any occasion.
2. Monogrammed throw pillows: Create custom-designed monogram pillows as a unique and stylish present for friends and family.
3. Monogrammed tote bags: Give an everyday essential a personal touch by adding a monogram design to a tote bag, perfect for shopping trips or daily use.
4. Etched monogrammed baking dishes: Create a thoughtful housewarming or wedding gift by etching a monogram on a glass baking dish.
5. Acrylic keychains: Add a monogram to an acrylic keychain that can easily be made using your Cricut machine, for a practical yet personalized gift.
More Ideas to Monogram
6. Monogrammed travel mugs: Customize a travel mug with a monogram for a unique and functional gift suitable for both coffee and tea drinkers on the go.
7. Monogrammed phone cases: Give someone’s tech a personal touch by designing and creating a monogrammed phone case using your Cricut machine.
8. Monogrammed wall decor: Design a beautiful monogrammed wall decoration to add a personal touch to your loved ones’ living spaces.
9. Monogrammed stationery: Create custom monogrammed notecards, notebooks, or journals for a thoughtful and practical gift for friends, family, or coworkers.
10. Monogrammed doormats: Add a welcoming touch to someone’s doorstep with a personalized monogrammed doormat, suitable for all seasons and styles.
Frequently Asked Questions
How to create a free monogram font using Cricut?
- Open Cricut Design Space and create a new project.
- Click on the “Text” tool in the left panel and input your desired initials.
- Select a monogram font from the available list. Many free fonts can be found online or within Design Space.
- Arrange the initials to your liking and resize as needed.
- Click the “Make It” button and follow the prompts to complete your monogram.
Which machine is best for creating Cricut monograms?
Cricut offers various machines suitable for creating monograms, such as:
- Cricut Explore Air 2: This popular machine is perfect for beginners and can handle a wide range of materials, including paper, vinyl, and iron-on transfers.
- Cricut Maker: This versatile machine has advanced tools for cutting a broader range of materials and is suitable for enthusiasts or those working on more complex projects.
How to fix issues with Cricut Monogram Maker?
If you encounter issues with the Cricut Monogram Maker, try the following steps:
- Check for software updates: Ensure your Cricut Design Space is up to date.
- Clear your browser cache: This can help resolve issues with the web version of Design Space.
- Reach out to Cricut Support: If you still face issues, contact Cricut’s customer support for assistance.
What are the steps for making a split monogram in Cricut?
- Open Cricut Design Space and create a new project.
- Click the “Text” tool and type your desired letter. Choose a suitable font for a split monogram.
- Add a shape, like a rectangle, and position it over the letter where you’d like to split it.
- Use the “Slice” function to cut the shape from the letter, creating the split.
- Add your text inside the split section and adjust the size and position accordingly.
- Click “Weld” to merge the elements of the monogram, then proceed with the cutting process.
How to create a circle monogram using the Cricut app?
- Open the Cricut Design Space app on your device.
- Create a new project and use the “Text” tool to input your initials.
- Select a suitable circular monogram font.
- Arrange the initials in a circular shape and use the “Group” feature to keep them together.
- Resize and adjust as necessary, then click “Make It” to complete your monogram.
Which font is recommended for monograms in Cricut design?
There are many fonts suitable for monograms in Cricut Design Space. Some popular options include:
- Monogram KK: Classic and elegant, perfect for personalizing items.
- Fishtail Monogram: A stylish font with a modern twist.
- Vine Monogram: A decorative and elegant option for a more upscale monogram.
There you go! You now know how to make circle monograms in Cricut Design Space. You can personalize all sorts of crafts and you have learned a number of Cricut Design Space tools!
If you would like cheat sheets to help you remember what all the tools in Cricut Design Space are used for, grab your guidebook in the shop!

Thank you. Very easy to follow directions.