Card Making For Beginners – All the Basics for Handmade Cardmaking
We may earn a small commission for purchases made through affiliate links in this post. For more information go to our Privacy Policy.
As a newbie to card making, it can be overwhelming to know where to start and what to buy, but don’t worry – this beginner’s guide has got you covered.
In this post, you’ll learn everything you need to know to create your first card-making project with confidence. From essential supplies to helpful tips and tricks, you’ll be well on your way to creating beautiful and unique cards in no time.

Just know that the artists who make the cards you drool on now, were all once looking at card making for beginners resources and tutorials just like you.
We all start somewhere.
The best reminder that I use (and tell myself regularly) is not to compare your start to someone else’s middle.
What is Cardmaking?
Cardmaking is a paper craft. It is a way to create little mini works of art that also has the added joy of letting you share it with your friends and family. It is the art of creating handmade greeting cards that are unique and special. There are many different techniques that you can use to make a handmade greeting card and we will cover the basics here.
You can mix and match multiple techniques and mediums to make a unique design. Card making can also be considered a form of mixed media art. Everyone has their own style, their own flair, and their own favorite tools, techniques, supplies, and levels.
Some like simple and understated.
Others love to pile on the goods.
Personally, I really enjoy cards that make me think of little illustrations in books. Small details. Nuances. Things you don’t notice were added for humor or a loving nod until you take a second look.
Terms You Will Use When Paper Crafting and Making Cards
Die Cutting
Digital Die-cutting
Embellishing
Foiling
Fussy Cutting
Heat Embossing
Ink Blending
Matting & Layering
Paper Piecing
Punching
Scoring
Stamping
Stenciling
Why Learn How to Make Cards?
If you’re looking for a new hobby that is both relaxing and creative, card making may be just what you need. Here are a few reasons why you should consider giving it a try:
- Everyone Needs a Creative Outlet Card making allows you to express your creativity and keep your mind inspired. Whether you’re a seasoned artist or a beginner, there are endless possibilities for creating unique and beautiful cards.
- Your Imagination Knows no Bounds: AKA The Sky is the Limit: With so many stamps, stencils, embellishments, and other supplies available, you can create your own style based on the techniques and supplies that you enjoy. You don’t have to be an expert at drawing or painting to make beautiful cards.
- Short on Time or a Detailed Perfectionist: Unlike larger paper crafting projects, card making projects are usually smaller and can be completed in one sitting. This makes it easy to fit into your schedule and gives you a sense of accomplishment when you finish a project. There are even 5-minute cards you can whip out.
- Share with Friends, Family, and Reputable Organizations: One of the best things about card making is that you get to share your creativity with others. Giving a handmade card to someone you care about is a thoughtful and personal way to show them how much you appreciate them. And who doesn’t love happy mail?! NOTE: If you aren’t really the “card giving type” *cough* like me *cough* there are a number of organizations that accept handmade card donations. Support the troops. Make the elderly smile at the local assisted living. Lots of options.
- Learning Keeps Your Mind Sharp: We all need to keep learning new things to keep our minds sharp. Card making is a great way to learn new techniques and explore your creativity. You can start with simple designs and work your way up to more complex projects as you gain experience. Who knows, you may even discover a new passion, or a new technique, or keep adding to those new skills by illustrating, writing sentiments, or becoming an ink blending whiz.
How To Get Started Cardmaking
As a beginner in the world of card making, it can be very overwhelming when you go to a site for ideas or you try looking for supplies to buy.
You may be wondering what supplies you need to get started.
The good news is that you don’t need much, but there are a few things that can help you kick off your first few projects. Here are the essential supplies you need to start making beautiful cards:
Types of Papers for Cards
Cardstock
Cardstock is a staple for card making. You will use it to make your card base, to stamp your sentiments, and much more. When shopping for cardstock, look for paper that is anywhere between 65 lbs-110 lbs in weight. Anything less than 65 lbs, and the paper is going to be too flimsy for a card base, and your ink could bleed through. Anything above 110 lbs and the paper will likely be too thick to cut and fold easily.
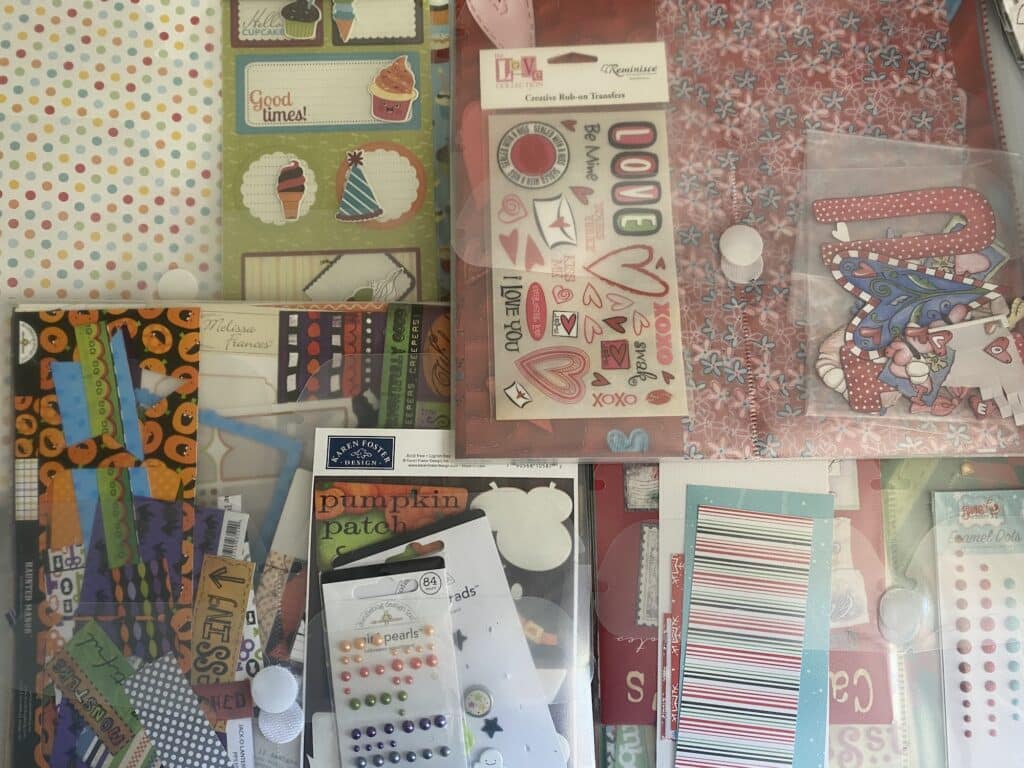
Pattern Paper
Pattern paper is usually made it coordinating colors and themes. You can buy sheets individually, in paper pads, or in packs that come with additional embellishments (such as stickers, brads, ribbons, tags, etc.). Sheets are available in two different sizes usually: 6 x 6 inches and 12 x 12 inches. You can sometimes find papers in 8.5 x 11 but it isn’t as common.
Vellum Paper
Vellum is a type of sheer paper that is usually really thin (think papyrus or rice paper). Sometimes it will have embossed or foiled designs. Sometimes it will be in different colors other than whites and creams. Usually, it is used over a section of a card front to mute the image underneath. Then a sentiment is added over the top by printing, stamping, or on a framed piece of paper.
Metallic Paper
Metallic papers are usually a little thicker and have a shimmer or shine to them. They mimic the look of gold, silver, copper, etc. These are great for adding a bit of shine or for elements that you want to appear to have a metal finish without the weight of actual metal on your card.
Glitter Paper
Glitter paper is the best thing ever invented. You can add shimmer and shine to your projects without having to deal with the mess. Glitter is layered or infused on the top of a sheet of cardstock. You can cut it out into shapes, letters, or use strips of it. All without worrying about glue, glitter, and gooey messes.
Types of Tools for Cards
Scissors
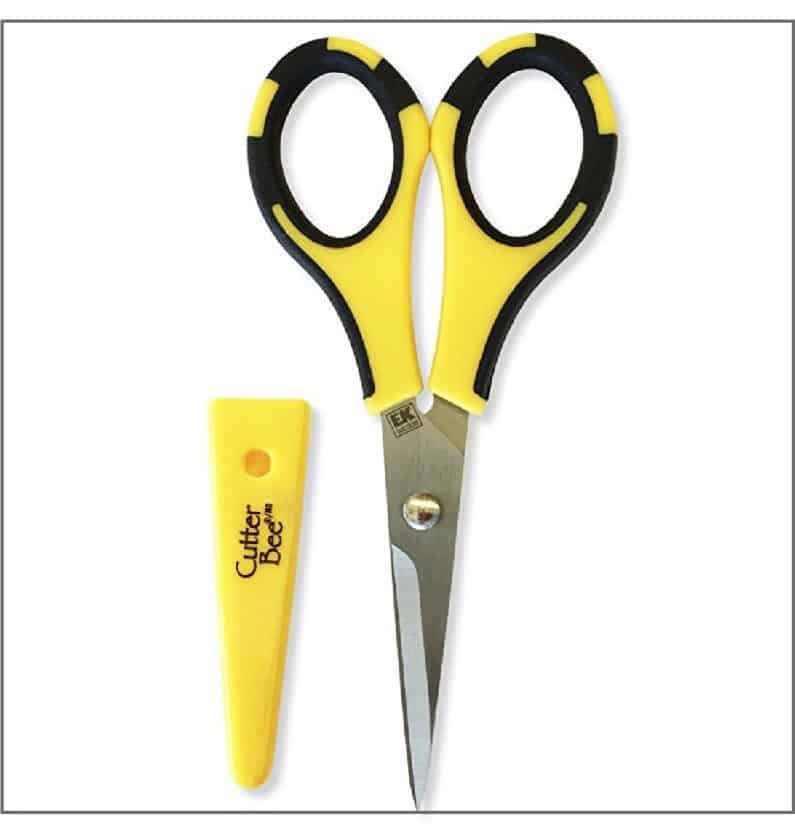
Not your momma’s fabric scissors. Or the kitchen sheers. You will need designated scissors just for your paper crafting. Preferably in at least two sizes. I love love love EK Success or Cutter Bee scissors for cutting little details with precision. These are only about 2 blades. A second pair of scissors for larger more bulky cuts would also be good to have. Around 5-6 inch blades are best.
Paper Cutters
There are so many different paper cutters (watch for a review coming soon). You can get cutters that include hole punches and score lines. There are guillotine cutters (think chopping motion like the ones used in school). My preferred cutter is a Fiskars 12-inch cutter because that is what I have used for over 20 years. Anything else just feels “weird”. I could be persuaded to try something new.
Hand Scoring Tools
Hand-scoring tools are usually pen-like tools with a metal end that has a small rounded tip. You can also use the pointy end of a bone folder. You make marks on your paper and then use a ruler to hold a straight edge while you run the scoring tool across the paper.
Scoring tools are used to make a line across your paper. Paper has fibers all interwoven from the way it is made. When you run something small and blunt across the paper to make a line, it breaks up those fibers. Now they are easier to bend without getting jagged edges in your fold or having it go all wonky on you (we’ve all been there).
I used to think scoring tools were just a gimmick to add to your tool collection. Now, I swear by them. Crisp clean fold lines make a project look more polished. Paper will ALWAYS find a way to bend where you don’t want it to. Score lines help ensure you get a smoother fold.
Scoring Platforms
This was another tool that I figured was overrated and I waited YEARS before I bought one. What was I thinking?
Platforms have small grooves every eighth of an inch with a ruler across the top and down the left side. You can get them in different sizes depending on the brand (12 x 12, 9 x 7.25, 7 x 9.75, etc.).
There is an edge on the top and left-hand side where you snug your paper up into the corner. Then use the included scoring tool or your favorite tool to score your lines on the measurements needed for your project.
Bone Folders
Bone folders were originally used by bookmakers. They are a shaped piece of bone usually made from cow bone, but sometimes from deer or elk bones. One end is usually pointed and the opposite end is smooth with a wide arc. They are used for scoring lines and then smoothing a fold once it has been made (along the crease of the folded edge similar to how you run your finger down a fold). Synthetic materials, such as Teflon and most recently Delrin are also used to make folders.
Types of Adhesives for Designing Cards
Glue and adhesives for cards is almost as important as adhesives for scrapbooking. You are making a work of art and you don’t want the glue to crack, yellow, or ruin your papers. Most cardmaking glue and scrapbooking glue (or adhesives) are interchangeable. They are also almost always PH Neutral (acid free) and PVA Free (PVA stands for polyvinyl acetate and is used in wood glues, school glues, etc. You do NOT want to use glue with PVA on anything that will be touching photos or that you want on a “memory keeping” item).
Liquid Glue
There are a number of liquid glues on the market for cardmaking. These are usually white glue. You can read my whole review (or watch the video) on liquid glues and which ones made the top grade in this post: Liquid Adhesive Review
Tape Runners
Tape runners are devices that are used to quickly and easily dispense a really strong double sided tape for paper crafts. I have also done a whole reivew and video on these and you can read/watch that in this post: Tape Runner Review
Glue Dots
Glue dots come on a page or in a roll of paper similar to wax paper. They are double-sided sticky dots that cardmakers (and scrapbookers) use to hold elements in place. Usually they are used on the back of something that is a little heavier than paper such as buttons, ribbon, or charms.
Foam Dots
Foam dots are a double sided sticky piece of foam. They can also be square. Different brands make them in different shapes. They are usually white but a few brands also make them in black. They are used to add a raised effect to your card designs. They are also referred to as “pop dots” because they give your element a little pop-up off the page.
3D Dots
Similar to glue dots, they are a double sided adhesive but in more of a blob version. Dots are flat with very little dimension. 3D Dots are thicker and will add a little height to an element or embellishment, similar to a foam dot but not usually as tall. These are mainly used on heavier embellishments as well but ones that you want to elevate a little more. Think “a stack of glue dots”.
Double Sided Tapes
Double-sided tapes usually come in rolls. No dispenser included like a tape runner. One side has a protective cover so you can add your tape to a project and then remove the protective cover when you are ready to attach your element to the project. My favorite brand of tape is Scor-Tape and I love using it on cards, mini albums, and my scrapbook pages.
Supplies You Need to Create Handmade Cards
Now we get to the goods. What do you actually NEED to make handmade cards? Very little. Really. We have already gone over the basics. There are few supplies that you need to make cards because the creative part is entirely up to you and what you want to include on your cards.
The basics:
- cardstock or a thicker paper (you could even cover over old greeting cards if you wanted to up-cycle as part of your creativity).
- adhesive of some sort (I would say you want at least a liquid. Tape could be optional.)
- pens, pencils, coloring utensils of some sort (markers, colored pencils, etc.)
- scissors
- colored papers, stickers, art supplies you have on hand
That’s it. You really do not have to break the bank to get started making cards. You can make them as simple and easy as you want. Reuse wrapping paper and gift tags. Cut out images from old birthday and Christmas cards. Go thrifting and find donated scrapbook papers and ephemera. This part is where your style starts to come out as well as your creativity and imagination.
However, there are a number of tools, embellishments, gadgets, and supplies that really bring this art form to life. Read on.
Supplies You May Want for Cardmaking
These are the supplies that you can add to the collection, but you don’t have to. If you are a card making beginner, it could feel like you have to spend a fortune and have all the latest and greatest to be successful and professional.
You don’t.
We all just buy this stuff because it makes our little crafty hearts go pitter-patter. It is similar to getting a new box of crayons and a brand spankin’ new coloring book as a kid. Giddy with excitement. Only the adult version.
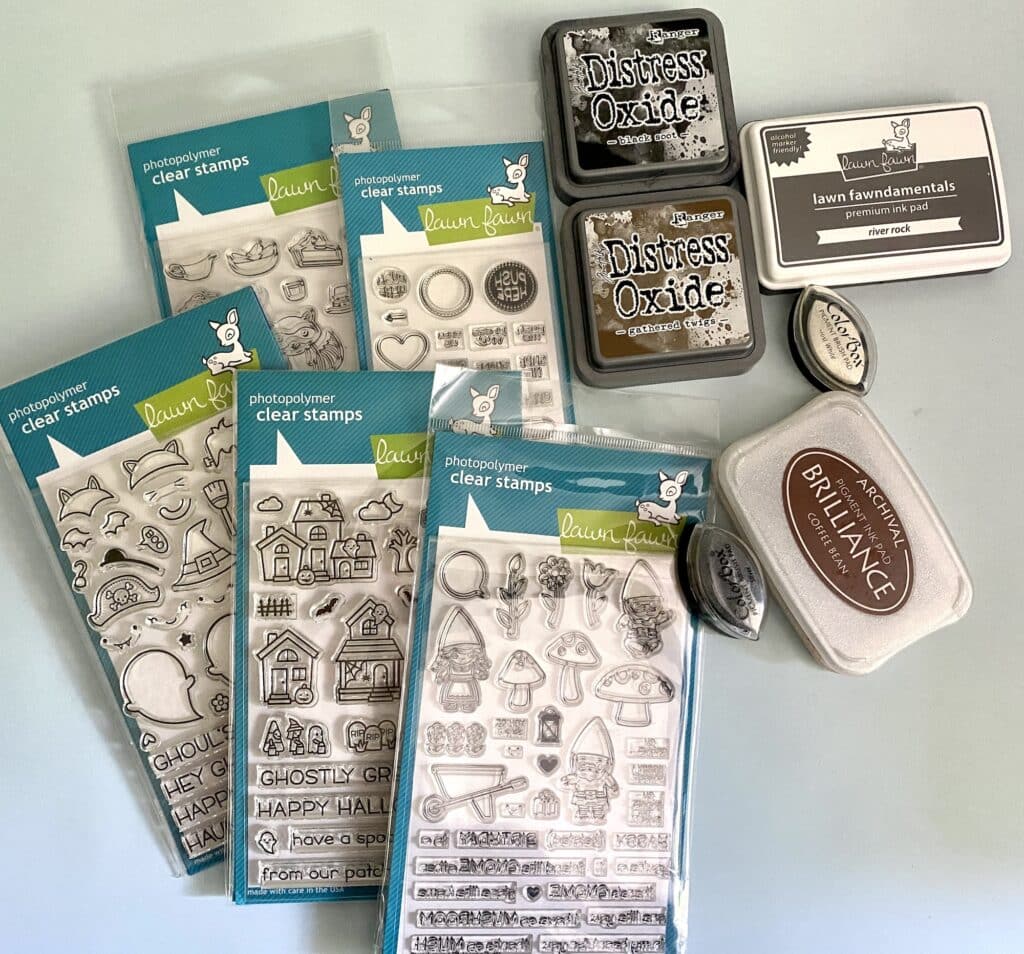
Stamps
They say stamping is one of the easiest card making techniques to learn as a beginner. I’m going to say bologna on that one. I was terrible at red rubber-mounted stamping. I attempted the clear stamps a few times and still wasn’t ever happy with my results. I used technology and digital stamps more because I could just print them and color.
Once I got a stamping platform, that all changed. Stamps will open up a world of creative possibilities but don’t make the investment unless it is something you are confident you want to try and master. Consider getting a versatile stamp set that has both images and sentiments, so you can use one stamp set to make a full design. This will allow you to see if you like the process without investing too much money upfront.
Acrylic Block
Stamps that are not mounted (stuck to a piece of wood) are flexible and flimsy. So you have to stick them to something flat and sturdy to get a good impression. Many people will use an acrylic block. These come in different sizes. You can buy one that fits your current stamps and use it for big or small images. No need to have a ton of them if you aren’t sure you will love stamping.
Stamping Ink
If you’re stamping, you’ll need ink. I recommend archival ink or dye ink to beginners. Archival ink dries quickly, tends to be permanent and waterproof, and it’s easy to find in most craft stores. It is more difficult to clean off your stamps though. So if you choose archival ink, I recommend getting some cleaning solution as well. Dye ink, on the other hand, dries a little slower and is not waterproof. However, it’s very easy to clean your stamps with a little water and some gentle soap if needed.
The type of coloring medium you choose will also determine which type of ink. If you are watercoloring, you want waterproof ink. If you are using alcohol markers, you want an ink that won’t smear or blend into the makers.
Stamping Platform
These make stamping a whole lot easier. Mass production becomes a dream. They are a little spendy up front, but the money you save by not ruining supplies and having to try try again is totally worth it. There are a few different brands. I’ve only tried the Misti and you can watch my tips and trick on that here.
Embellishments
Things like sequins, rhinestones, and enamel dots are things that add some accent designs to the card. They are what we call embellishments. These things are optional but can add a really nice touch to your design. If you’re thinking about purchasing embellishments, I suggest starting with something that already has adhesive on the back. Like enamel dots or rhinestone stickers.
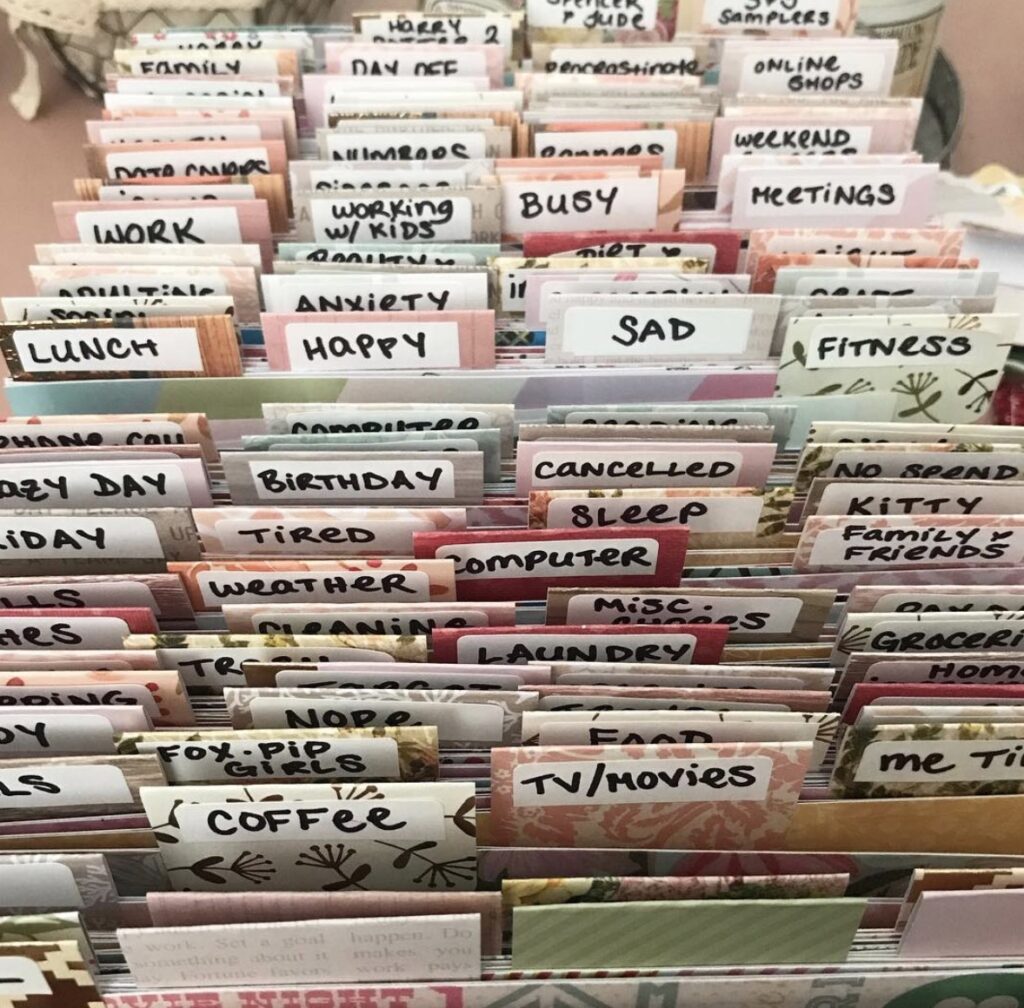
Stickers
The sky is the limit with stickers. The hardest part will be choosing which ones to use. There are characters, alphabets, borders, quotes, sentiments, dates, and so much more available to use. Mix and match. Cut them up. You could make 100’s of cards alone with just cardstock, inks, and stickers.
Read this post if you need ideas and help with sticker organization. And this post if you want to print your own stickers.
Punches
These are like oversized paper punches. They are metal blocks with a shape that punches through a matching hole. They usually have a lever that you compress once you have placed your paper inside the punch. Usually, you flip the punch upside down and line up what you want to cut inside the hole (a circle around a design or words for example) and then compress the lever. The shape sheers through the paper as it presses into the hole. Little punches in shapes like flowers, small circles, squares, etc. are also great for making shaker card confetti.
Pre-printed Die Cuts
If you want to skip the stamping and coloring for a bit, you can use die cuts instead. They are images that are already preprinted on thicker paper and then cut out. Think stickers without the stick. They can be glued down to create scenes and image clusters. Another trick is to cut images out of pattern paper, old cards, old children’s books, etc that you love. This is essentially creating your own die cuts.
Dies
Dies are metal shapes that you use to cut out your stamped impressions, tags, or shapes to use on your cards. There are older versions that are mounted to a plastic block with a protective layer of foam around the metal. These usually went in a machine like a Sizzix and were pressed down into the paper to make a cut.
More modern dies are thin and you roll them through the machine to make them cut (they can also be pressed but most machines roll a plate through with the die and paper on top. You will hear crafters refer to the “die-cutting sandwich”. This is the number and types of plates that are used to make the right thickness for different brands of dies. Different machines and different dies all require different thicknesses to roll through. It really is a trial-and-error process.
Die Cutting Machines (Manual or Electric)
These are the machines that are used to cut shapes with your metal dies or to emboss (leave an impression) your papers. There are manual versions where you stick your stack of plates, dies, and paper into the roller part of the machine and then crank the handle to pass the plate through. Pressure is required to cut or emboss so the handle is usually fairly stiff to rotate.
Electric machines make this process a little easier. You insert the stack and then the machine does the work of passing it through to the other side. No cranking required.
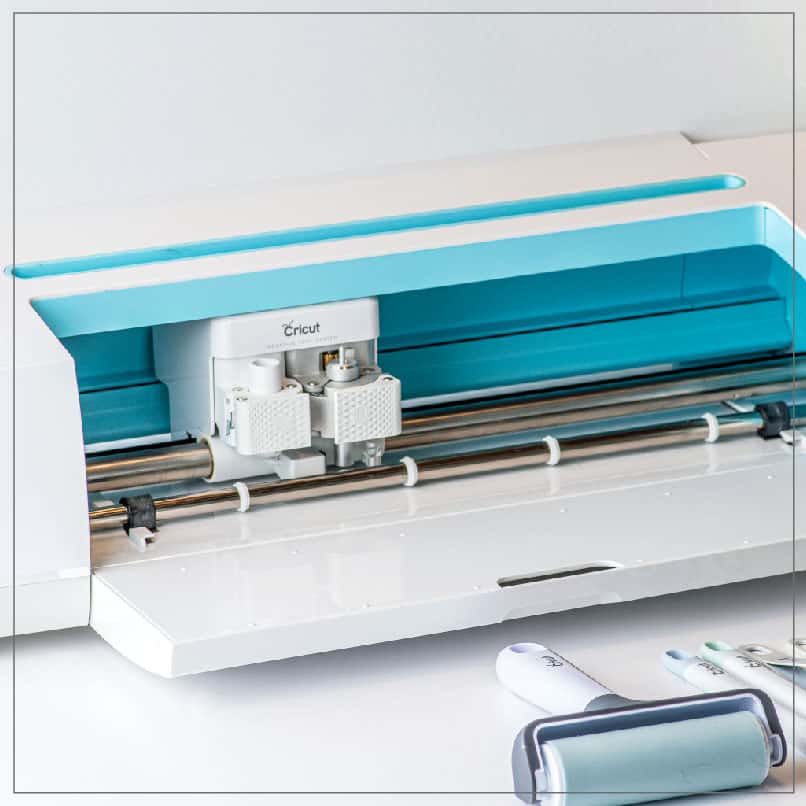
Electronic Cutting Machines
Electronic cutting machines are your Cricuts, Silhouettes, ScanNCuts, etc. They require software and digital files to cut out your patterns and shapes. All of your options are stored digitally either on your device or in the cloud. Different machines and styles have different abilities such as scoring lines, print and cut options, etc.
Embossing Folders
Embossing folders are little plastic envelopes that have raised impressions of patterns and shapes. The term for this technique is usually called “dry embossing” because you don’t use inks and embossing powders. You place your paper inside the folder, add the folder to the stack of cutting plates, and then send the stack through your die-cutting machine. The pressure from the machine stretches and bends your paper so the impression from the folder is now transferred to your paper. These are gorgeous and addicting. You’ve been warned.
Embossing Powders
Embossing powders are used to add a touch of elegance to your handmade cards. These fine, powdery substances come in various colors and can be used with stamps and embossing ink. When heated with a heat gun, they melt and create a raised, glossy, and beautifully textured effect on your card designs. I always think of them as ground-up crayons. They stick to the embossing ink and then melt into your paper when heated.
Heat Gun or Embossing Gun
A heat gun, sometimes called an embossing gun, is an indispensable tool in the world of cardmaking. It emits a focused stream of hot air, which is perfect for setting embossing powders. It is also great to use for drying any glitter glues, paints, or pastes you have used to decrease your wait time. It gets hotter than a hair dryer (it melts plastics) and doesn’t blow as harshly. You don’t want your powders blowing all around the room.
Texture Pastes
Texture pastes are fantastic for adding depth and dimension to your card designs. These thick, paste-like substances can be applied through stencils to create raised patterns and textures on your cards. Whether you want a rustic, gritty texture or a delicate, raised lace design, texture pastes are versatile tools for enhancing the tactile appeal of your handmade cards.
Glitter Glue and Dimensional Glue
Glitter glue and dimensional glue are used to add sparkle and dimension to your card creations. Glitter glue infuses a touch of shimmer, while dimensional glue puffs up to create 3D effects. These glues are perfect for highlighting specific elements of your cards, from delicate accents to eye-catching embellishments that make your cards truly pop. They can be used in addition to rhinestones and enamel dots or in place of those items.
Foils
Foils are like magic for cardmakers. These metallic sheets can be applied to your card surfaces using heat and/or pressure, typically with a laminator or foiling machine. The result is a stunning, reflective surface that catches the light and adds a touch of glamour to your cards.
Laminator or Foiling Machine
A laminator or foiling machine is the tool of choice for adding foil accents to your cards. These machines use heat and pressure to transfer the foil onto your cardstock, providing a professional finish that mimics the look of expensive, store-bought cards.
You can foil with a Cricut Maker if you get the foiling blade. The machine will trace your pattern or image while pressing the foil into your paper.
Card Sizes & Envelopes
There are a wide variety of card sizes. The most common sizes of cards are meant to fit in pre-made envelopes. If you want to create a card size that is different than the following common sizes, you can always create your own envelope.
- A2 – This is one of the more popular card sizes. It measures 4.25 inches by 5.5 inches.
- A6 – This card size measures 4.625 inches by 6.25 inches and is another common size for greeting cards.
- A7 – This card size measures 5 inches by 7 inches and offers more space for designs and creativity.
- 5×7 – Another popular size, measuring 5 inches by 7 inches (folded size), provides a versatile canvas for various designs and messages.
- 6×9 – This card size measures 6 inches by 9 inches (folded size), offering a larger format that works well for cards with more content or elaborate designs.
- Slimline – tall and slender these cards measure 3.5 inches by 8.5 inches.
- Mini Slimline – as the name suggests, they are just a smaller version of a slimline card measuring 3.5 inches by 6 inches.
- Square – Square cards come in various sizes, such as 4×4, 5×5, or 6×6.
Make Your Own Card Bases
Using the sizes above as a guideline, you can cut your own card bases. Most card makers will design their card fronts on a separate piece of cardstock or pattern paper (because they want to emboss or embellish it separately) and then attach the decorated piece to a card base.
Making your own card bases means you have the ability to make your card any size you need at the moment as well as any color to fit your theme.
Many card makers will pre-cut and fold a number of card bases in advance and also use their scraps for common card front sizes so they have these ready as well. This makes whipping up a card at the last minute just that much quicker.
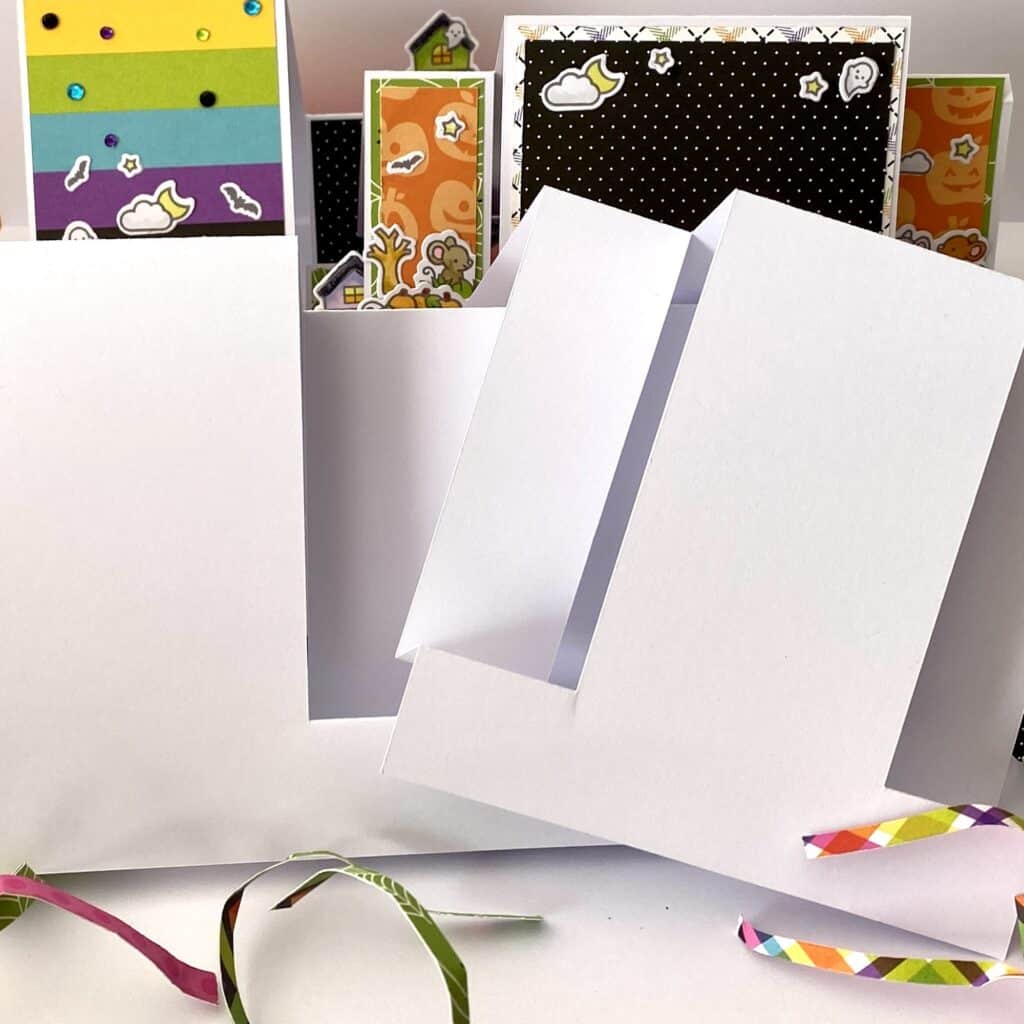
Buy Pre-Made Blank Cards
There are many companies that sell premade card blanks with coordinating envelopes. This is also a great option to have card bases ready at a moments notice. They come in various sizes, colors, and paper weights as well.
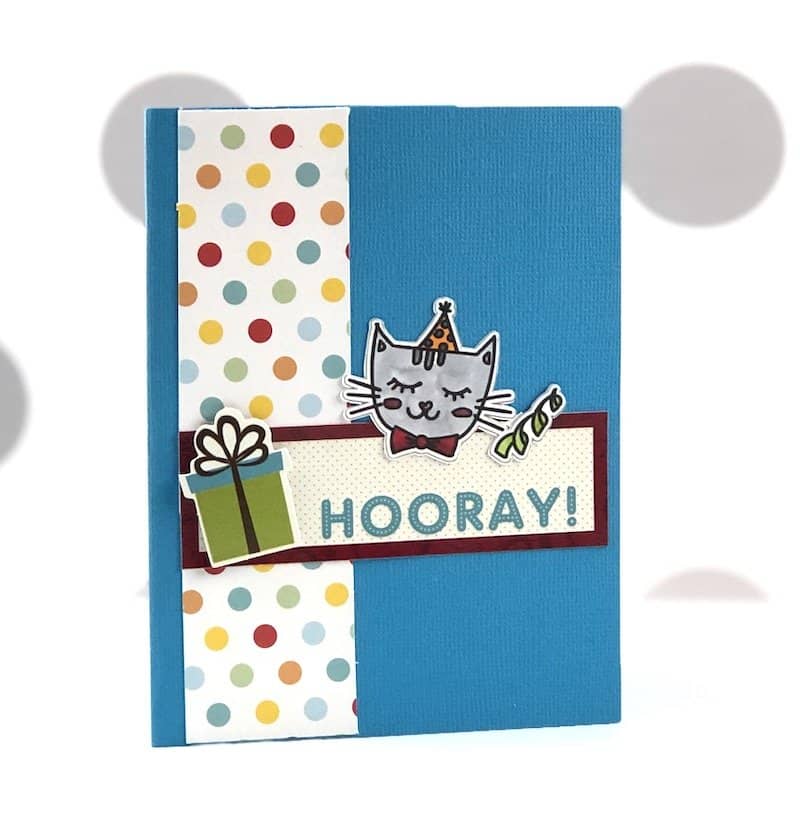
A Few Cardmaking Techniques
- Keep it simple and use stickers.
- Design a card front using die cuts.
- Create a collage from different papers and images.
- Doodle and color your design and sentiment.
- Try a different fold instead of the standard “in-half”.
- Add some ribbon.
- Add some sparkle with glitter glue or glitter paper.
Fun Folds for More Advanced Card Making
Ready to try something a little more advanced? There are templates in the library for different fun folds (gate fold cards, bridge fold cards, pop-up cards, box cards, etc.) You do not need to have a Cricut machine to use these files. Almost all of them include a PDF with a template that you can use as a guide to cut designs by hand.
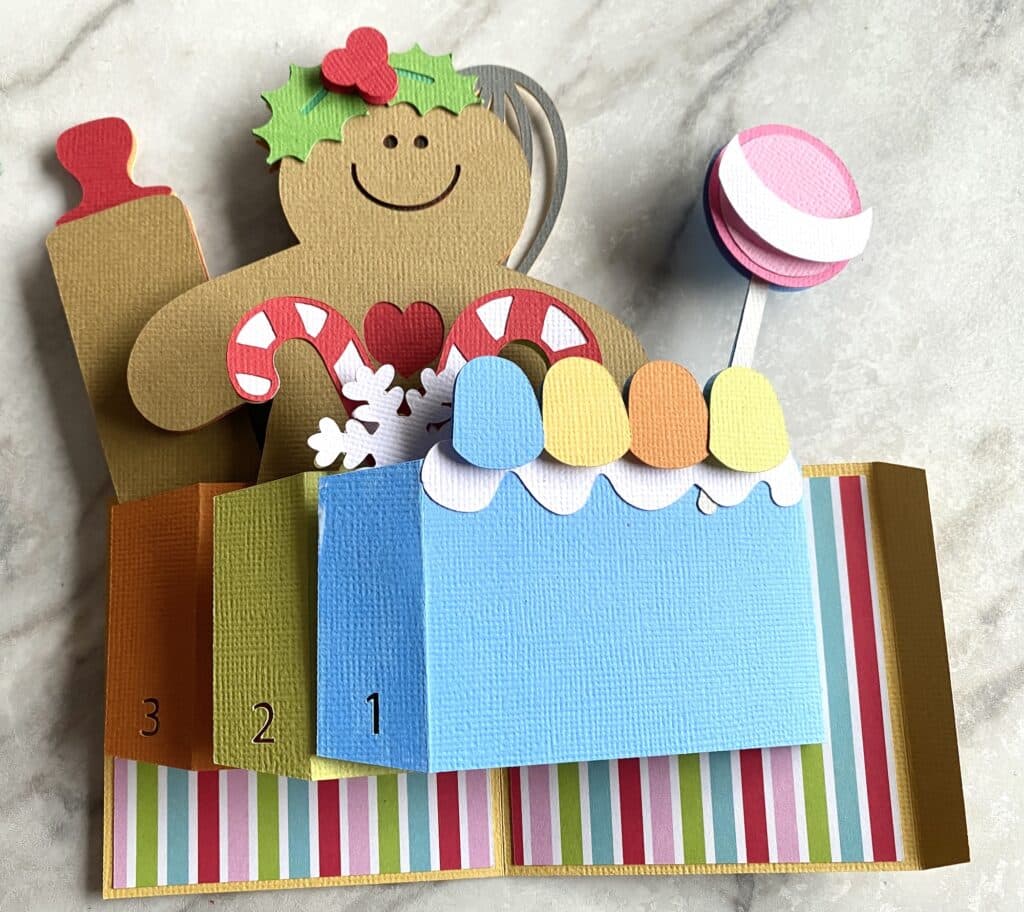
There are so many different ways to fold a piece of paper or glue a pile of folded pieces together that result in stunning creations.
Once you learn how to look at a design and break it into elements, you will see how most cards start with a similar base. The elements and techniques are what make them truly unique and into mini works of art.
Cardmaking Kits
Cardmaking kits are pre-selected items that are usually tied to a theme. The company will pull together pattern papers, stamps, stencils, and other embellishments that will make a set number of cards. This is a great way to get an assortment of supplies to try without having to buy them all separately (kits are usually offered at a discounted price compared to buying all the supplies on their own or they break apart paper pads or products so you can try a few things without buying a whole pack).
What Is the Easiest Way to Make Greeting Cards?
The easiest way to make a greeting card is to cut a piece of cardstock to your desired size and then fold it in half. Add doodles, stamped images, or stickers for decoration to the front. Write your sentiment on the inside. Voila. You have just made a greeting card.
Cardmaking For Beginners Project Ideas
There are so many great ideas for cards on Pinterest and YouTube. Don’t let the plethora of inspiration overwhelm you and keep you stuck in the analysis phase.
Pick a card you love the look of. Why do you love it? How can you replicate that element?
Now CASE it (copy and steal everything).
That is why people share those ideas online. To give you guidance and inspiration. I don’t care if you copy any of my cards on this site (not to resell as digital files, obviously). The idea behind sharing is so that you can give it a try too. It doesn’t matter how hard you try to replicate a design you love, your own flare will always be added and it will become your own unique piece of work. Give it a go.
Connecting With Other Crafters
Need to ask a few questions? Want some feedback or design direction? Join the Facebook group and chat with other card makers and scrapbookers. It is the best way to get those creative juices flowing.
Oh. And FYI. I subscribe to the “there is no such thing as a stupid question” camp. Even if it seems silly or like the answer should be obvious.
Sometimes, just saying it (or in this case typing) it will help you solidify your thought. You might even answer it yourself after posting. I don’t mind. Ask anyway.
Most likely, someone else has the same question and will appreciate that you asked and found an answer.