
Cricut Cursive Fonts: Tricks To Connect Free Cursive Fonts
We may earn a small commission for purchases made through affiliate links in this post. For more information go to our Privacy Policy.
Using Cricut cursive fonts allows you to expand your project capabilities so that you can create beautiful pieces. Unfortunately, unless you know how to connect your cursive letters font, you’ll end up with a mess rather than a beautiful finished product when you cut. This tutorial shows you two different ways you can connect Cricut script fonts easily.
There are so many ways to use Cricut script fonts. You can use them with vinyl, heat transfer vinyl, paper for scrapbook titles, cards, and more.
But there’s a catch to using them.
The problem is that there are beautiful script fonts that just don’t look right when you type them out. The letters have too much spacing. The cursive doesn’t flow the way it’s supposed to. And we only have so much time to search for Cricut cursive fonts that connect. What’s a Cricut crafter to do?
Luckily, I’ve figured out a few tips and tricks for how to connect Cricut script fonts using Cricut Design Space as well as another font app.
Psst. This app is also AMAZING for making Word SVGs. It’s a double bonus!
Not sure how to upload fonts to use in Cricut Design Space? Or how to get cursive fonts on Cricut Design Space? Check out this post on uploading fonts.
Why connect fonts in Cricut?
You want connected fonts on Cricut because the letters need to stay attached when you cut them out of your material. Otherwise, you’ll end up with a MESS when you go to cut your design (don’t ask me how I know!)
How To Connect Cricut Cursive Fonts Using Cricut Design Space
Now it’s time to dive in and learn how to make cursive fonts connect on Cricut.
The first way to connect a script font in Cricut is to use the letter-spacing tool in Cricut Design Space. Make sure you have uploaded your font into Design Space.
Type your word on the workspace. Then while it is still highlighted, you can click on the top toolbar to adjust the space between letters.

Simply adjusting with the letter-spacing tool does most of the work. However, you will notice there is still too much of a gap between the beginning capital letter in each word.

The trick to finishing it up is to UNGROUP the words and then scootch the lowercase letters closer to the uppercase letters. You can group just the lowercase if it makes it easier to move while keeping them together.
The last step in this process is to remember to WELD the letters together. This will do two things:
- It will keep the placement of your letters when you’re ready to cut.
- It will also keep the little bits where letters overlap from being cut out.
Your cursive letters font is now a seamless outline instead of overlapping cut paths! This is the QUICKEST way to connect Cricut script fonts without having to use other programs.
NOTE: If you want to keep the entire phrase in the arrangement you designed, you’ll want to select all the words and click on ATTACH. This tells the Cricut Design software not to “save material” by moving all the pieces to the top left corner.
Three Different Methods To Move Letters Around On The Workspace
As you’re arranging your Cricut cursive font letters in Cricut Design Space, I want to let you know that there are three different ways you can do it. These methods are useful in varying circumstances, so it’s super helpful to know all three!
- Use your arrow tools on the keyboard to move the letters from left to right. This keeps them at the correct height and only moves them along a horizontal line.
- Grab them by clicking and holding and then move them left or right. This might move them a little higher or lower, but you can adjust them by using the guidelines on the workspace. Moving them manually is sometimes superior to the arrow method, which can move a letter too far at times. Moving them manually gives you total control over how far the letter moves.
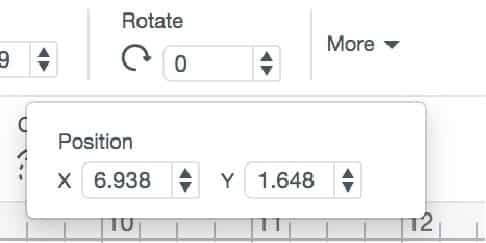
- Use the X, Y coordinates on the top toolbar to adjust the placement of the letter. You can get as precise as you want with this one because the coordinates go out to 1/1,000th of a unit of measurement.
How To Connect Cursive Letters Fonts In An SVG File
Cricut Design Space isn’t the only way to connect script fonts! This next method uses a useful app that you can download on your MAC or Windows computer called FontLab-Pad.
NOTE: If you just go to font lab (dot) com, you will see a SUPER expensive software. That is NOT what you want.
Download The Software
- Grab the free download version of FontLab-Pad.
- Enter an email address. Then check your email and click the link they send you to begin a download.
- Double click on the download to begin the installation.
- Navigate to your Applications folder and open up the program.
Add The Font To The Software
This is where the process gets slightly complicated (and maybe a little irritating). If you’re like me, you install a font on your system and then delete all the excess files. The problem here is that this program doesn’t access your system’s font files. It wants you to drop the actual font file (TTF or OTF) into the software.
You have to have the files on hand in a folder! Pro Tip: Keep a separate fonts folder that’s labeled as such and easy to find so you can access your fonts quickly.
This may not be an issue if you have just downloaded the font. But if you have deleted the files from your folders and they’re now just on your system, then you’ll have to redownload them.
It might be worth the extra time and effort in exchange for the last feature, though!
Drag your font into the window of Font Lab.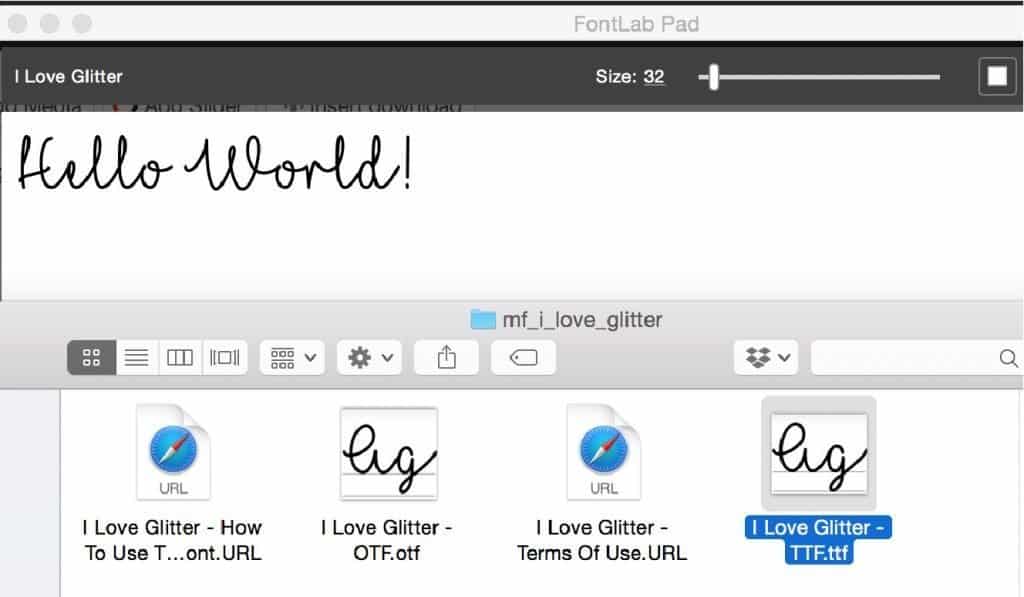
Add Your Text
Type in your phrase. Then click on the A| on the top right corner of the toolbar. This will give you the justification (left, center, right) and the line-height options as well as letter spacing.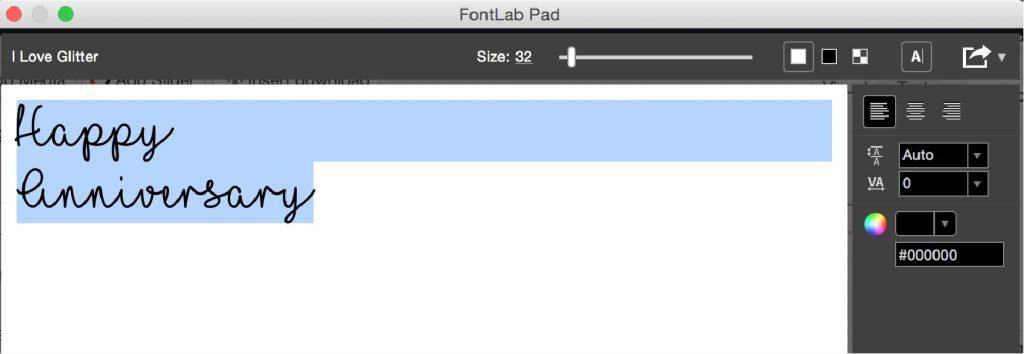
Adjust The Font Size
To adjust the font size, grab the cursor on the slider and move it left or right.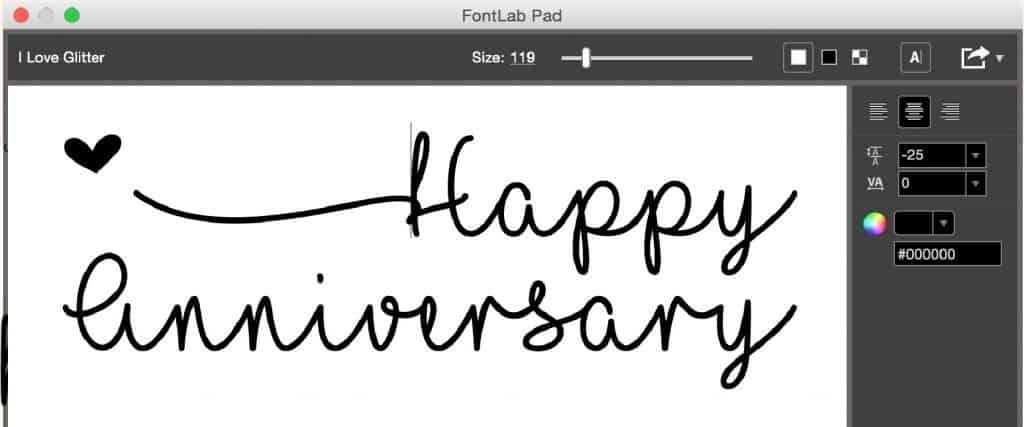
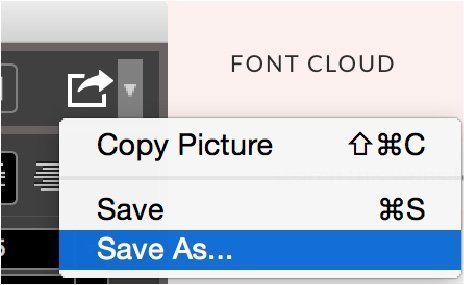
Save It As An SVG
Once you have the word art set to your liking, let the fun begin! You can click on the rectangle with the arrow pointing to the right and save your work as an SVG.
Use The SVG File Anytime You Want
Now you can take that file and upload it into Cricut Design Space to use as often as you wish.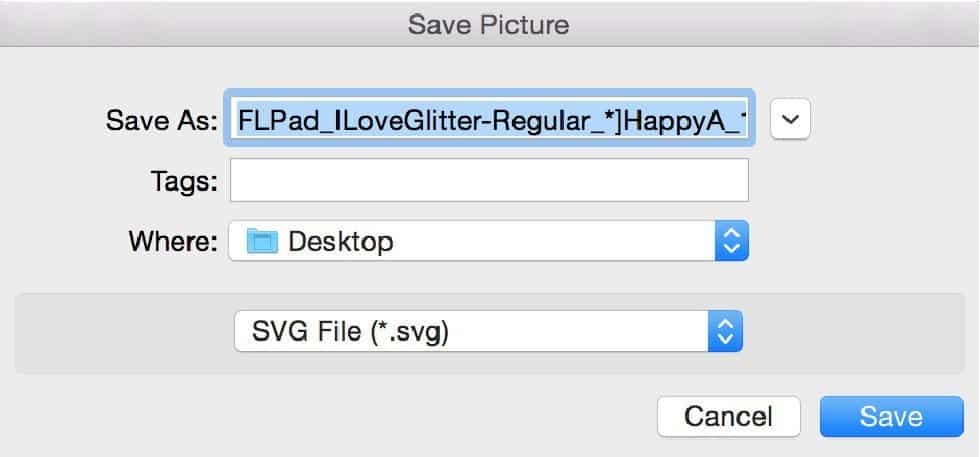
If you’re designing a shirt with cuttable graphics, add this to your design in Illustrator. No need to rasterize your text and then trace and expand it!
Putting These Tricks For Connecting Cricut Cursive Fonts To Use
No matter which way you choose to connect your Cricut script fonts, you now have the ability to make gorgeous word art without a great deal of effort. I recommend spending just a little bit of time practicing the techniques. This way, you feel comfortable using these different methods when you’re working on a project.
The script font hacks will allow you to design quotes and sayings that you can use over and over on all your Cricut craft projects. It’s a great way to take popular Cricut fonts and use them to make your favorite Cricut crafts.
If you would like to learn how to design SVG files from scratch, check out my course below!


Thank you very much~~~This saved me so much time trying to type and move lettering and the most awesome was being able to save it and import quickly. It is so simple to use but it makes me want to do more with it!! Thanks again!!
I’m happy that you found these tricks for connecting scripts useful. Thank you for the comment. Happy crafting!
Rhoda
I have a multi line project. I typed it all in but it would only save what was showing in the window. If I reduce the font size in Font Lab to show the entire project in the window…it is all distorted when I download into Design Space. Is there a way to save the entire project? Or is this just for a few words…
Can you type a line at a time in the text box?I’ve never had an issue with it saving more than one text box…and I have done the larger sign for the bathroom with multiple fonts.
The other option is to create it in something like Canva and save it as a PNG file. Then upload and trace that image in Design Space.
https://lemonyfizz.com/upload-to-design-space/
That would be a workaround if typing one line at a time didn’t work.
Rhoda
This post was super helpful! I never knew there were so many tricks to connect cursive fonts using Cricut. I can’t wait to try out the tips you shared. Thank you for breaking it down so clearly!