Easy How to Draw a Rose Step by Step Tutorial
We may earn a small commission for purchases made through affiliate links in this post. For more information go to our Privacy Policy.
Learning how to draw a rose doesn’t have to be complicated. It is a beautiful flower that has a complex set of petals in real life. It can be drawn with simplicity and still be beautiful. The following tutorial will teach you how to draw a rose step by step.
Ready to Learn how to Draw
A few things to keep in mind while you are learning how to draw a rose.
You need to draw lightly. There will be some shapes that you draw as a guide and later they will be erased. You should always draw your first lines as lightly as possible.
Don’t be afraid to change the design a little. You might practice it one time the way the tutorial shows you. After that, try adding thorns or more leaves. Make the stem long and crooked. Change up the design of the rose to make it fit your journal or artwork.
The basic steps of drawing this rose will show you how to take a complex image or object and break it down into more simple shapes. Don’t be intimidated by the flower and all it’s petals. You don’t have to draw every single detail to make it beautiful.
When I taught high school art, many of my students would get caught up in the little tiny details and become frustrated because it didn’t “look exactly like the real thing”. You have to learn to draw with the basic shapes before you move on to a harder flower tutorial that shows more detail.
Shading always helps something to look more realistic as well. Keep this in mind when you are adding color later. A few shadows or darker shades of color will help your image pop even more.
This step by step rose tutorial is intended to teach you how to see the basics and then move on to something more complex later. It’s a great foundation to start with if you want to draw flowers in your planner or bullet journal. It’s also a great activity to practice on a rainy day with your kids. They will love drawing flowers as much as you do!
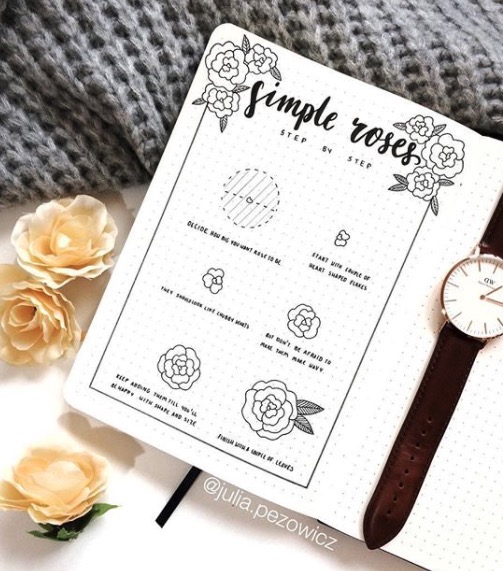
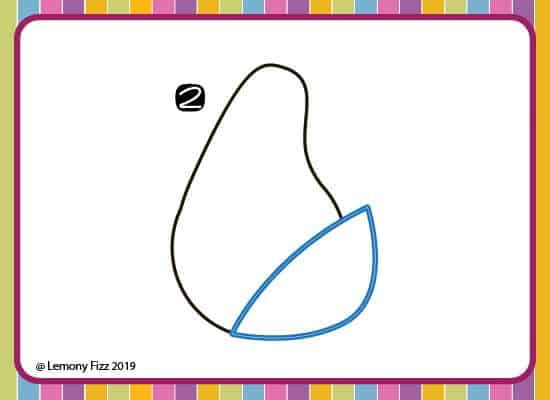
- Remember that sometimes you need to draw a shape for a guide. Draw these guides very lightly so you can erase them later and not leave any marks. Start with a circle and that odd little shape on top.

- Erase the line between the top shape and the circle. Now add a petal to your shape (the blue lined shape).
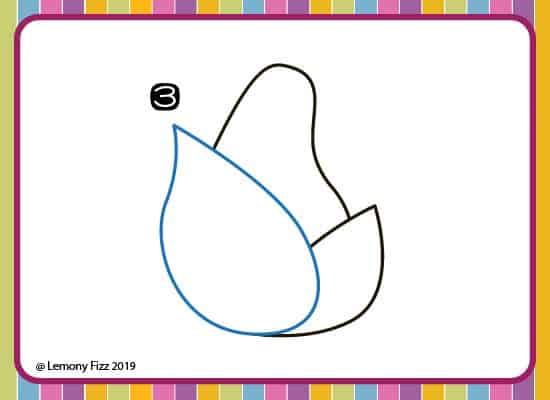
- Add another petal on the side of your rose.
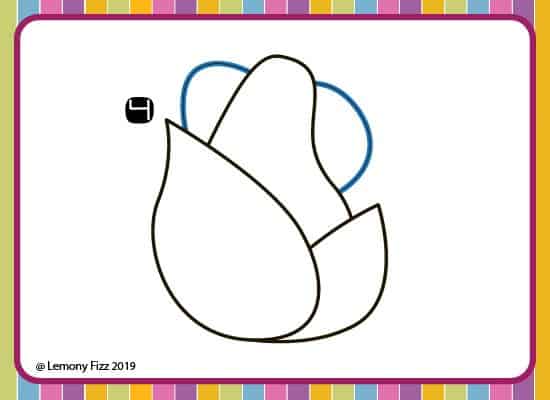
- Add two small loops to the back to show more petals in the background.
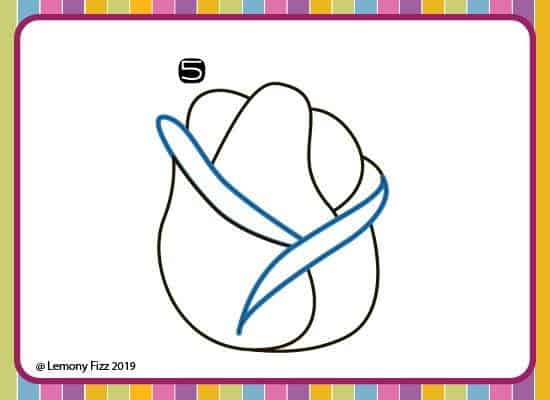
- These are a little tricky. You are going to show a curled rose petals by drawing long sharp ovals. One will overlap the other.
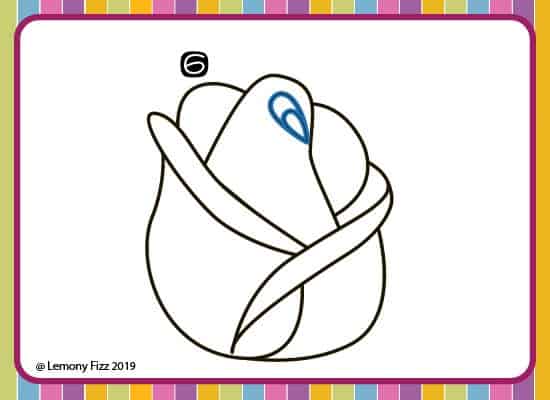
- Draw to upside down teardrops near the top of your rose. This is showing how the rose has multiple petals that are wrapped around each other.
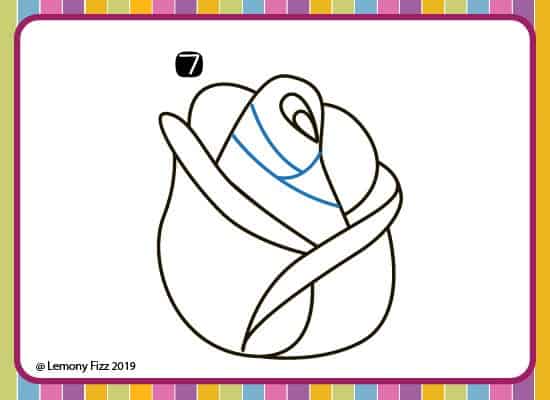
- Now you will draw a few lines across the center of the rose. This is showing all the other petals that are wrapped around the blossom.
- Now you can add a small petal around the base of your rose drawing. Add 1 or two more than one if you like. This tutorial is only going to show one hanging petal, but you can add more.

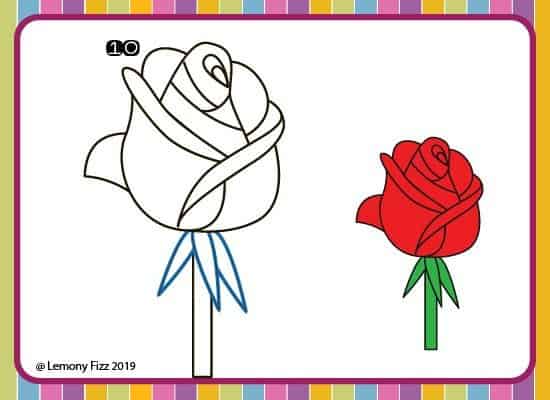
- Now you can add a stem to your rose. This can be a long straight stem or you can make it curvy with sharp thorns. Start adding your own creative touch to your drawings. This will add character to your artwork or your journals.

- Last, add a few leaves to the base of your rose. There are 3 of them on this rose because the human eye likes to see things in 3. Keep that in mind as you draw and add details. Color your drawing with journaling markers, colored pencils, crayons or any other medium of your choice.
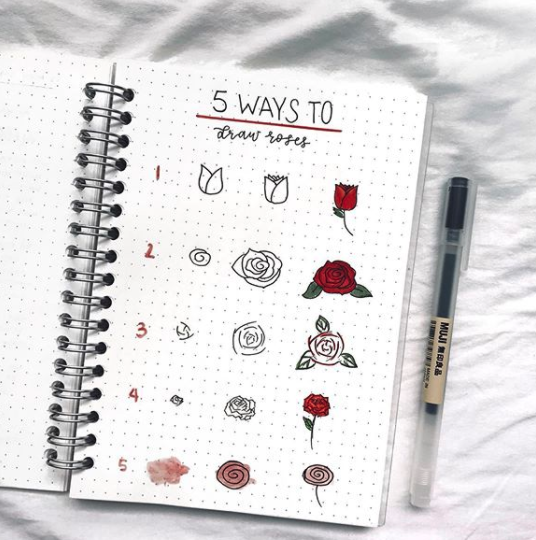
Now that you have learned how to take a complex image like a rose and break it down into simple shapes, you can try drawing some other flowers. Some will be easier. Some may be harder.
The idea is to keep practicing how to draw a rose, a tulip, or any other flower you may want to add to your journal, planner, or artwork. Don’t think that just because you have drawn it once and it didn’t turn out exactly the way you wanted it to, that you can’t draw.
It Takes Time to Learn to Draw
Drawing is like anything else in life. It takes practice. Sometimes years and years of practice.
The analogy I always used with my art kids was that drawing is like shooting a basketball.
Unless you are really lucky, you never stepped up to the basket and made the ball go through the hoop on the first shot. It took hundreds of free throws and shots to learn how to get the ball high enough, or to arc just right and actually make it into the basket. And sometimes, you still miss!
It’s the same with drawing. It may take hundreds of tries or hours of practice. Some days a few drafts might end up in the trash. Or they might not be your favorite piece…but they still work for what you need. Keep trying.
Or step away from it and then come back. Sometimes seeing it with fresh eyes will show you what you need to fix in your flower drawing. Or you might come back and be completely happy with your ability to draw a rose.
Other Rose Tutorials to Try
Learning how to draw a rose with a step by step guide, or any other flower or object is a great practice in seeing the shapes that make up an object. Try looking at other flowers or objects in a similar way. What shapes can you break them into? How do they overlap?
Now go draw some more roses, flowers, and other doodles in your planner or journal. Or just free draw. It’s good for your brain!