Thanksgiving Card: Make This Simple Card
We may earn a small commission for purchases made through affiliate links in this post. For more information go to our Privacy Policy.
It is frustrating when you see a card and love it, but it seems like it probably took hours to make. Or you search for an “easy card” and it is just two or three pieces of paper slapped together.
You want something that is in the middle. Not too challenging. And not so easy it looks like you made it when you were in grade school.
This Thanksgiving card is simple. Whimsical. And it looks like you probably spent hours. Really it won’t take you more than one. Unless you are a really slow colorer. (Did you want to add more er ers to that word? I did.)
Quick and Easy
The joy of this card is you can give it to a family member during a traditional Thanksgiving or you can give it to a friend during a Friends-giving.
It is universal.
You can watch the video to see how I created this fun woodland Thanksgiving card or you can continue reading the following tutorial.
Supplies for a Woodland Feast Card
- card base (4.5in x 5.5in card) 9 x 5.5 inch cardstock
- yellow card front – 4.5 x 5.5 inches
- 12 x 12 grey cardstock (for the 3 layers of tree frame)
- Tree Frame SVG file
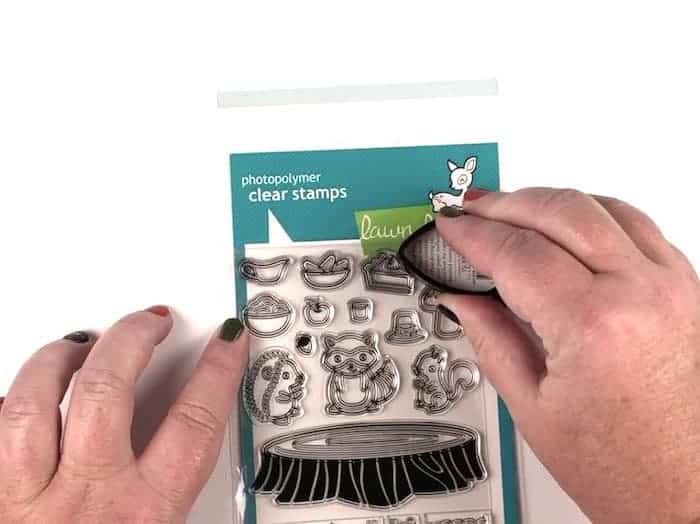
- Lawn Fawn Forest Feast stamps
- Lawn Fawn Forest Feast die cuts (if you don’t want to fussy cut)
- coloring tools of your choice (Copic markers, colored pencils, watercolor paints)
- glue
- 3D foam dots
- lamination pouch
- laminator
- sequins or glitter in fall colors
How to Assemble:
To start this card, you are going to sprinkle some different colored sequins into a lamination pouch and then run it through your lamination machine (You might be able to iron a lamination pouch…but I don’t have any advice on temperature or time. I haven’t tried it!)
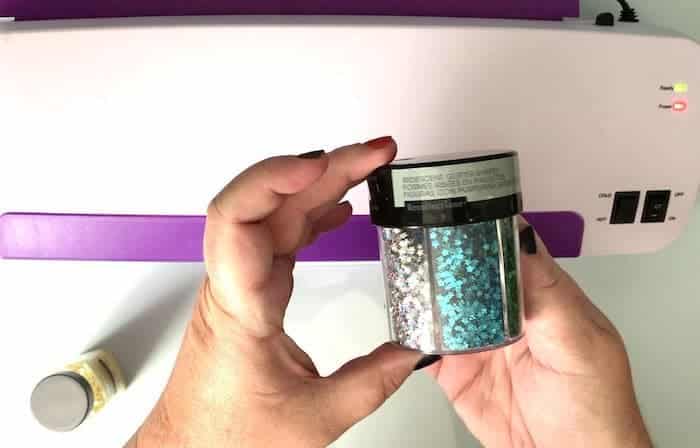
Once you have the sprinkles all spread out in your lamination pouch it is time to run it through the lamination machine.
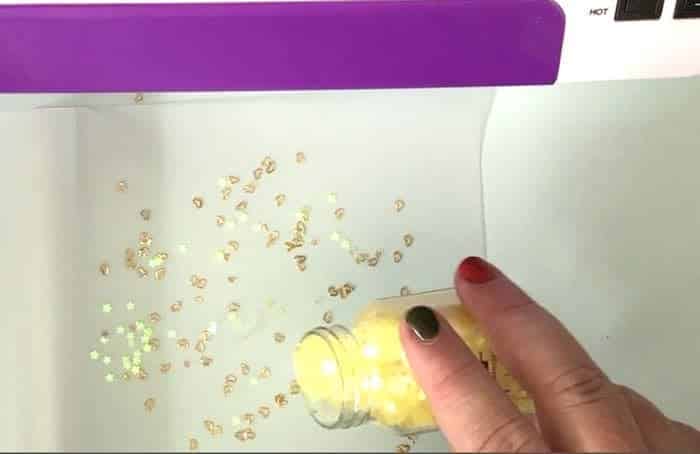
You will have a clear window with sparkles that won’t come loose or get rubbed off and be all over everything!
The next step is to ink your stamps so you can get them colored and ready to cut with the metal die cuts.
I inked all of the critters and food items that I planned to color while they were still on the sheet. There was no need to take them off and separate them out. This made it quicker to ink them up and quicker to get them cleaned up.
Coloring Your Stamped Images
You can choose whichever medium you like best to color your stamped images. I really love my Copic markers so that is what I used to color mine.
Any excuse or reason to use my markers makes me happy!
Some people love to watercolor paint their stamps. Some crafters are really good at coloring with colored pencils. This is your craft time. You do what makes you happy!
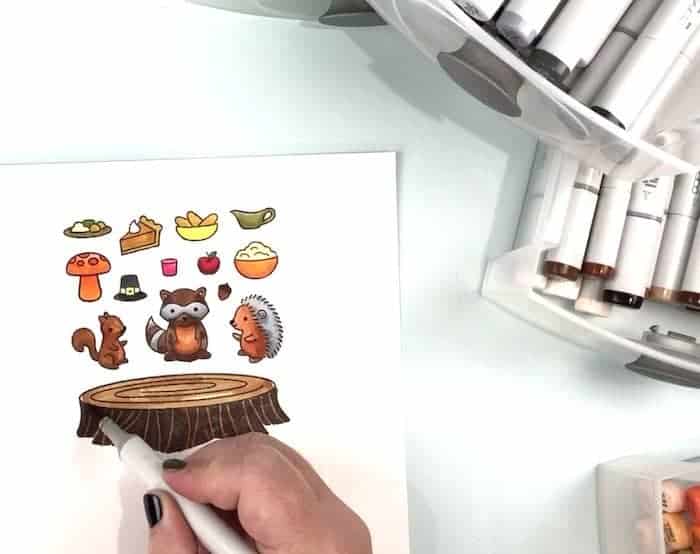
This is probably the step that takes the longest. Once you have everything colored then you are ready to cut them out.
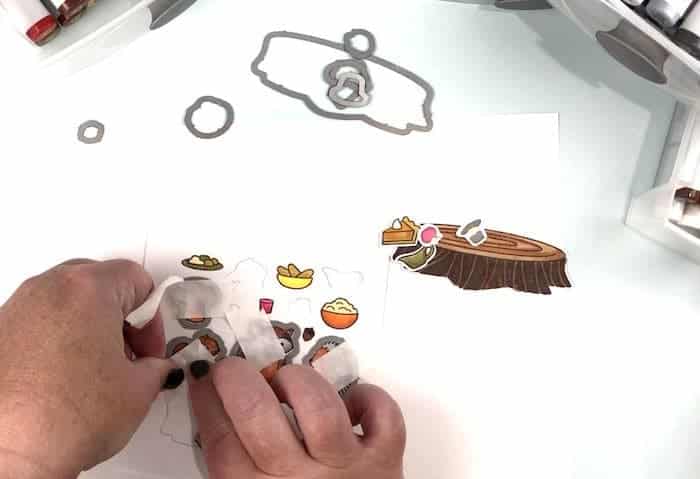
Cutting Out Your Forest Feast and Animals
There are a few ways to cut out your stamped images.
- Cut them out using the metal die cuts (there are coordinating ones with the Lawn Fawn stamp set)
- Fussy cut them out using your favorite pair of scissors.
- If you have a Silhouette, you could use the scan and cut feature.
I chose to use the coordinating metal dies and then I used my scissors to cut a few of the larger white edges off. I personally love to fussy cut…and it is hard for me to look at the white sticker border on these die cuts. Next time, I will probably finish them up by fussy cutting!
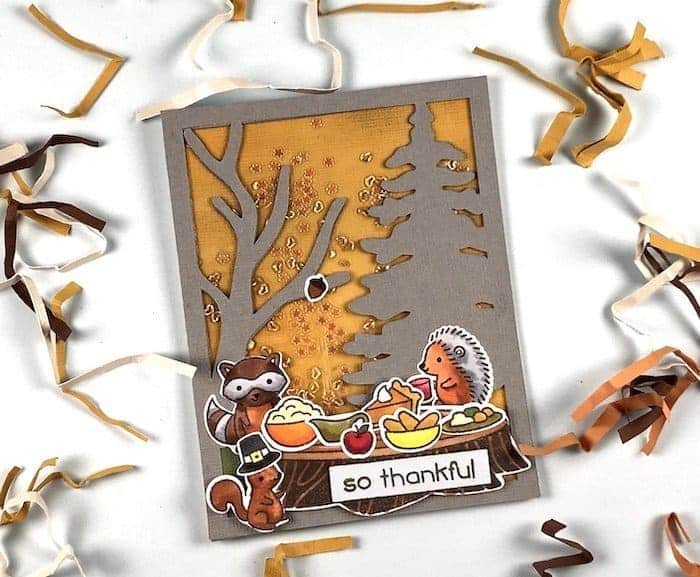
You will also need to cut the tree frame. You can print out a template and cut this out by hand or you can upload a file to your Cricut Design Space or Silhouette software and have your machine cut it for you.
There are 3 layers, so you will need to cut the design 3 times. The measurement for the frame should be the same as your card front.
My card front was 4.5 x 5.5 and that is the size that I made my frame and cut it out 3 times from grey cardstock with my Cricut Maker.
Gathering the Remaining Design Elements
There are just a few things left to do before you start putting all the pieces of this Thanksgiving card together.
If you want, you can ink the yellow card front. I added a few different colors to mine to create an illusion of depth on the card front.
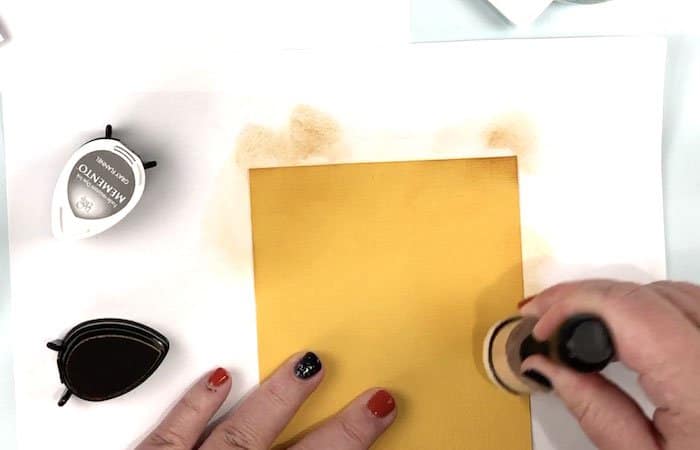
After that is all inked (if you choose to) then it is time to start gluing pieces together.
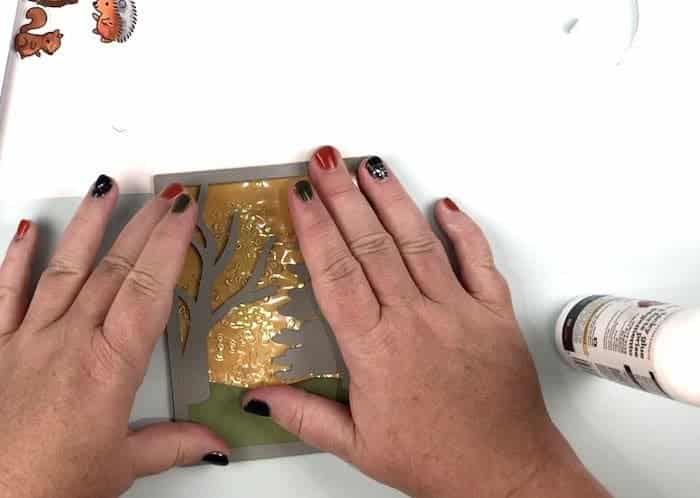
I added the clear lamination pouch with sparkles to one of the tree frames. After that is glued down, you can add the other two frames.

NOTE: I also added in a piece of green rolling grass. It helped anchor down the forest animals on the left-hand side of the card.
Assemble the remaining frames by layering them and then glue the whole piece down onto the yellow card front.
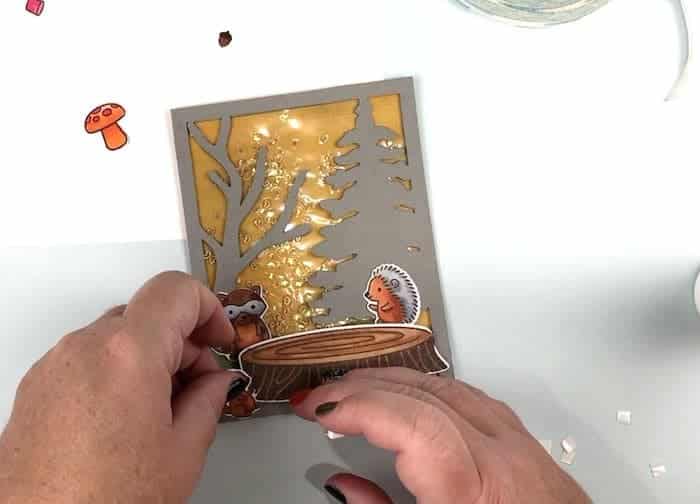
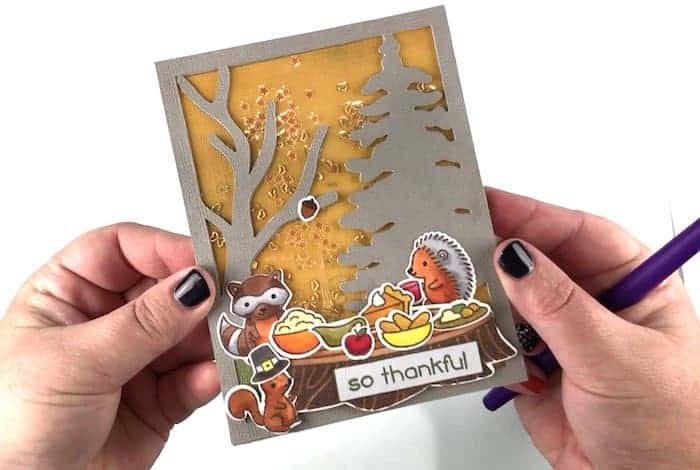
It is now time to rearrange all your colored forest animals and their feast.
Use 3D foam dots to make them have a little more dimension on the card. Overlap some of the food items to make the table seem a little more realistic.
Once you have the entire card face assembled you an attach it with the adhesive of your choice to your card base.
I just used a piece of white American Crafts cardstock that I cut 9 inches by 5.5 inches and then folded in half.
You can also use pre-made card fronts if you have those on hand.
If you loved making this Thanksgiving card and would like tutorials for other cards you can check out my online card classes.
Let me know if there is something specific you would like me to cover in a tutorial. There are plenty more paper crafts on the site. Look around and get crafty. I’m happy to help!
[mv_create key=”6″ type=”list” title=”Card Making Supplies” thumbnail=”false”]