
3 Simple Free Bridge Fold Card Templates and Ideas
We may earn a small commission for purchases made through affiliate links in this post. For more information go to our Privacy Policy.
Creating a bridge fold card is very simple. Knowing where to score the ends of your card base is really all you need to know. Or you can just let your cutting machine do the work for you.
Either way, this post will include 3 free bridge fold card templates that you can use as your card base. Next, you can pull all those goodies out of your stash and start decorating.
Measurements for a Bridge Fold Card
The 3 sizes in this tutorial will make the following cards:
- A2 (4.25 inches x 5.5 inches)
- 5 x 7 card
- a slimline card (3.5 inches x 8.5 inches)
If you would like to create a card that is a different size other than the 3 included in this post, you can cut a piece of paper to the height of your card. Then take the width of your desired card and add 2 inches. Example: you want a 6 x 6 card. Cut your card 6 inches tall and 8 inches wide (6 + 2 = 8).
Grab the templates (SVG, PNG, and PDF) in the library.
Designing Your Triple Fold Card
Position your paper so you are looking at it hotdog style (landscape, rectangle laying down).
Score your first line on the left-hand side at 1 inch. Score the second line at 2 inches.
Now rotate the paper so the score lines are on the right-hand side.
Score the paper again at 1 inch and 2 inches.
That’s it.
Now you fold those in towards the center so the left-hand size makes a backward Z and the right-hand side makes a normal Z. With the flaps covering part of the front of your card.

Cut panel pieces from pattern paper, create a sentiment and scene on the inside, and add your die cuts and embellishments of choice.
The trick with a bridge fold card is to have a strip of paper that connects your two side panels. You can make this decorative like hills, grass, clouds, etc. Choose how thick you want it (height) and then make it the folded width of your card. Example: for a 4.25-inch wide card the strip of paper will be 4.25 inches wide and as tall as you need for your design. This strip holds your card stable and creates the “bridge”.
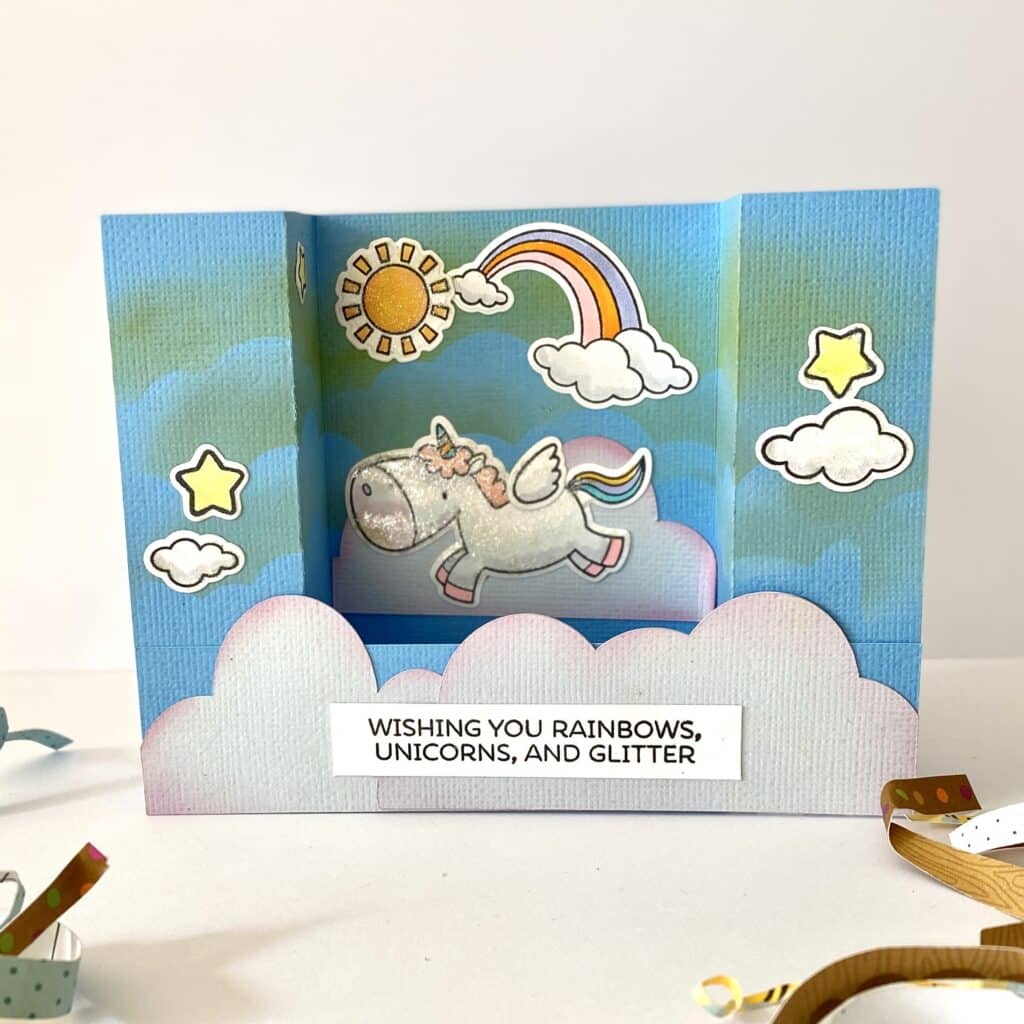
Unicorns and Magic A2 Card Idea
Supplies Used:
- My Favorite Things (Magical Unicorn Stamps and Dies)
- Copic Markers
- Distress Oxide Inks
- Lawn Fawn Liquid Stardust
See the links at the bottom of the post.
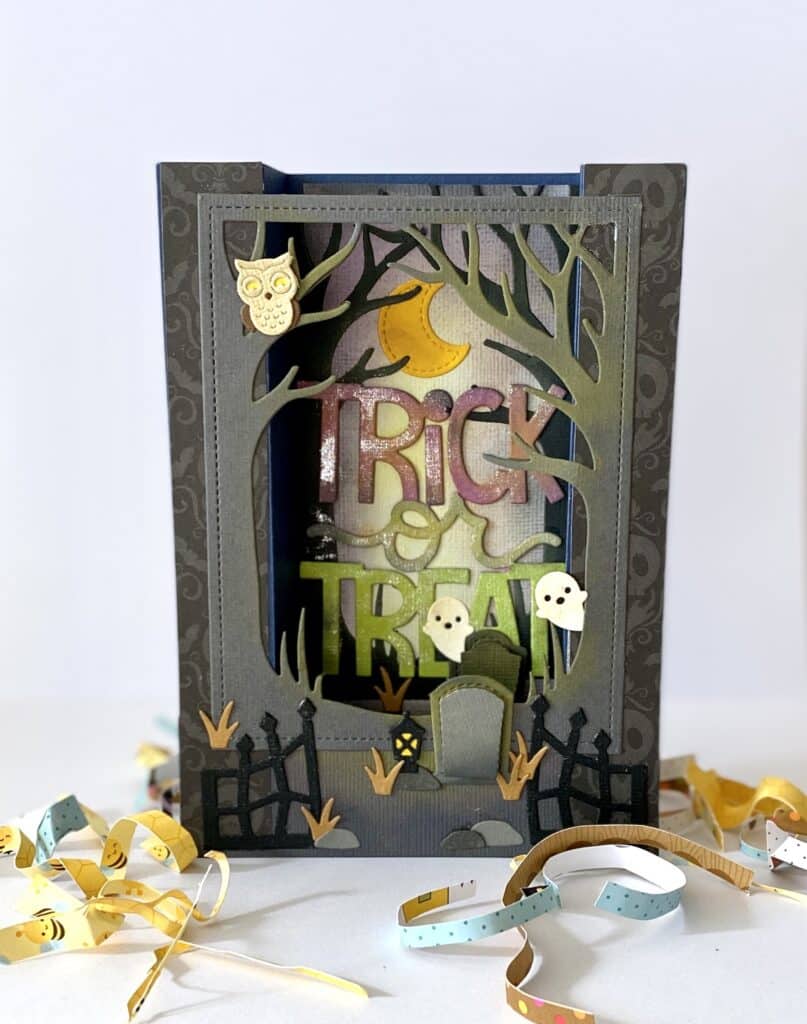
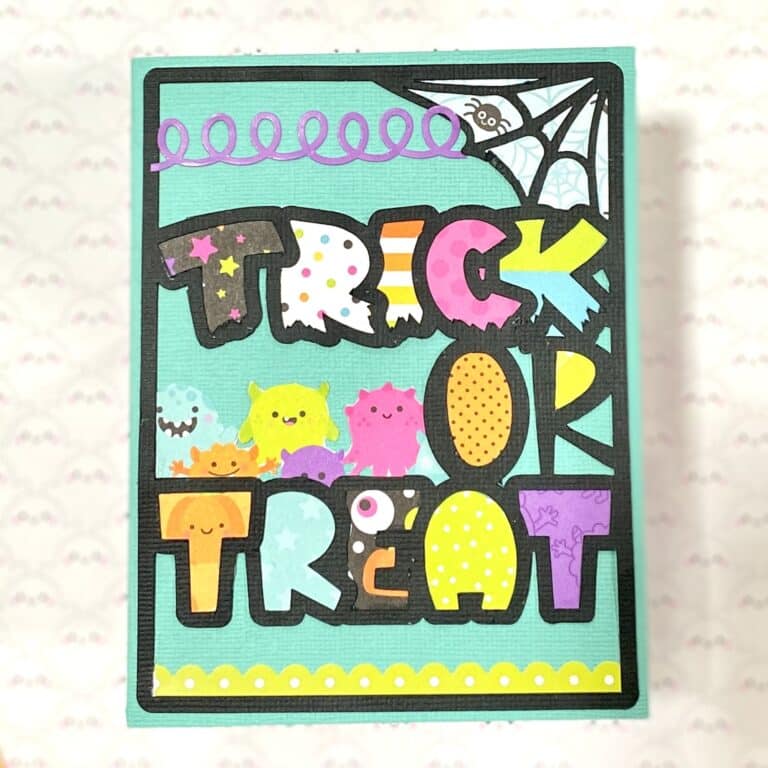
5 x 7 Trick or Treat Halloween Card Idea
Supplies Used:
- Lawn Fawn Spooky Gate
- Lawn Fawn Big Trick or Treat
- Lawn Fawn Spooky Backdrop
- Lawn Fawn Liquid Stardust
- Distress Oxide Inks
See the links at the bottom of the post.
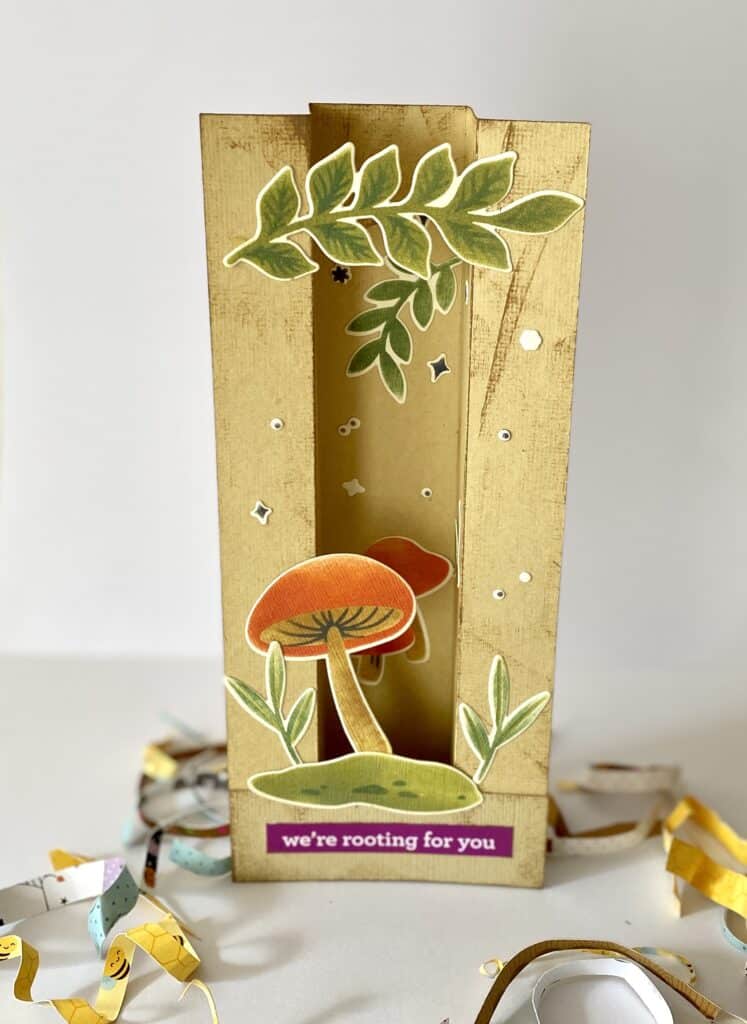
Slimline Rooting For You Card Idea with Mushrooms
Supplies Used:
- Pink Fresh The Magic is In You Stencils
- Pink Fresh The Magic is In You Dies
- Distress Oxide Inks
- We Are Rooting For You sentiment strip from DoodleBug Harvest Paper
See the links at the bottom of the post.


Unable to download in the library?
The download works. I just forgot to add the main image. All fixed (and I sent you a quick email with the downloads to save you the hassle).
Rhoda
Hello, Iwas wondering how you fold the bridge cards, and what size envelopes are used for mailing the cards?
Hi Diane,
The sides of each card are accordion folded one time (once toward the center and then one time back to the edge). You do this on each side and then attach a “bridge” with a strip of paper.
You can see the “fold” on the post above. The blue card with the z shaped ends.
The card sizes are based on whichever template you use. Envelopes should be standard sizes for the following: an A2 (4.25 x 5.5), a 5×7, and a slimline (3.5 x 8.5).
Rhoda