Free Gingerbread Box Card for DIY Handmade Christmas Gifts
We may earn a small commission for purchases made through affiliate links in this post. For more information go to our Privacy Policy.
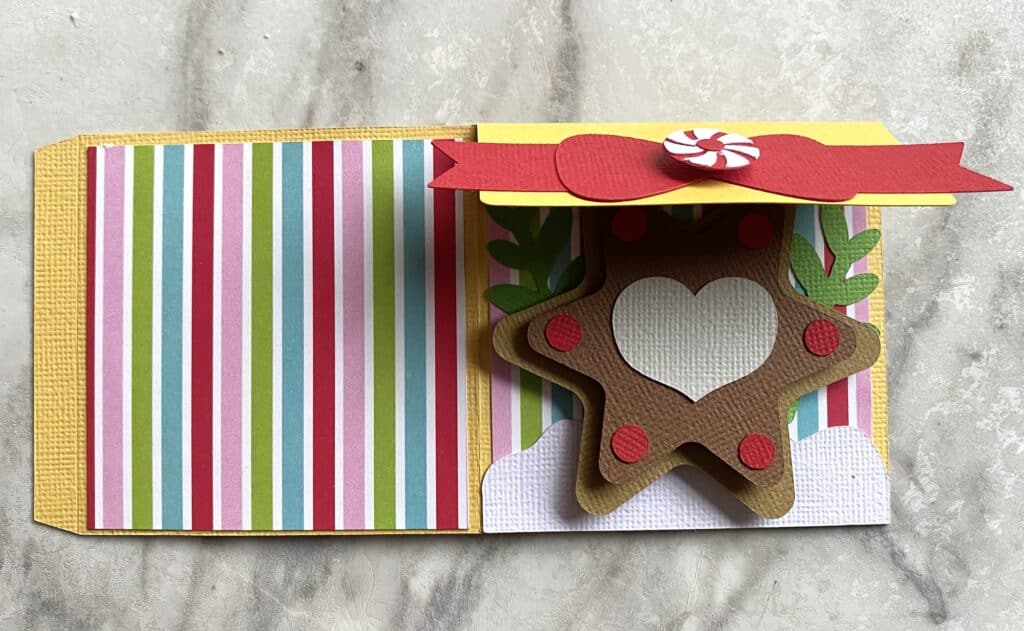
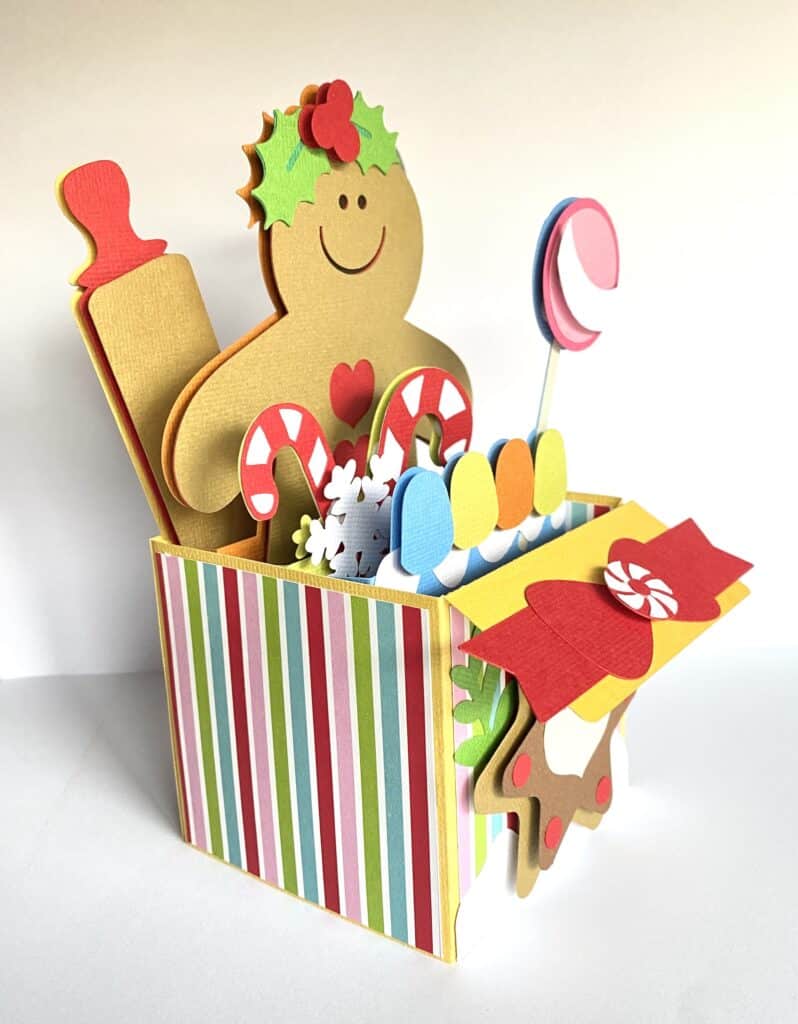
The colors of Christmas bring on a feeling of nostalgia. This little gingerbread box card is no exception. He also adds a little bit of cheer.
Box cards add dimension to a paper project that foam dots just don’t manage. Add a few foam dots to each panel and you are really cooking (errr…baking).
Box Card Tutorial
The process of putting the panels into a box card was a mystery to me until I made a handful of them. I used to make the outer box first, then insert the panels. Glue messes galore. And I could never line up the panels without them going crooked or curved.
This tutorial will show you how to add the panels BEFORE you close the box. Game changer.
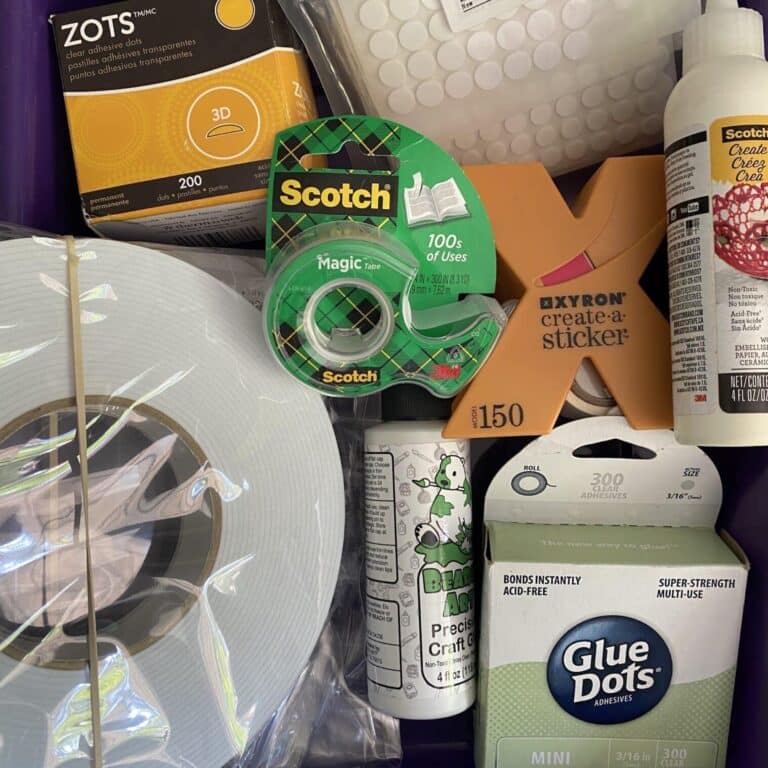
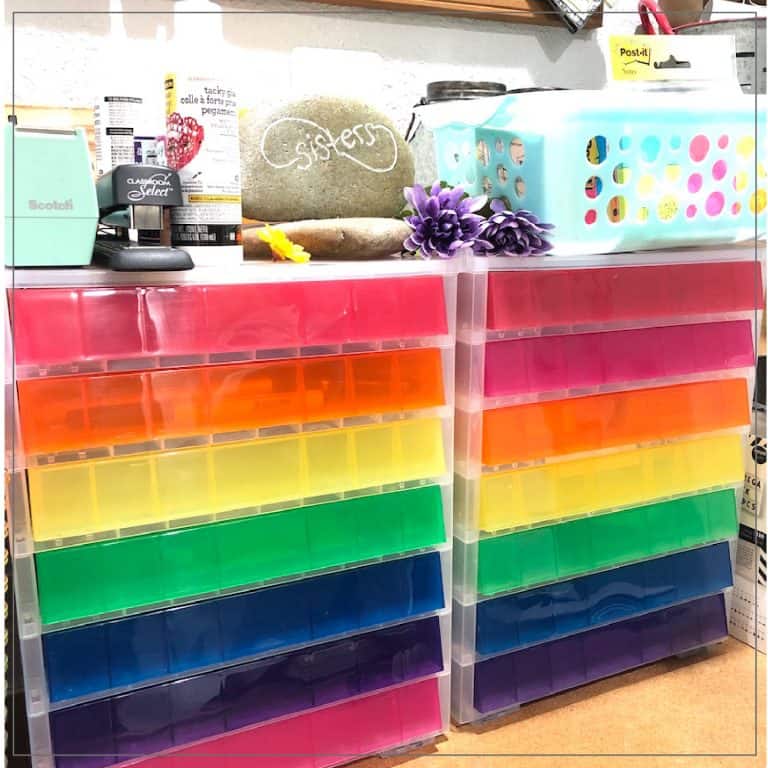
Supplies for Handmade Christmas Box Cards
- Cricut machine
- Blue Cricut cutting mat (light grip)
- Solid Core Cardstock (I use American Crafts)
- PVA Papercraft Glue
- 3D foam adhesive dots
- favorite embellishments (glitter glue, bling stickers, ribbon, etc.)
- Gingerbread SVG file
If you are using a cutting machine to make this holiday box card such as a Cricut Maker, Cricut Explore, Silhouette Cameo, or Brother ScanNCut, be sure to set your score lines (or delete them so they don’t cut off panels). T
Assembling a Handmade Box Card
Once you have all the pieces cut, you are ready to assemble. If you struggle to keep track of all the puzzle pieces of a project, I would suggest cutting one section at a time. The front and back panels, then each panel insert. Personally, I just send it all to the machine, lay it out, and then piece it all together. I like puzzles *wink*.

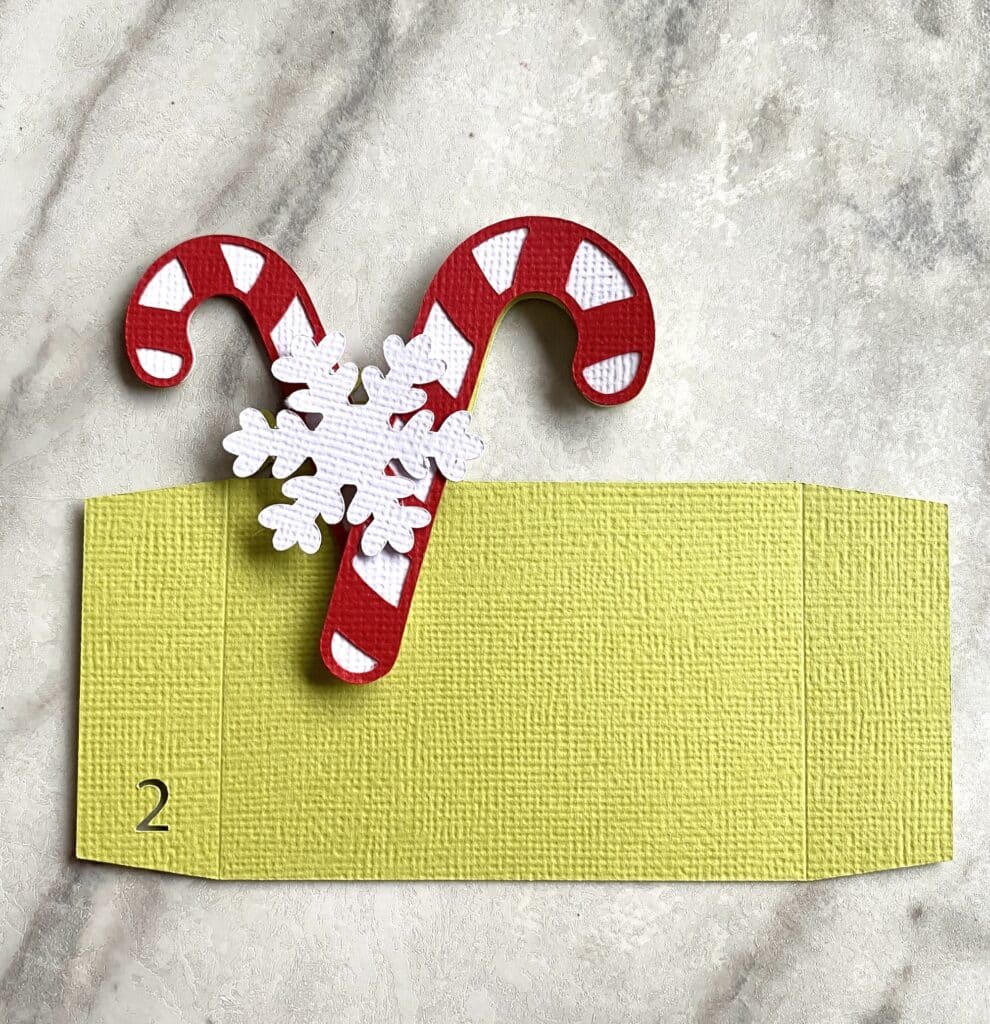
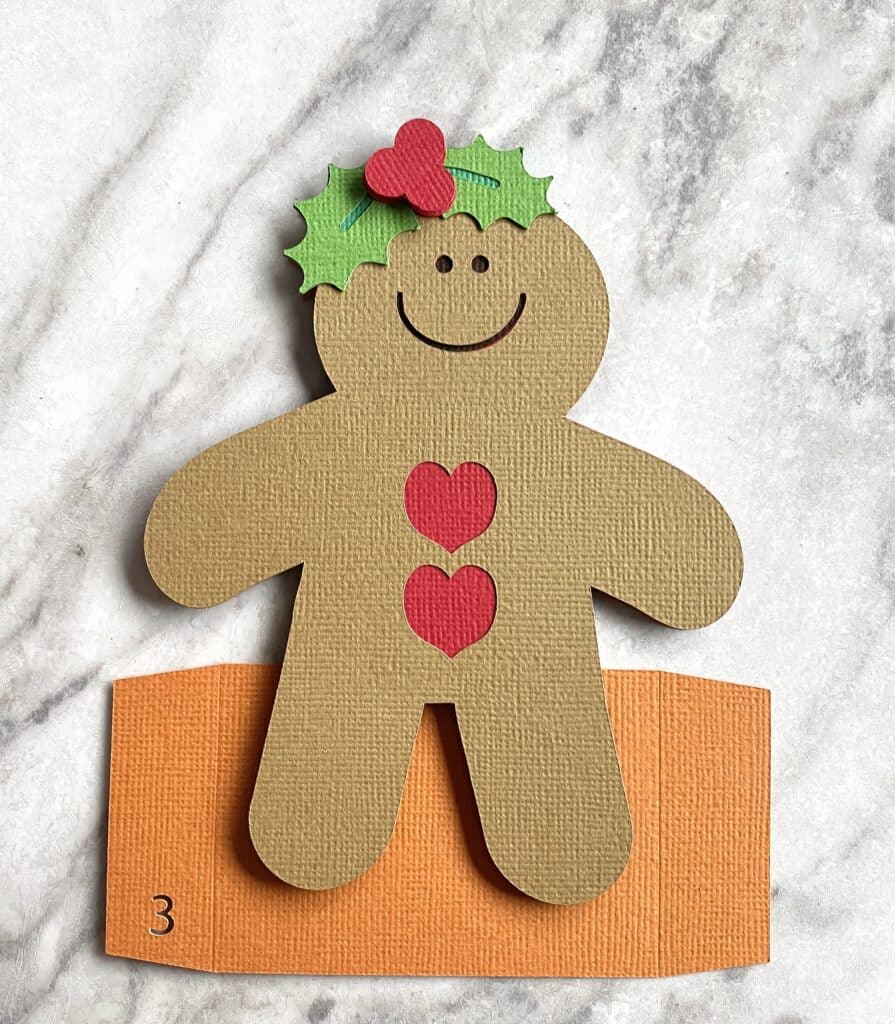
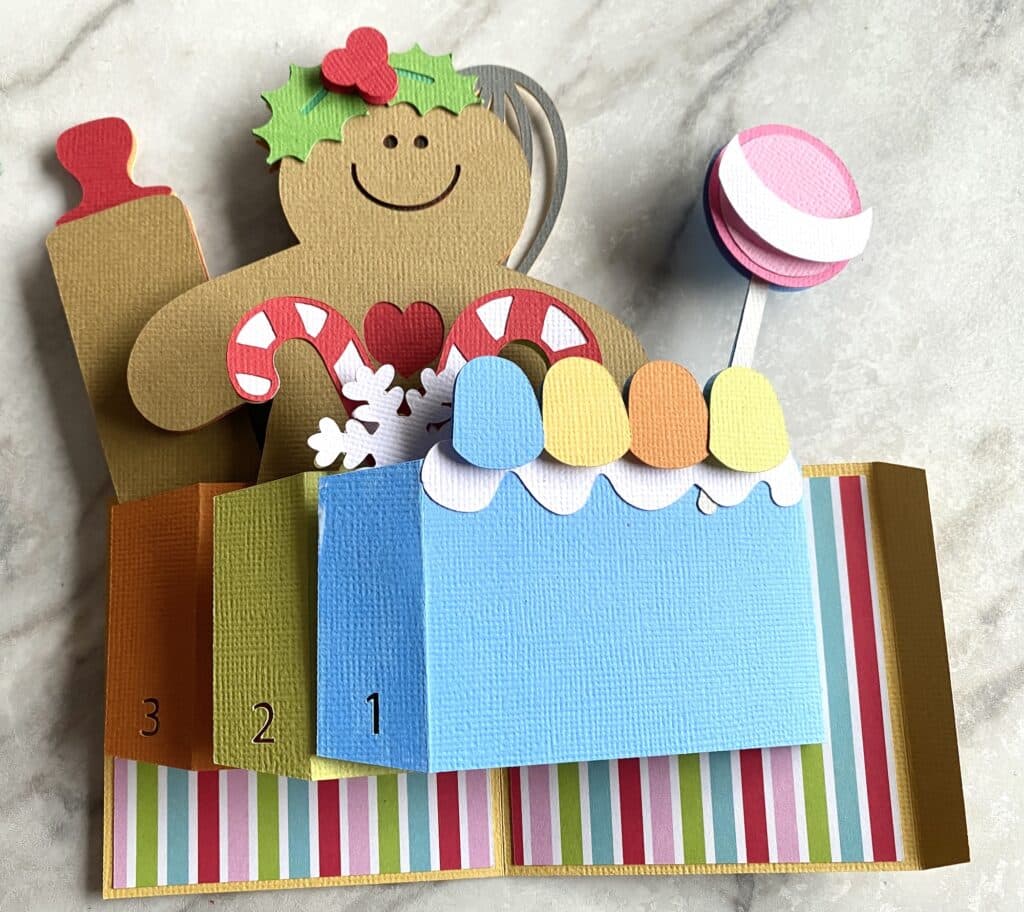
Piece together each of the elements with glue, foam dots, and any embellishments you want to add. Some elements are easy to make off the panel. Alignment doesn’t matter on some (like the candy canes). If you are unsure, piecing them on the panel will help with alignment. It will also help with the puzzle of which piece goes where.
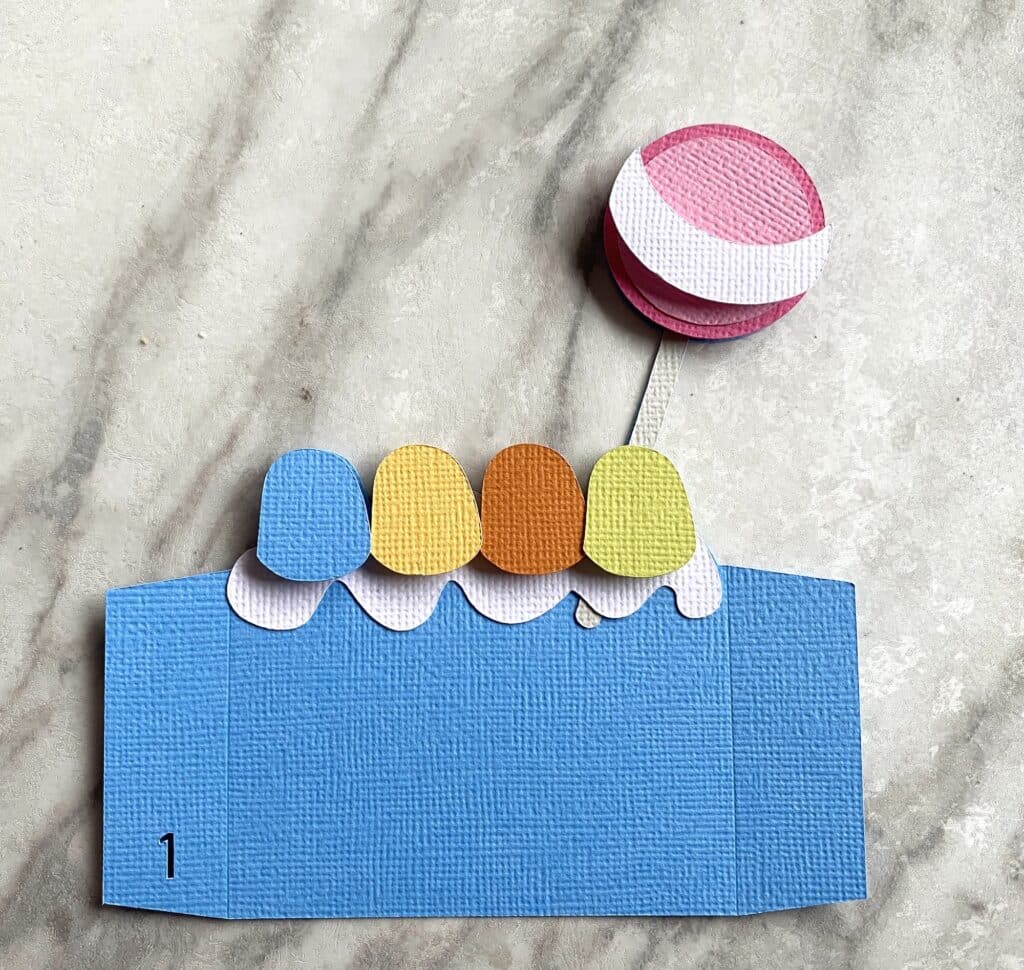
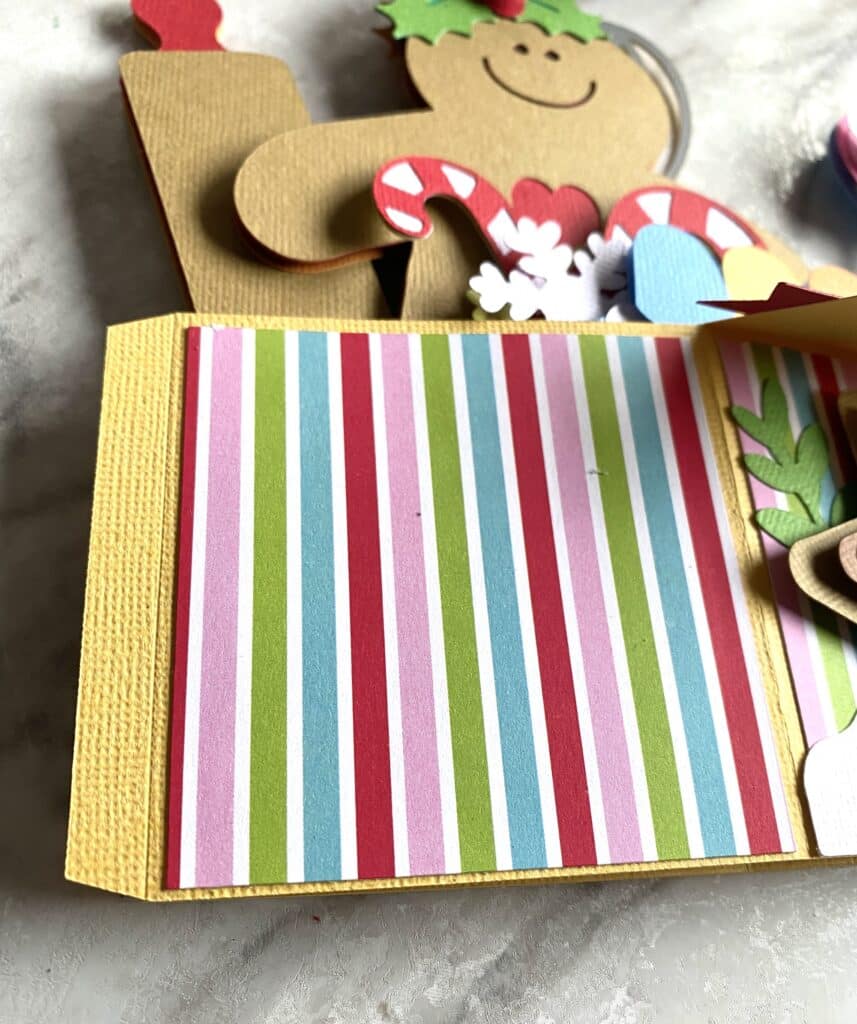
The bright pink squares in the cut file are for your pattern paper. Choose a paper that you have in your stash or get a fun new set of Christmas papers. This set is from Doodlebug Designs.
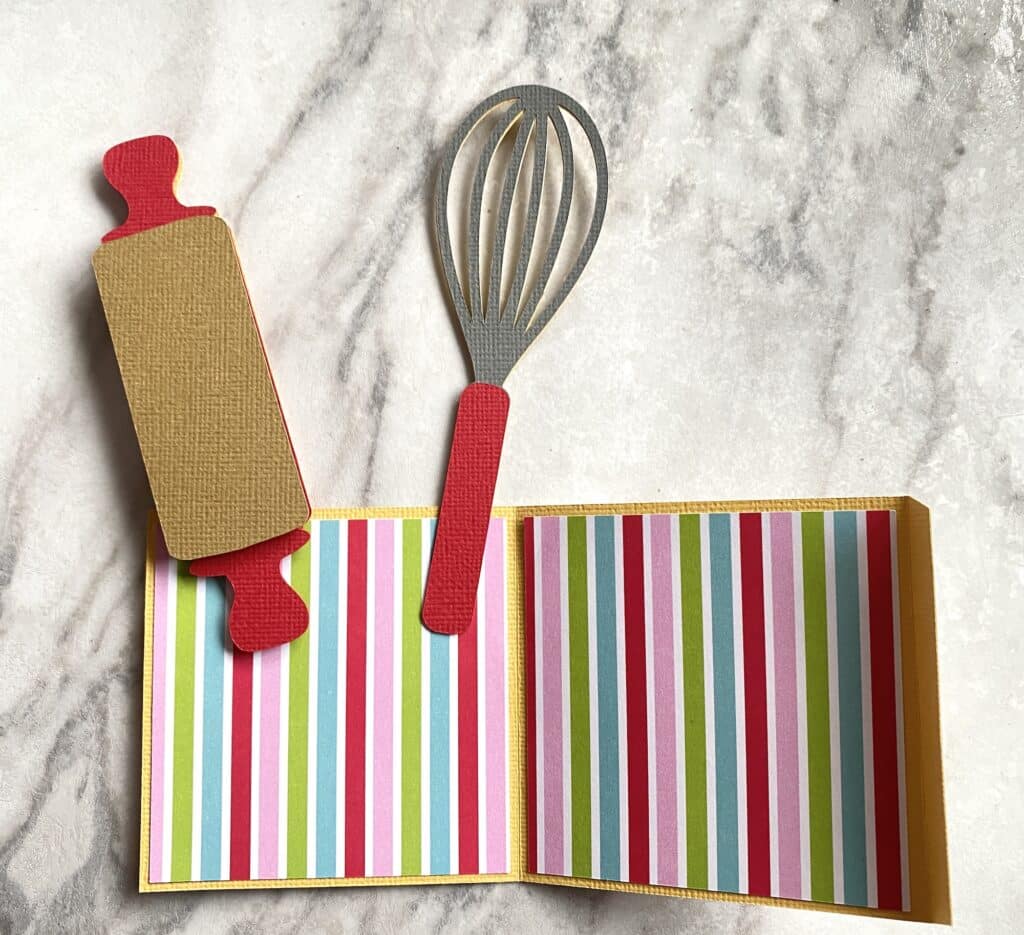
Once you have all the elements on your panel inserts and the front and back panels, you are ready to put the card together. The front panel has a flap. The back panel will have elements or be just a single box line.
The back panel of this card is the rolling pin and whisk. I messed up and put my pattern paper on the inside. Whoops. I just cut two more panels and added them to the outside.
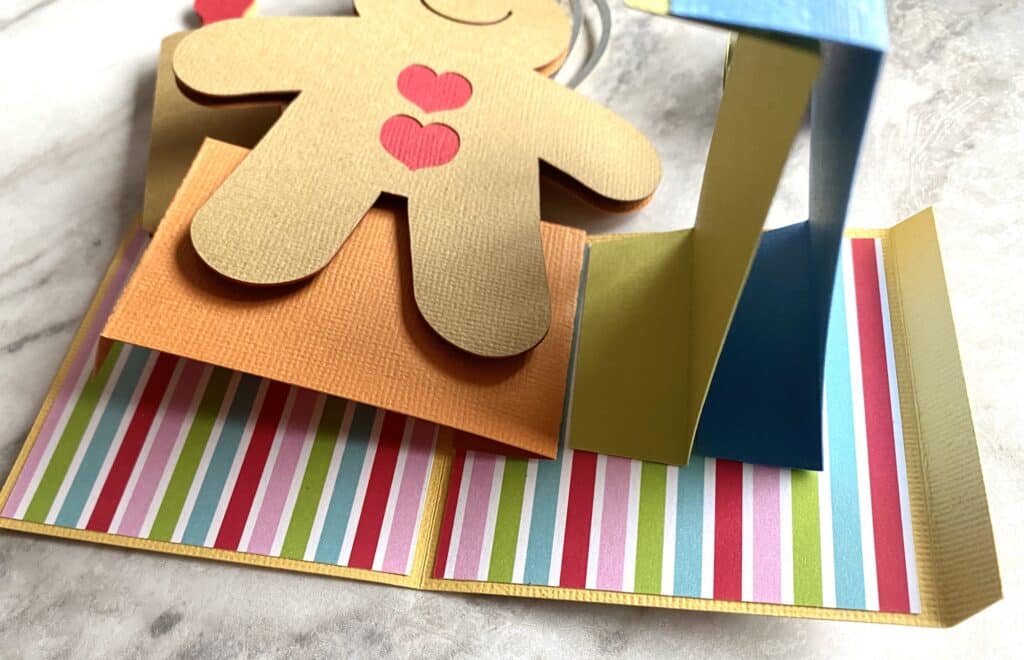
Fold your flaps and get ready to glue your 3 panel inserts inside the gingerbread card.
Placing Panels in a Box Card
When you cut the file, you will notice an F, B, 1, 2, 3 cut into each panel.
F = front panel
B = back panel
Then each panel goes in order. 3 will be closest to the back of the card. Then stack in numerical order toward the front.
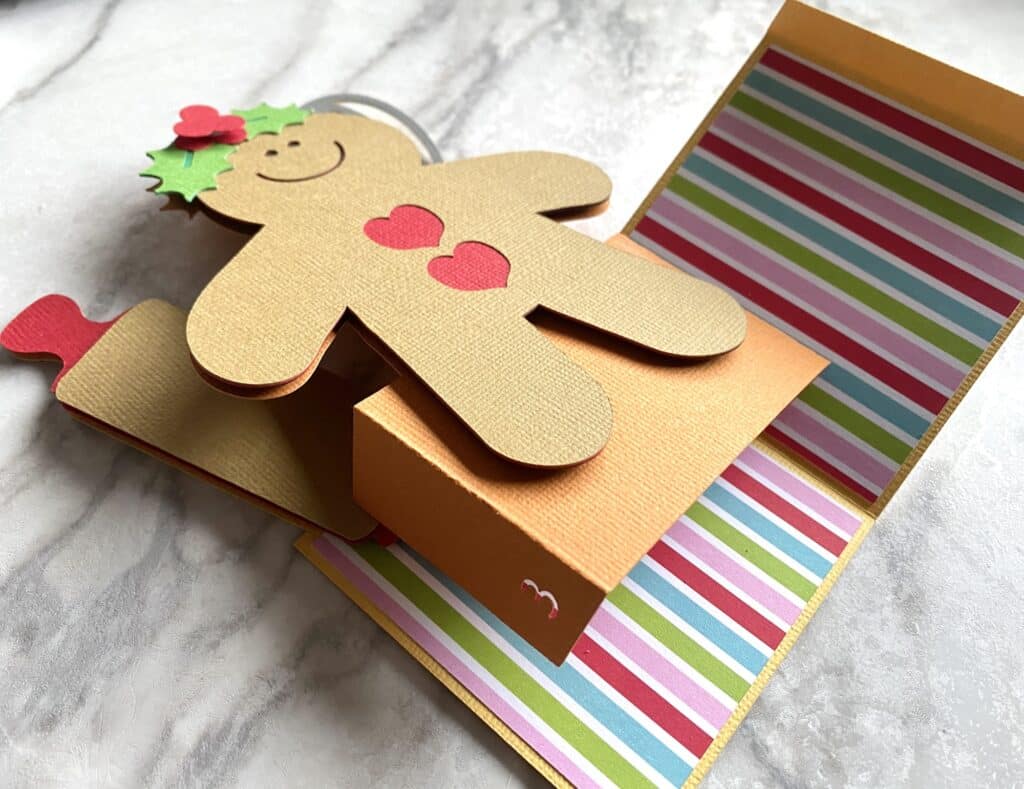
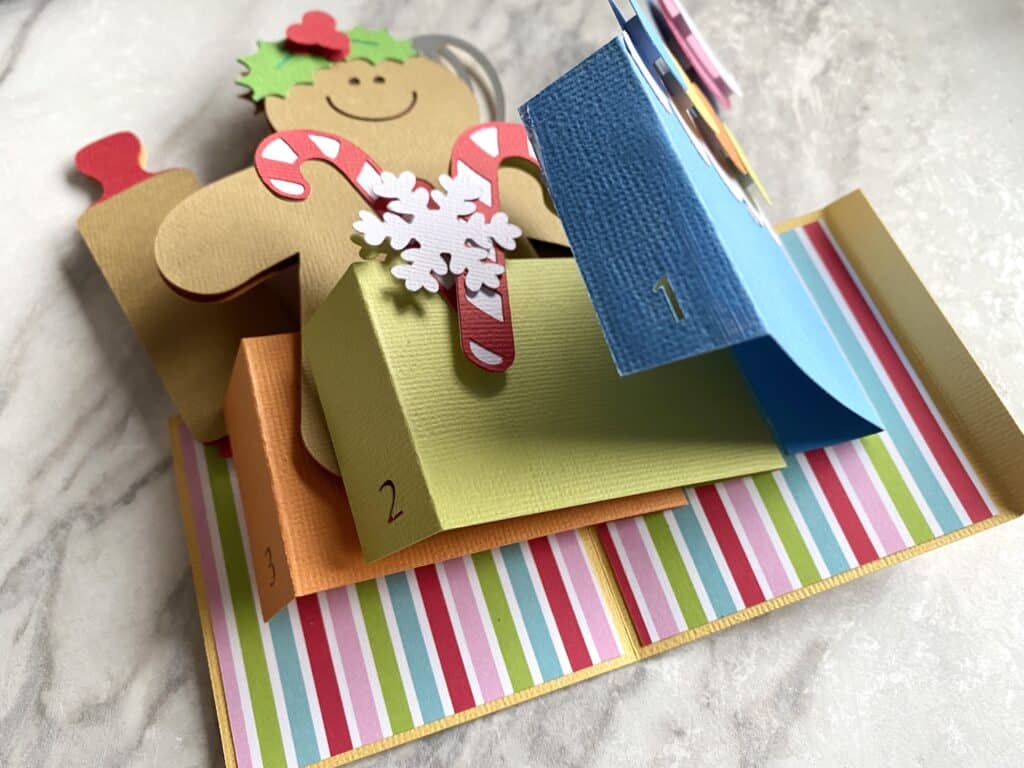
Place each panel flush with the top of the back side panel of the box. Start with panel number 3 and line it up parallel to the back crease on the box (you will be gluing to the inside of the right-hand side of the box).
Each panel will line up with the top of the right side and the panel behind it. Leave just a little space for movement of each panel when you pop open the card or squish it flat.
Once all 3 panels are glued to the right-hand inside part of the box, you will be able to push them flat and they will line up in descending order (3, 2, 1).
Add glue or adhesive to each of those panel tabs. All at the same time.
Line up the front panel with the top edge of each of the panel inserts, the bottom edge of the back panel, and the crease line of your tab with the outer left edge. Press to stick your adhesive. Let it sit for a second or two. Make sure your glue is holding.
Now you can add glue to the front and back tabs to complete the box.
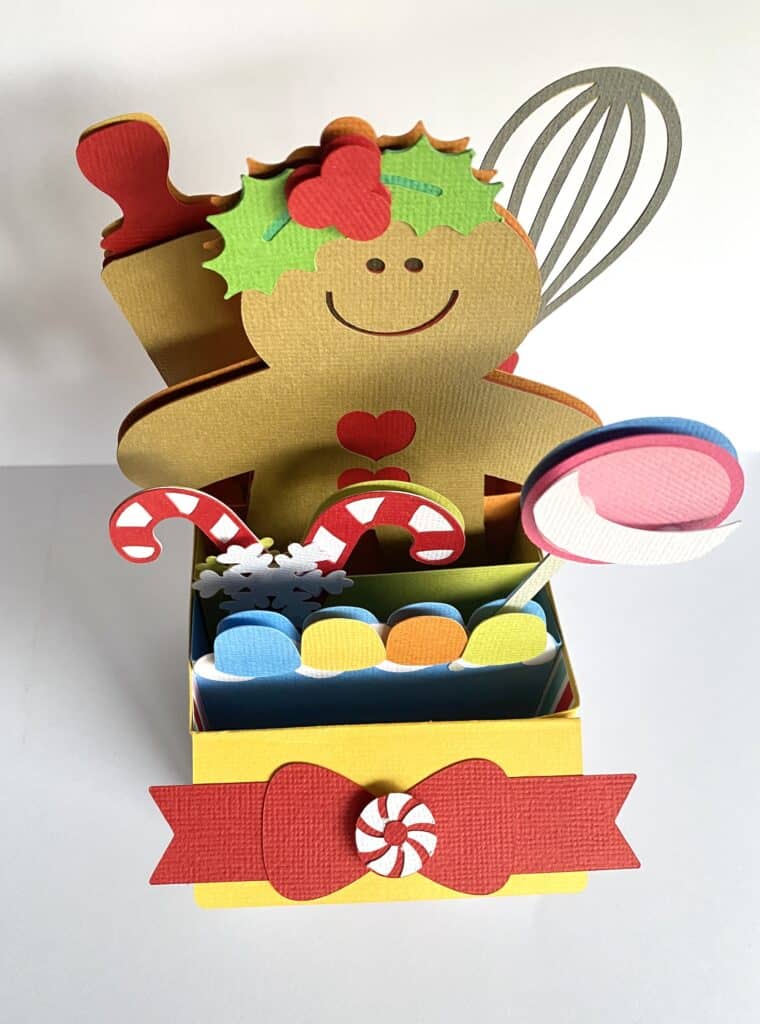

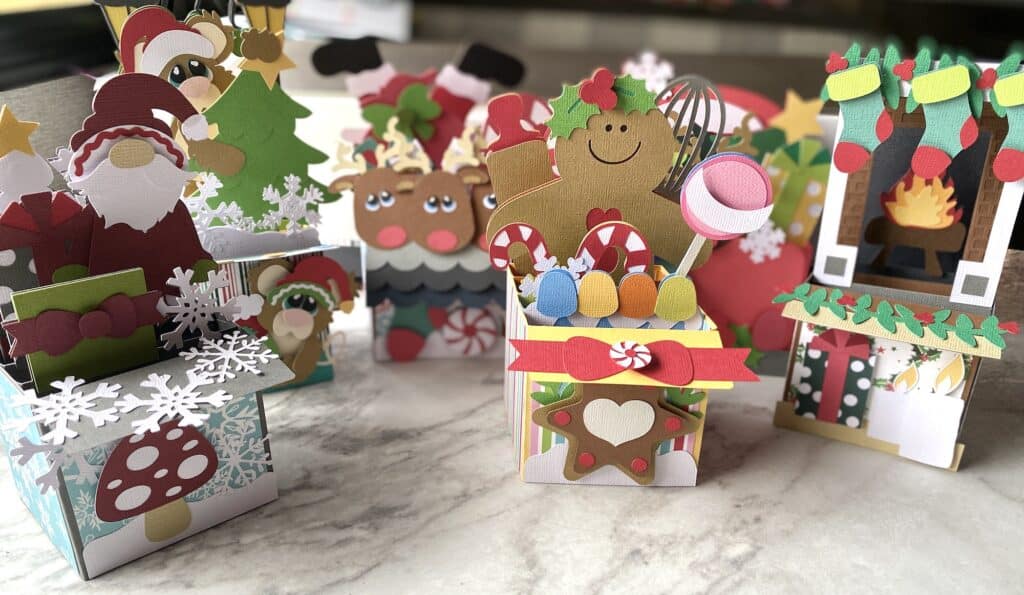
There is nothing quite like a homemade Christmas card. These box cards will bring lots of ooohhhss and awwwwss with all the fun colors, dimensions, and cute characters.
Want a whole bundle of Christmas crafts to create for the Holiday season? Check out the MEGA bundle of Christmas Holiday Paper Crafts.