7 Easy Steps for Design Space Cricut Scrapbooking Layouts
We may earn a small commission for purchases made through affiliate links in this post. For more information go to our Privacy Policy.
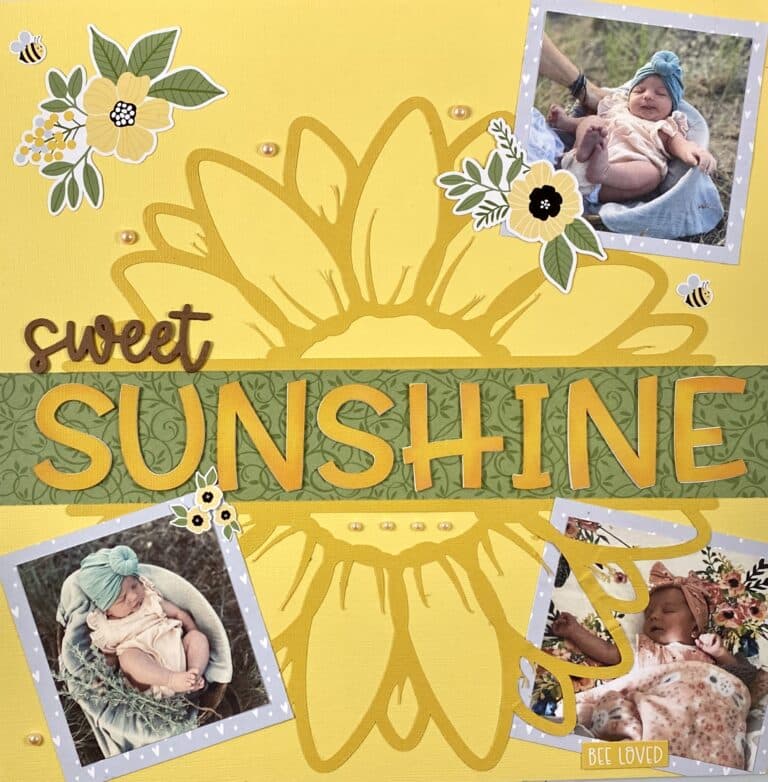
Are you an avid scrapbooker who loves to use creativity to record significant milestones and other memorable events? Your Cricut machine can save you time and money and help you create personalized elements for your scrapbook page layouts. Learn all about Cricut scrapbooking below!
Today I’m combining two of my great loves: Cricut and scrapbooking.
Oh, who am I kidding? I love many creative endeavors! Planners were one of my first loves, and hand lettering and calligraphy helped me develop my bullet journaling skills. Then, somewhere along the line came my Cricut machine, and I still can’t stop using it.
Now it’s time to dive into scrapbooking.

Maybe you remember a time, say, about 15 years ago, when scrapbooking seemed to be the “latest craze.” Well, I’m here to tell you it hasn’t gone anywhere, and it’s just as practical (and fun) as it was at the peak of its popularity!
The Benefits Of Scrapbooking
If you’re a longtime scrapbooker, you know all about its benefits. However, if you are an avid Cricut machine enthusiast, you may want to extend your skills into a new hobby. A beneficial pastime for many reasons, scrapbooking:
- is relaxing and helps reduce stress.
- produces a sense of accomplishment.
- increases self-esteem.
- promotes memory improvement.
- is meditative.
- is an outlet for expressing feelings.
- evokes feelings of happiness.
The downsides of scrapbooking include being time-consuming and getting pretty expensive if you purchase a lot of decorative embellishments.
I would say that the benefits far outweigh the drawbacks. However, if they are holding you back from trying it yourself, I have a way to make them less of an issue. Just use your Cricut for scrapbooking!
How do you use a Cricut for scrapbooking?
It’s very straightforward, and your Cricut will help you cut time, save money, and personalize your designs even more than you can do with store-bought items. Your machine can also help you create better layouts. That’s what I call a win-win!
Ready to learn how? Here’s how to begin scrapbooking with a Cricut machine.
The Best Cricut Scrapbooking Tool
When choosing a Cricut machine for scrapbooking, consider factors such as the materials you plan to work with, the complexity of your projects, and your budget. If you are only planning to use it for titles and embellishments, then the Cricut Joy would be your best option. elements that are larger than 4.25 inches will need to be cut on a larger machine. Consider an Explore or Maker as the best Cricut for scrapbooking.
- Cricut Explore Air 2: Known for its speed and precision, the Explore Air 2 is a versatile machine that’s great for scrapbooking. It can cut a wide range of materials and has wireless capabilities for convenient use.
- Cricut Maker: This machine is considered Cricut’s most advanced model. It can cut even more materials than the Explore Air 2, including fabric and thicker materials, making it an excellent choice for intricate scrapbooking projects.
- Cricut Joy: The Joy is a compact and portable option, ideal for smaller scrapbooking projects. It’s designed for quick and easy cuts, making it great for simple and efficient crafting.
- Cricut Expression 2: While an older model, the Expression 2 was popular for its larger cutting size and compatibility with a wide range of cartridges, which can be beneficial for various scrapbooking designs.
Read this post for more about Cricut machines for scrapbooking and crafting.
Materials Needed For Cricut Scrapbooking
Like hand lettering, making scrapbook pages is all about creating layers. And the more layers you have, the more detailed your design will look. But that doesn’t mean that you need to buy more supplies!
Scrapbooking with a Cricut significantly reduces your need to buy and store embellishments since you’ll be creating them yourself. As a result, you only need to keep these minimal supplies on hand.
Cricut Machine
Here’s how to find the best Cricut model for your projects. Also, be sure to check out my recommendations for the best accessories.
Cardstock Paper
I have found that medium-weight cardstock works best with most Cricut machines. Additionally, cardstock with colored cores cuts cleanly and doesn’t fray as easily as alternatives. Here are some cardstock options that I always recommend when people ask.
- Cardstock Starter Pack – This pack offers an assortment of basic colors, and the cardstock pages are the perfect weight for most papercrafts.
- Seasons Collection – These solid-core sheets offer many popular colors.
- Stardream Metallics Sheets – If you’re looking for a metallic shimmer finish, the Stardream is your go-to line. Plus, the core is also colored, which is challenging to find in metallic paper.
Glue/Adhesive
I recommend only using acid-free adhesives when scrapbooking to prevent your photos and other items from turning yellow. You can choose between wet glues (which are stronger and last longer) or dry glues (which are easier to reposition and easier to remove), depending on what you need for your project.
These are my favorite adhesives for scrapbooking with Cricut:
- Tombow MONO Aqua Liquid Glue – This clear glue has a permanent hold and is my favorite for adhering die-cut embellishments to my scrapbook pages. This glue “pen” has two ends: a broad tip and a fine tip for easy and accurate adhesive placement.
- Glue Dots – Glue dots can come in removable and permanent varieties, and this set includes both. I love using them because they’re mess-free and have no drying time.
How To Make Scrapbook Pages With Cricut Design Space
I will outline the basic process you’ll use to create scrapbook pages with Cricut Design Space. Then I’ll give you some additional resources that you can use to learn more details and techniques so you can begin your first scrapbooking project with your Cricut machine.
Scrapbooking with a Cricut cutting machine is easier than it may seem at first glance. You’ll need to use Cricut Design Space to design your layout or page elements. Again, think of your design in layers and use these basic steps for any type of scrapbook page.
Step 1: Choose Your Page Size (12 x 12 or 8.5 x 11)
Before you can do anything else, you need to create your base layer, which will be your page size in Cricut Design Space. This layer will act as your outline and ensure you stay within the page sizing limits, and help you envision the composition of your layout.
Use the shapes tool to make a square the size of your scrapbook page (commonly, it’s 12”x12”). If you plan to make a 2-page layout, create a second square that sits side-by-side with your first square.
You will hide this layer before you cut your design.
Creating custom albums is also possible with your Cricut and Design Space. Just set your page size to equal your album size.
Step 2: Create Fast and Easy Photo Mats
Using the shapes tool again, create boxes that correspond to the shape and size of your photos. I recommend changing the color to match the matting of your images to help you visualize all the elements appropriately as you layer them into your design.
Step 3: Create Layers, Embellishments and Borders
My favorite part about scrapbooking with Cricut is how fast and easy it makes cutting out various shapes and banners that you can use to accessorize your scrapbook page.
For this step, you’ll be creating banners, circles, tags, shapes with decorative edging (to use as backgrounds), labels, and more that you want to add to your scrapbook layout. Think of this part of the process as creating decorative elements and other embellishments that you may include in your layout.
Again, I recommend changing the color of each shape to match the paper you want to use for that shape so you can envision the design as it comes together.
Step 4: Add A Title
You can choose many different ways to create a title. For example, you may want to upload an image or premade SVG, use an image from Design Space, or use the drawing or text feature to create an image.
Step 5: Determine Paper Type (pattern papers or cardstock)
Now it’s time for one of my favorite parts! Once you have completed your work creating the elements you want to use in Design Space, it’s time to choose your paper. This is where my design goes from the “concept” stage to the point where I can really envision it coming together.
Step 6: Using The Cricut Machine To Cut Out Your Scrapbook Page Elements
Follow the directions within the Design Space software to begin cutting out your shapes. Don’t forget to hide the base layer (the first shape you made to show you your page outline) first if you aren’t cutting it out as part of your page layout.
Step 7: Putting Your Scrapbook Page Together
Start with your base (or bottom) layer and build it “from the ground up,” adding your middle layer and then your top layer. If you’re unsure of what order to glue your pieces on, I recommend doing it in the order you created them within Design Space.
Tips For Scrapbooking With Cricut
Listed below are a few tips and tricks I have learned through experience that may help you as you begin making your first scrapbook with a Cricut machine.
- Masking tape or a lint roller is handy for rolling up little pieces.
- A blue mat should work well for cutting most cardstock. It has just the right amount of grippiness while still being easy to clean up.
- If you use cardstock that doesn’t have a colored core, I recommend using a standard green grip mat. That type of paper tends to have a textured surface, so you need more grip to hold it in place. Use tweezers to pull off the scraps when you finish cutting.
- I find it easier and more efficient to create the shapes in Design Space before I worry about colors and paper patterns. When I tried to do it the other way around, I would spend my time playing around with colors and patterns instead of cutting out my designs and making my pages!
Helpful Cricut Scrapbooking Resources To Check Out
Video tutorials are a great way to really understand the process, so here are some of my favorites to get you started scrapbooking with your Cricut machine.
- Crafty Concepts With Erin has a terrific video tutorial that shows how she puts her page layout together.
- Here’s a video tutorial from Crafting With Wine that takes you from the beginning through designing your scrapbook page layout. Check out the color sync layers!
- I love this video tutorial from Jayma Malme because it shows how layers work when putting together a scrapbooking with Cricut page layout. She makes good use of negative cuts that she can take and use in other projects (or layer into the current project if they fit).
- Debbie O’Neal has a great introductory tutorial that takes you through the process at a good pace and includes lots of helpful information.
Cricut Scrapbooking: How To Create Decorative Elements In Cricut
After you understand the fundamental process of putting together scrapbook pages with your Cricut, it’s time to hone in on how to make some of the specific decorative elements you’ll need for your page layout.
In this section, I’m covering embellishments, titles, borders, and page overlays.
How To Create Embellishments In Cricut
Embellishments can come in many different sizes and shapes and have many different layers. Because there is so much creative freedom, I have found that this is the best basic method to make embellishments.
- Decide the types of images you want for your embellishments. If you want simple shapes that sit behind other elements, just use the shapes tool to make them. If you are looking for images, go to step 2.
- Search for Print & Cut images to find specific graphics (key, house, car, animal, etc.) from the Design Space library. If you don’t see the images you want to use, you can combine shapes to create new graphics.
- Change the colors to match your project.
- Turn the image into a Print & Cut file.
- Cut out the images using your Cricut.
Resources To Check Out
Here are a few resources that you may find helpful to show you how to make various embellishments. I find it very beneficial to see the process from start to finish in these video tutorials.
- Check out this video tutorial from Yes, Please Papercrafts as she walks you through the process of creating key-shaped embellishments step-by-step. I love how she made these so they really “pop” off the page!
- Creatively Cel shows how to make pumpkin and flower embellishments in this tutorial.
- I can’t get over how cute the rubber ducky embellishments are from Paper Crafting With Rebecca.
- Wow. This video tutorial from TheScrapZone is impressive because it shows her tips and tricks for making layered embellishments that add eye-catching depth to the page. She also shows how she pulls the entire page layout together, but you have to see those layered embellishments!
How To Use Your Cricut To Make Titles
Page titles are another significant scrapbooking element that your Cricut can cut out for you to make the creation process much easier. If you want to learn more about making titles when scrapbooking with Cricut, check out these videos.
- Check out this series from Yes, Please Papercrafts. This video tutorial is specific to making titles, but she has other equally terrific videos on different aspects of using a Cricut machine for scrapbooking.
- Richelle Scott uses this video tutorial to show how to make offset titles when scrapbooking with Cricut.
- If you’ve ever wanted to make layered titles, this tutorial from SimplyTitles Scrappy Time is for you!
- The Craft Room Diaries shares a video tutorial that shows how to create your own custom scrapbooking titles by altering and contouring Cricut images.
How To Make Borders For Cricut Scrapbooking
No guide on scrapbooking with Cricut would be complete without offering some inspiration around making borders. You may not want borders on every page in your scrapbook, but adding borders to your page layout design can be just the right touch on some pages.
Your Cricut will make the process so much faster and easier! Here are a couple of resources that will help guide you through making scrapbooking borders with a Cricut machine.
- Miss Carrie’s Creations has a video tutorial that shows how to use Weld and Slice tools within Design Space to make borders for all your scrapbook pages.
- Check out these gorgeous borders (and embellishments) from TheScrappyBookworm1. Note: This video doesn’t show how to make the elements within Design Space. But if you take what you learn from this guide and other videos, you can use it as inspiration.
How To Make Layout Overlays With Your Cricut
An overlay can add depth to your design by revealing sections of a paper layer underneath. If you need some help with making overlays, just use your Cricut. Check out these resources if you want to start bookmarking with Cricut and making borders.
- I came across this video tutorial from Build-A-Book Scrapbooks showing how to use Design Space to create overlays you can use when scrapbooking with Cricut. This tutorial is helpful for learning how to weld items.
- And Melody Lane has a great tutorial that shows how to make a different overlay design.
Creating Mini Albums with Your Cricut
You are not just limited to premade scrapbooks and sizes. There are ways to create shape albums, unique sizes, and design your own album.
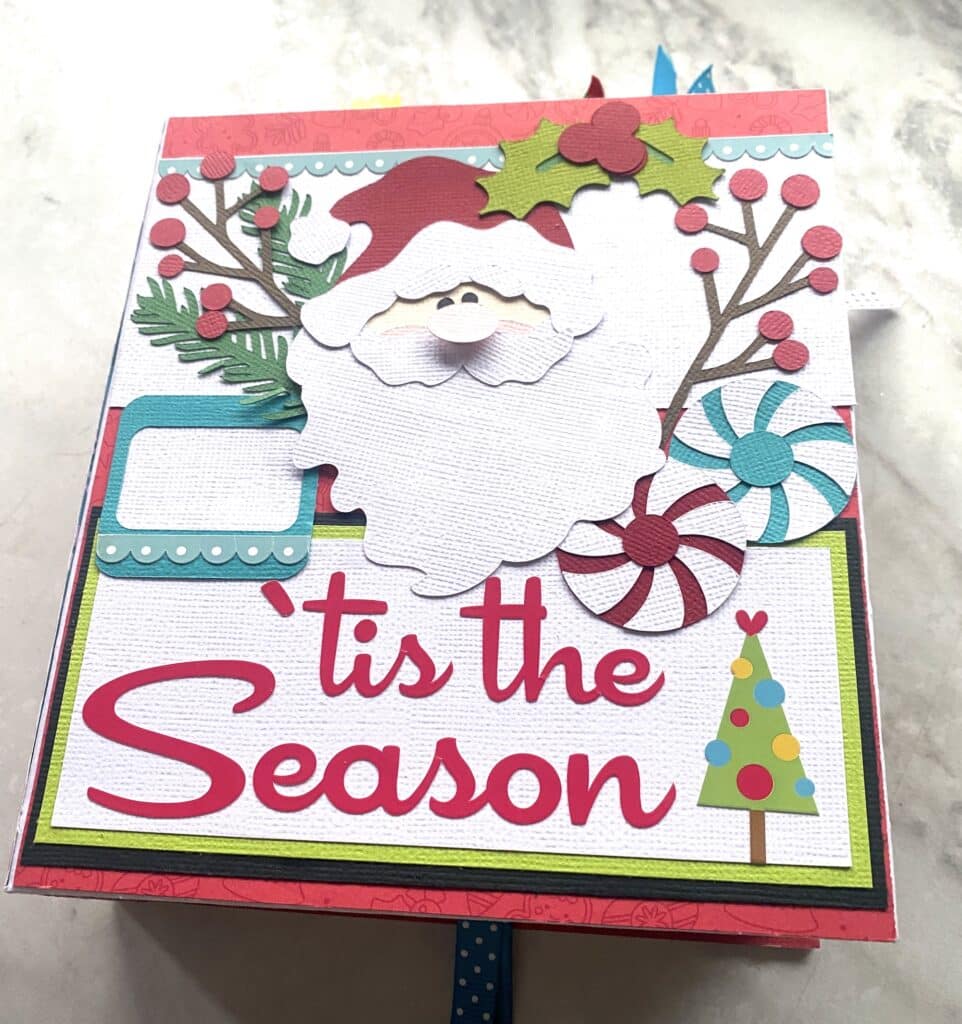
Creating mini albums is probably my favorite way to scrapbook. Each one can be a theme that you showcase an event in. Holiday traditions, grandma’s recipes, a trip to the zoo. Mini-life moments that fill up a beautiful paper-made work of art.
Scrapbooking Cricut
Scrapbooking is a fun activity and a beautiful way to record memories and notable events. You can purchase tons of supplies for scrapbooking at your local craft store or online, but doing that gets expensive and requires storage space until you use the items.
However, it’s an entirely different ballgame if you put your Cricut machine to good use! You can save money, time, and storage. In addition, you can create unique and personalized layouts, embellishments, and titles for the perfect touch that your project needs (that you can’t find anywhere else).