
Gnome Pumpkin Patch Layout Scrapbook Overlay
We may earn a small commission for purchases made through affiliate links in this post. For more information go to our Privacy Policy.
It is time to scrapbook all those fabulous pumpkin patch photos. This quick and easy layout takes less than 30 minutes.
Added bonus: the cute gnome hanging out in the pumpkins.
Cut the overlay file, add some fun pattern papers from your stash, get those photos put on it, and quicker than you can say “pumpkin spice” you will have one more scrapbook layout finished.
Materials Needed for Pumpkin Patch Layout:
- Gnome pumpkin patch SVG scrapbook cut file
- Background paper (12×12 inch cardstock or thicker pattern paper)
- Cricut Machine (or Silhouette, Brother, etc.)
- Adhesive (wet glue or tape runner)
- Foam dots or adhesive foam tape
- Scissors
- Embellishments (optional)
- Photo (4×6 inches)
- Photo mat (slightly larger than the photo)
- Journaling supplies (optional)
- Rub-ons, brads, bling, or ink for distressing (optional)
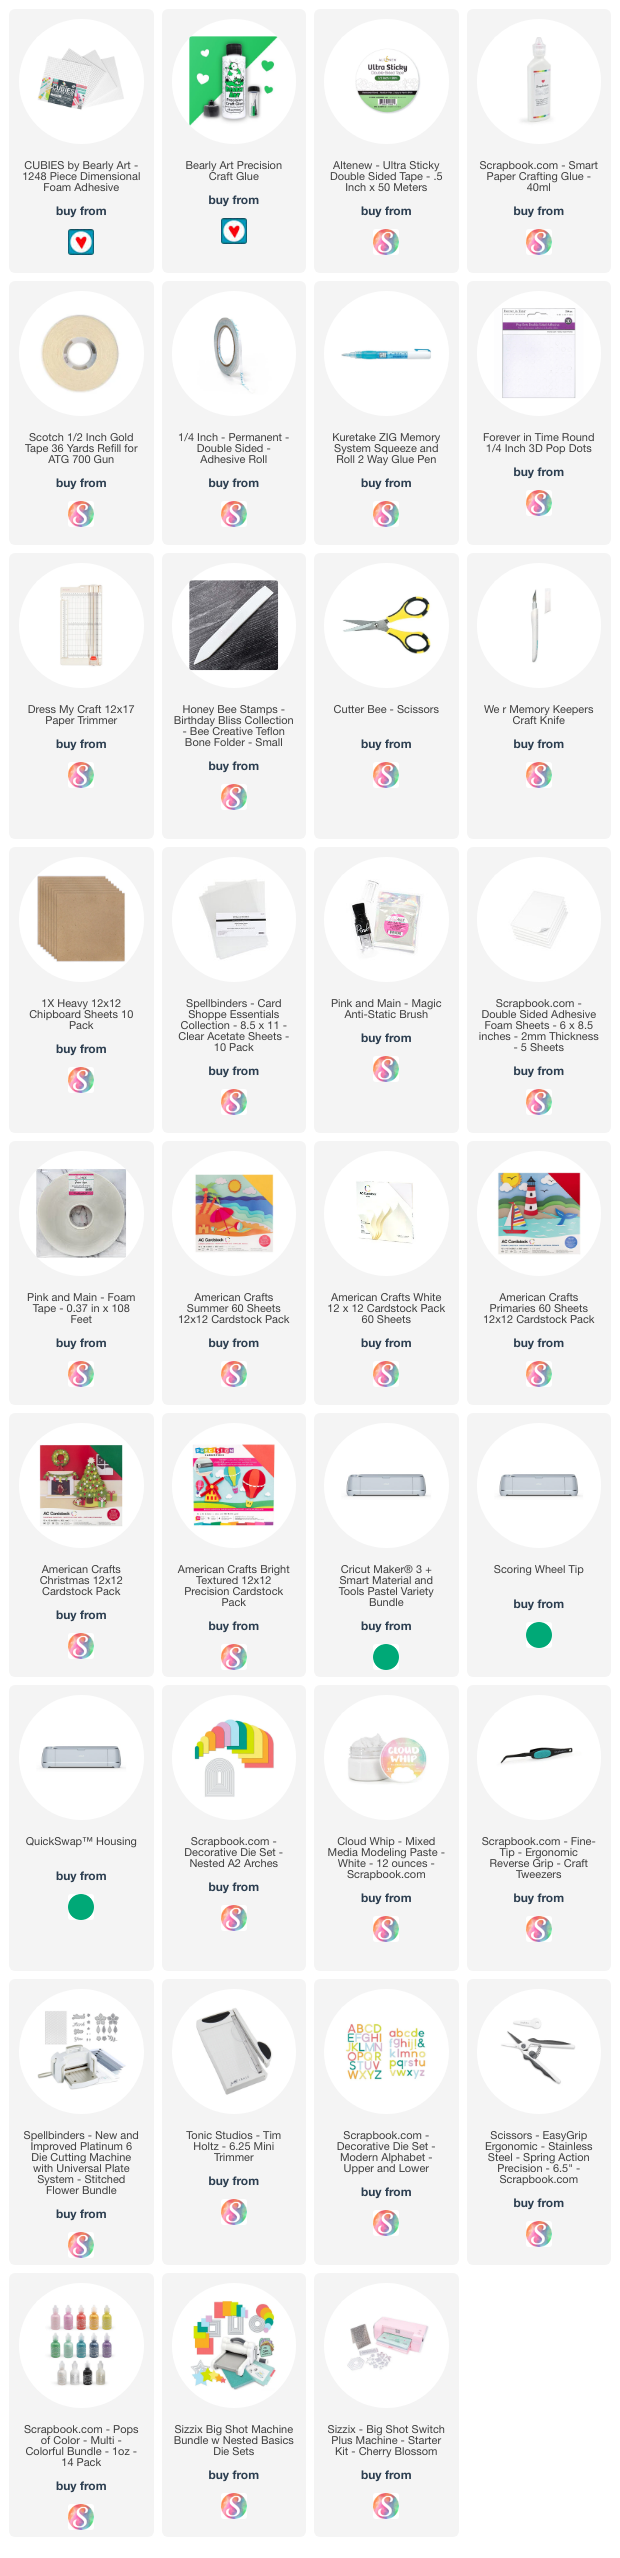
All the general supplies for scrapbooking and cardmaking that I use are listed below. Pattern papers and cardstocks are not specific. Use what you have (unless you were eyeballing that new paper release…).
NOTE: This file is part of the 2023 Halloween Craft Stash Challenge. If you are working on this project after the challenge is complete, you can still participate. The file is sold individually in the shop and it is also included in the Mega Halloween Bundle.
Directions for Gnome Pumpkin Patch Overlay
Step 1: Gather Your Materials Collect all the materials you’ll need for this project, including scrapbooking papers, the gnome pumpkin patch SVG file, adhesive, foam dots, scissors, and any optional embellishments.
Step 2: Prepare the SVG File Upload the gnome pumpkin patch SVG file into your cutting machine’s software. Resize the file if needed to fit your desired project size. (if your cutting software needs a different file format, there are also PNG files included).
Step 3: Cut the Design Cut the gnome pumpkin patch design from the selected scrapbooking papers using your cutting machine. Use scraps of cardstock for the smaller cuts.
Step 4: Arrange and Glue Lay out the cut pieces on your chosen background paper. Arrange the elements to mimic a pumpkin patch scene, placing the pumpkins on a piece of pattern paper or a cardstock “hill”, the gnome behind one of the pumpkins, and other embellishments where they look best.
Step 5: Adding Dimension For added dimension and depth, attach some elements using foam dots or pop-up adhesive. This will create a layered effect and make certain parts of your scene stand out.
Step 6: Personalization and Embellishments Consider adding your personal touch to the project. This could involve using rub-ons to add dates, titles, or captions to the scene. You can also use brads, bling, or other embellishments to enhance the overall look.
Step 7: Ink and Distress (Optional) If you prefer a distressed or shabby chic look, use ink to distress the edges of the paper elements. This technique can give your project a vintage or rustic appearance.
Step 8: Glue Down the Scene Once you’re satisfied with the arrangement and any added details, begin gluing down the elements onto your background paper. Work from the back forward so you don’t accidentally glue down something that needs to overlap another design.
Step 9: Add Journaling (Optional) If you’d like to include journaling, use a tag or strip of paper to write down your memories or thoughts about the project. Attach the journaling element in a suitable location.
Step 10: Final Touches Review your completed scene to ensure that all pieces are securely glued down and that the arrangement looks balanced and pleasing. Add extra elements if you need to.
Don’t forget to share your creation with the rest of us in the Lemony Fizz Paper Crafters Facebook Group.

General Scrapbooking and Cardmaking Supplies that I Use


Love the details of this along with the “simplicity “ I Need! I’m obsessed with Gnomes!
So awesome, thanks for sharing
I love this one and can’t wait to try it!
I love this cute halloween gnome in a pumpkin patch! I already have a card design in mind for it. Thank you so much for putting this event together! I’m looking forward to each day 🙂
I love gnomes and Halloween. Perfect!
So cute…gnome and pumpkins!
Don’t know what happened this morning, but it’s working great now. Thank you! Love it. Can’t wait to try it.
thank you for the gnome page, your tutorial was very interesting, can’t wait to see what’s next.
Just adorable. Can’t wait to make this one🥰
This is so cute and I can’t wait to make this as I love Gnomes!
This is such a cute design!
I had a really hard time hearing this on my chromebook I had youtube and my chromebook volume at the max and still had to pick it up to be able to hear it
love gnomes!!
Absolutely adorable! I love this page! Simple, yet not so. I love gnomes too!
GREAT JOB! so excited to see more at this summit!