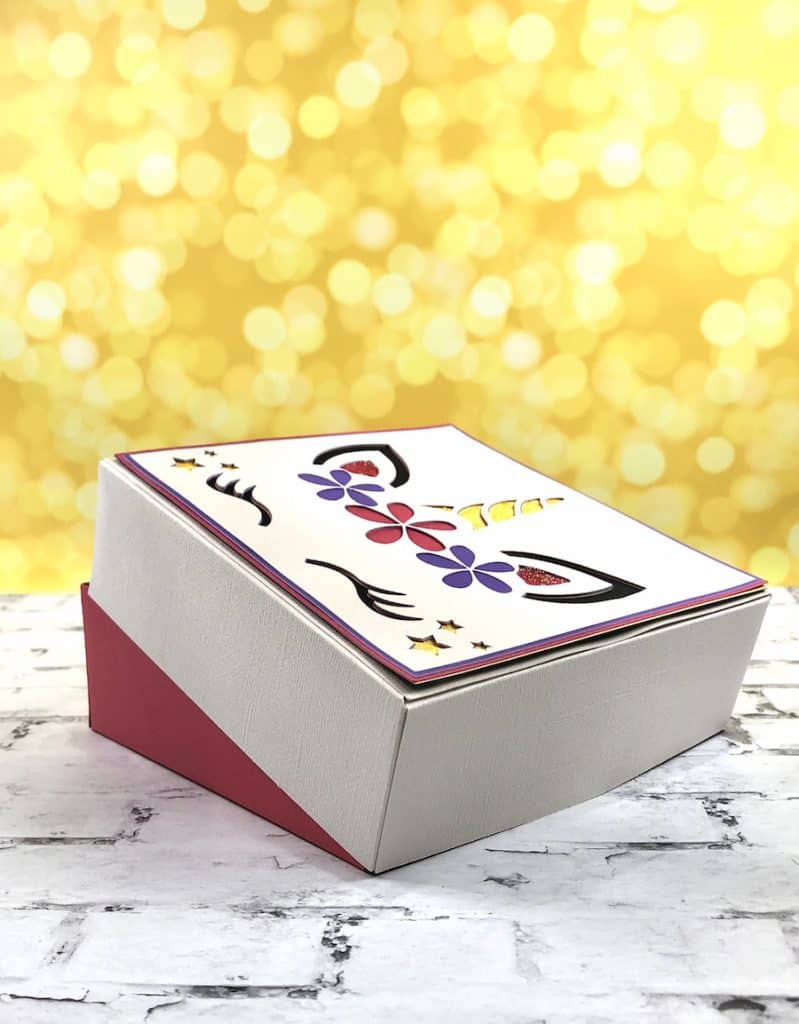
DIY a Colorful Unicorn Paper Box
We may earn a small commission for purchases made through affiliate links in this post. For more information go to our Privacy Policy.
Do you know a little girl in your life who would love to own a paper box decorated with a unicorn? Most little girls are nuts for unicorns right now (and a lot of big girls too!).
If we could decorate the whole world with unicorns, glitter, and bright colors there would be a LOAD of happy people.
This is a fun box to make using your Cricut machine. If you need help getting started, check out this post.
Make a Unicorn Decoration
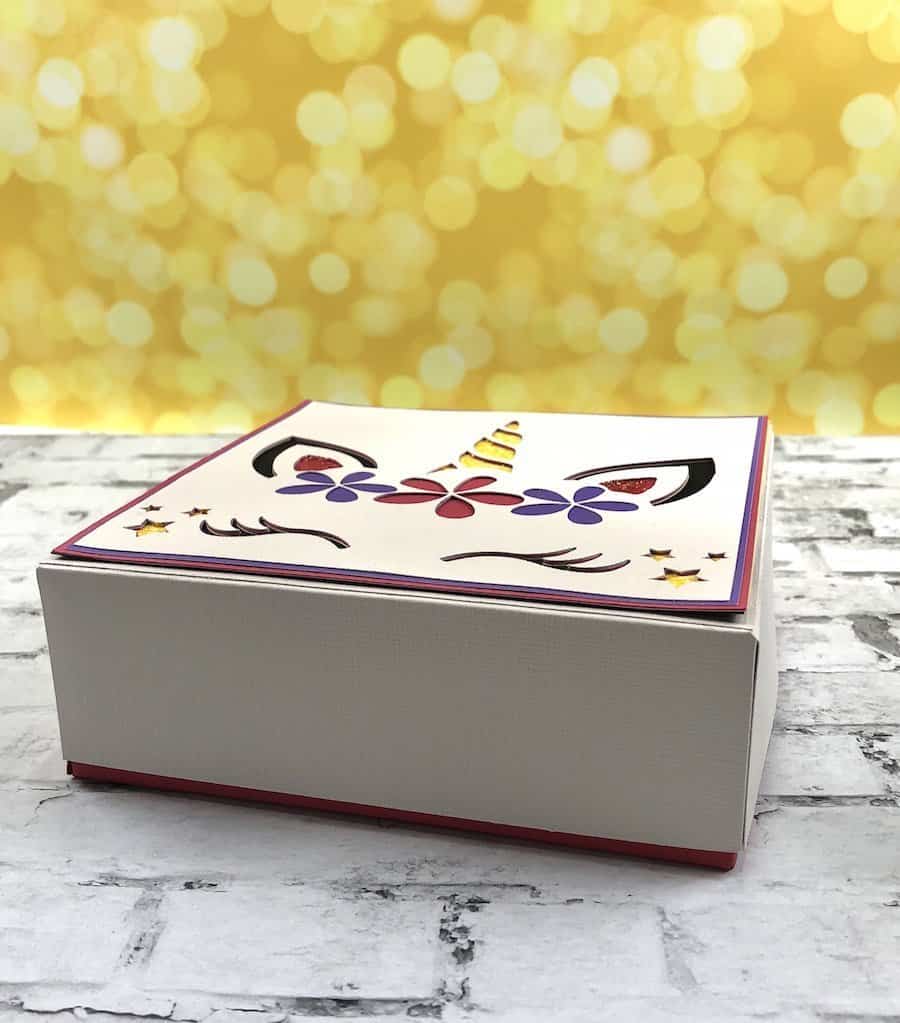
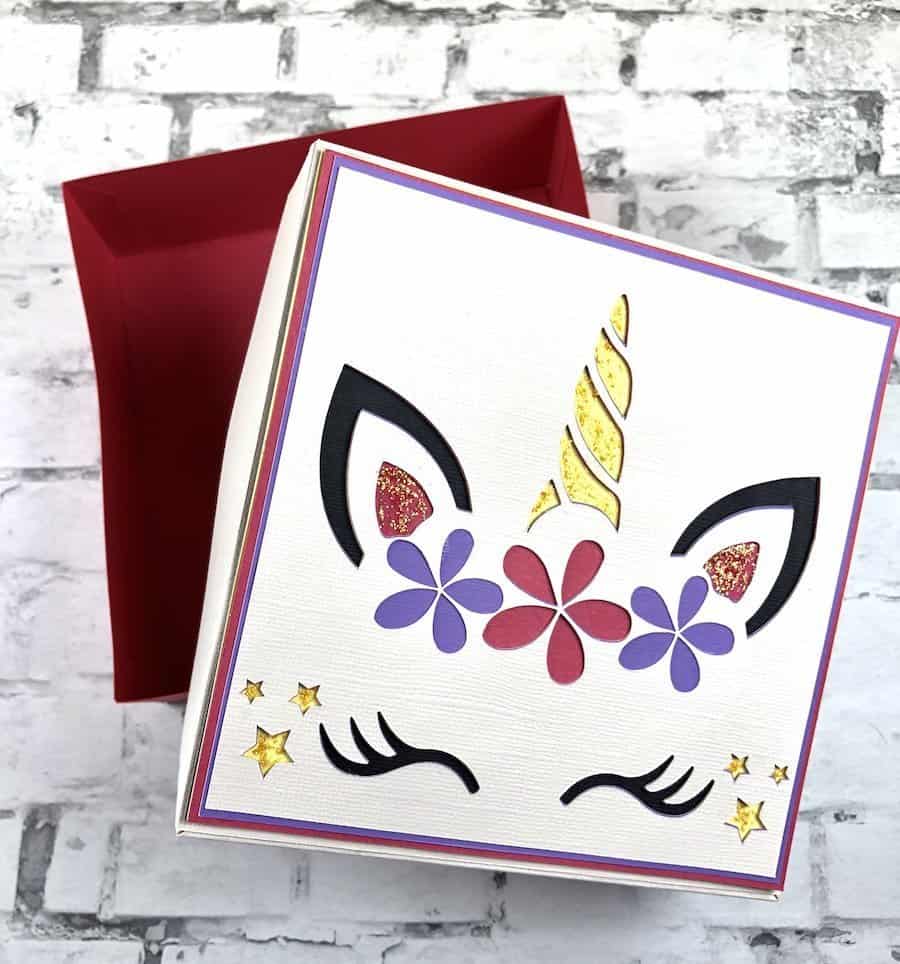
This unicorn paper box is very quick to put together and you can make it with cardstock that you have piled up in your paper stash.
You have one of those right?
If not…it’s time to jump on board. Who doesn’t love a rainbow of papers to dig through? You can turn those papers into unicorns. That’s magic right there!

Supplies:
3 pieces of white cardstock
2 pieces of pink cardstock
1 piece of black cardstock
1 piece of purple cardstock
1 piece of yellow cardstock
paper glue (I used this glue)
glitter glue (optional)
You can vary the colors of the box to fit your likes and according to what you have in the paper pile. The colors listed are what I used to make my unicorn paper box. They are just guidelines.
Once you have all the papers ready to go and the SVG file downloaded you are ready to get started.
The box goes together really easily.
Pro Tip: The files are named according to their part (ie: box bottom, box top, lid insert, etc.) Change the colors of the file when you upload it to Design Space to match the color of cardstock you are using. That way you can keep your design organized.
Once you have the images uploaded to Design Space or the Silhouette Studio, make sure you change the score lines to “score” instead of cut.
You don’t want to lose those tabs! You need them for gluing.
Once all your cardstock is cut, put your bottom pieces in one pile and your top pieces in another pile.
Fold along the score lines and then glue the “edges” of the box together. Do this by placing the short tab to the right with the long tab along the top.
Glue the next edge onto the flap with all your edges lining up. Keep doing this until all four edges are glued together and then complete the square by gluing the last tab to the end of the first edge. You should have a square now.
A squishy, wobbly, square. But you are about to fix that!
Take the big square that is either going to be the top or bottom of the box (depends on which part you started on).
Glue one edge and make sure it is flush and even along the edge. Now put some glue on the other four edges and flip the box over so you can press along the inside on the flaps to get a good seal with the glue.
There is an inside flap piece that is there to strengthen the box and to cover the flaps so they don’t get caught on whatever you place in the box.
Glue this inside the box lid or box bottom.
Repeat that process for the other half of the box.
Once that is done, set the box aside and you are ready to make the paper unicorn design for the top of the box.
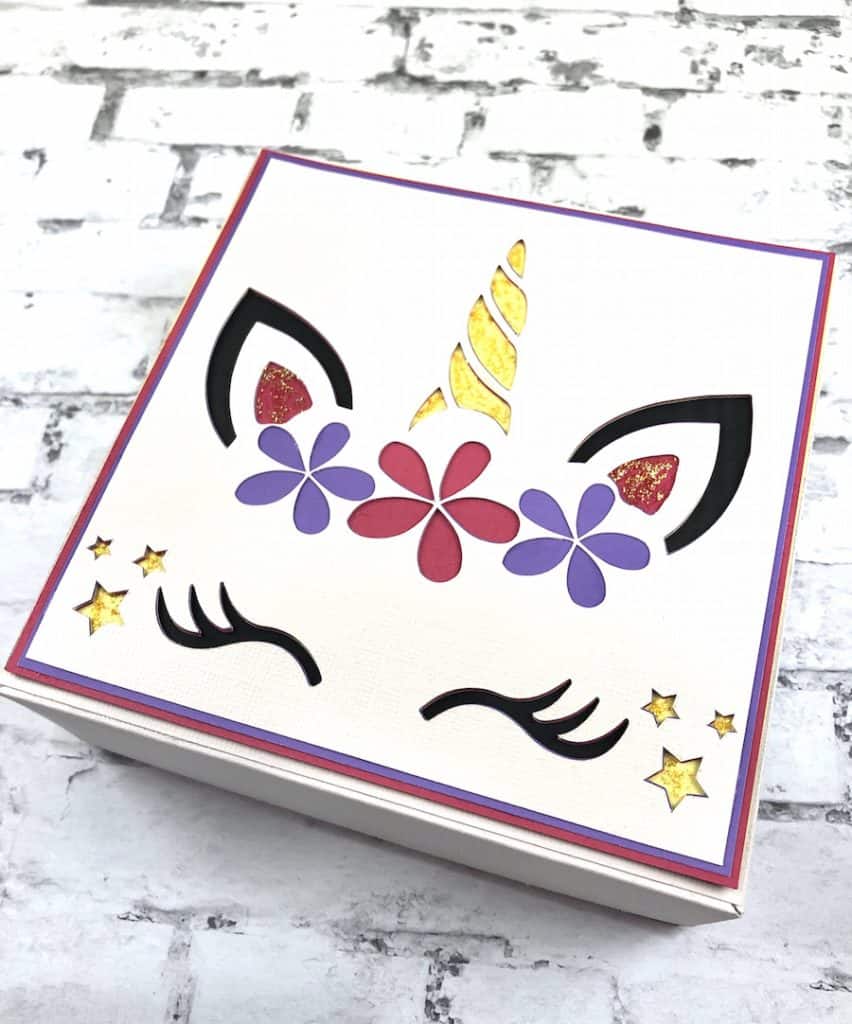
Layering Squares to Make it Sturdy
This part is really just about putting your colors in order and lining things up properly. Determine which piece is the very bottom (the one with no negative space cut out).
Next, find the and layer the 2nd color over the top of that (this should be the piece with just the eyes and outer ears cut out. (This layer is the color of your horn and the stars)
Glue it down and then work your way through the next three layers.
TIP: put glue close to the edges of all the negative spaces (openings or cutouts) so they hold down better and don’t start to pull up. Make sure it isn’t too thick or it will squeeze out into the visible areas
The next layer will be the one with the horn and stars cut out of it. This layer will be the color of the center of the ears and the center flower.
The next two layers are cut as smaller squares so there is a colorful border on the edge of the box lid. The 2nd to the last layer will be the color of your outside flowers.
Finally, you will layer on the top color (I chose white to compliment the color of the paper box lid). Now that you have all the pieces layered together, glue the whole piece to the top of the lid.
Decorate with ribbons, extra flowers, or glitter glue to personalize your unicorn paper box.