
Add Your Own Images and Upload to Design Space
We may earn a small commission for purchases made through affiliate links in this post. For more information go to our Privacy Policy.
After years of crafting, I have a lot of different types of images that I can upload to Design Space. You are probably the same way unless you are just starting your DIY crafting adventure.
Just wait! It won’t be long and you will have a collection of digital images, digital stamps, and other crafty files.
Uploading your own images to Design Space is a great way to get started with your DIY projects and to make them more unique. If you are like me, you struggle to find images that you really adore in Cricut Access. This method will take care of that too!
The idea of having to upload to Design Space may seem a little complicated. It really isn’t.
Cricut has made the process very simple, as I show in the video. If you didn’t have a chance to watch that, you can follow the directions below. It is very quick and easy!
How to Get Your Images into Design Space
The first thing you need to do is open up Design Space. When you are on the home page you will see a screen that prompts you to view your past projects or start a new one.
Start a new project:

The next screen will be your canvas and the area that you change the size of your files, mark them for cutting or scoring, etc. If you need more help with Design Space you can check out my Cricut Guidebook.
In the lower-left is the UPLOAD button. Click on this.
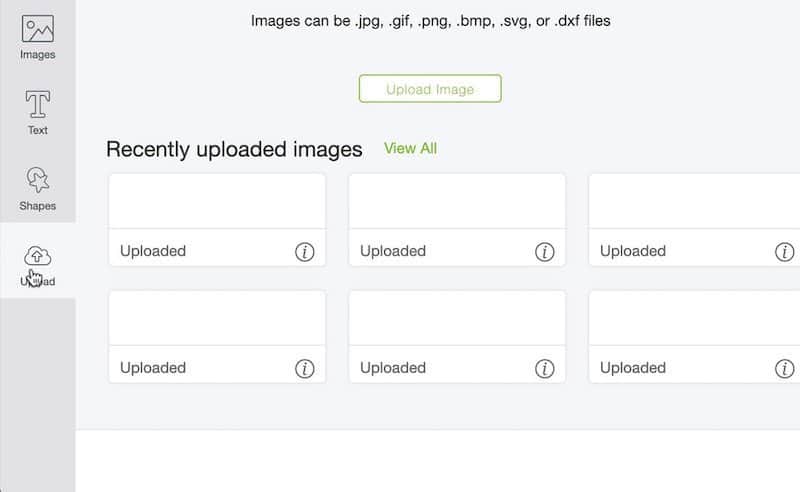
You will see all the images and files that you have uploaded and saved in the past. You also have the option to upload a new image. Click on the gree rectangle that says UPLOAD IMAGE.
Navigate to the folder that has your digital stamp or image. It should be in PNG or JPG format.
Now that you have uploaded the image, you need to tell the Design Space software how detailed you want it to be when it transfers the image to your Print and Cut files.
Read the descriptions of each option. Usually, you will be able to choose SIMPLE or MODERATE because you are uploading a simple black and white line drawing.
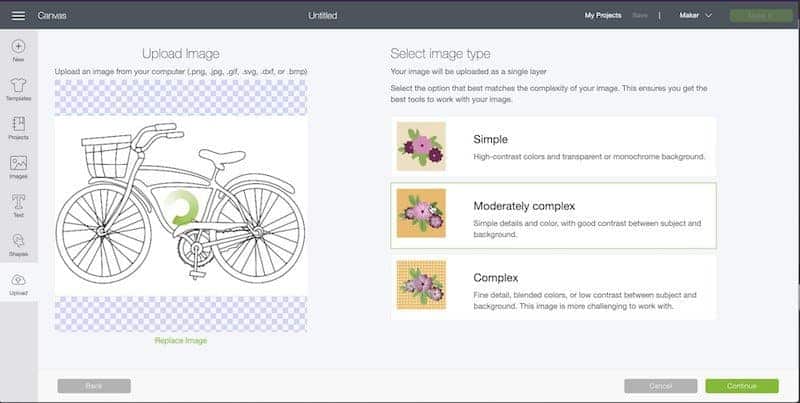
In the video, I choose MODERATELY COMPLEX for each file that I upload so that it is an equal comparison between the different file types.
Cleaning Up a Digital Image
Now that the file has been uploaded to Design Space, you need to tell the program what parts you want to cut and which parts you want to print.
If it is a digital stamp set that you have purchased from the Lemony Fizz shop the PNG files are ready to use. You won’t have to do any cleanup or fussy adjusting on them!
When you upload a file in JPG format, you will need to erase out the background and all the parts that you do not want to be part of the final image.
To do this, click on the background while the MAGIC WAND is highlighted. You can use the ZOOM buttons to make the image larger or smaller. Use the UNDO or REDO buttons to back up a step or put something back.
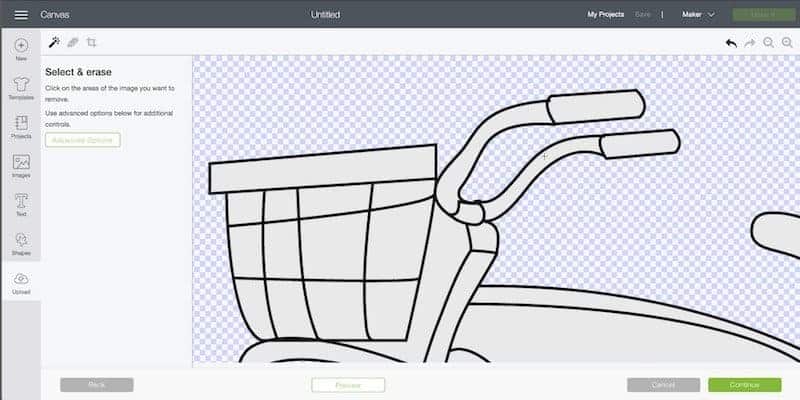
Once you have erased all the parts that you no longer want in the file, click on the green CONTINUE button.
NOTE: if the area is white on this screen or a black line on the inside of the design, it will print. Anything that is the blue and white checker pattern will be empty. The edges where the two meet will be your final cut lines!
Saving Your Images in Design Space
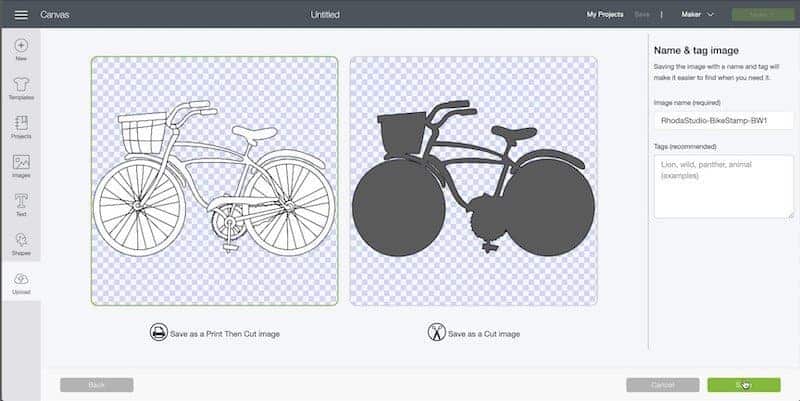
If you are happy with the image and how it looks as a cut line (the black silhouette) then you can save it. Choose the format you want to save it as (see the green bounding box on the left design).
Clicking the Print Then Cut image will make the file into a print and cut file. This file you can send the graphic to your printer and then cut out the design.
Saving as just a cut image will only save the file as the outline of the image. Nothing will be printed and you will NOT have any of the details that were visible on the image.
TOU for Images
It is really easy to forget that there are copyright laws and trademarks that go along with the images you can find online.
Just because an image is on Pinterest or available in Google search, does not mean that it is free to use for your papercraft projects.
Make sure you have the rights to upload and print an image before you use it! Personal use is okay (that means it is staying in your house or being used by you). Anything other than that (and especially selling) is NOT okay.
When in doubt…track down the artist or the website where it is being sold and purchase the image!
How do I download free SVG files to Cricut?
Most sites will have a “download” button for their images (free or paid). Click this and the file will be saved on your device.
If it is a compressed file, you will want to unzip it or double click (MAC) to open it.
Once the file is no longer zipped (compressed) you can follow the steps above to add it to your Cricut images.


I have a question that I cannot figure out. I am new to the Cricut world and have been trying my hand at some easy projects. I uploaded “stars” for the flag project I am doing and every time I “make it” and it lays them out, the stars are not offset but just lined up. So instead of having 5 rows of 10 stars, I have 4 1/2 rows of 12 stars that are all in a straight line. How do I get it to cut out the image I have on my design board?
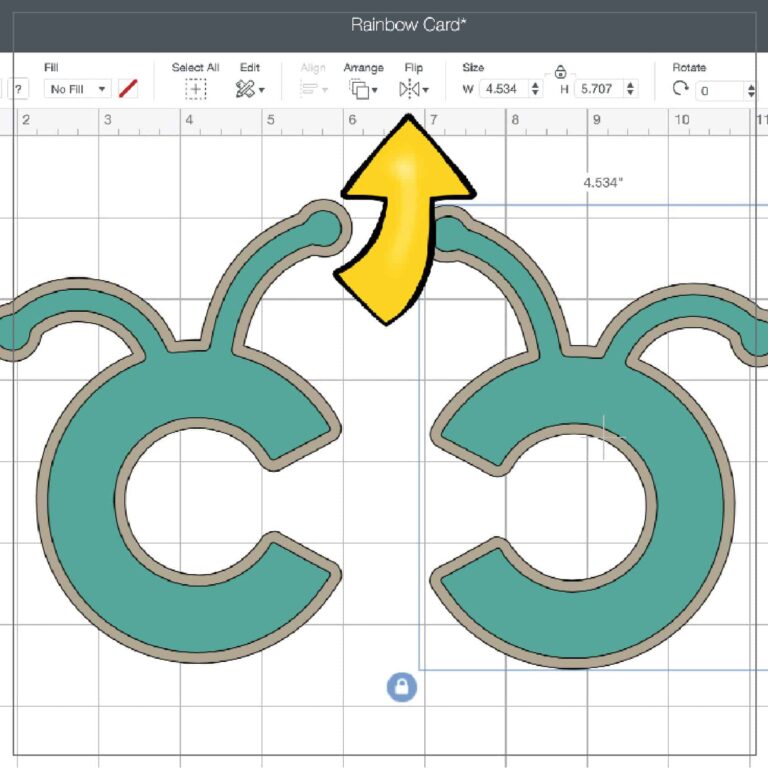
The Design Space software tries to be “efficient” and puts all elements in the top left corner and then arranges them from there.
The trick is to “attach” your stars to the square of the flag so they will stay in the corner of that rectangle.
Highlight each star (or star layer) and the rectangle. Then click attach in the bottom right layer panel.
When you go to “make it” they should be stuck where you want them in that flag. 🙂
Hope that helps. If you need more help, just let me know.
Rhoda