
30+ Cricut Hacks You Need to Know to Get the Most out of Your Cricut
We may earn a small commission for purchases made through affiliate links in this post. For more information go to our Privacy Policy.
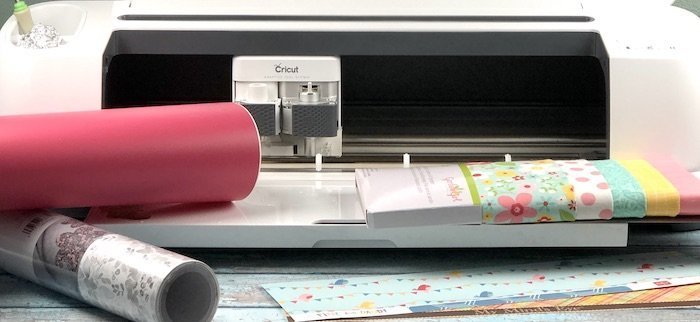
You are still in the research phase of buying a Cricut or you have a Cricut but you need to find ways to save money, make supplies last, or you just really like hacks! (Check out this post for the best Cricut to buy.)
It was a ton of money to buy that machine.
Now it is just sitting there. On your craft table. Collecting dust!
You made the investment. Now you are intimidated by the cost and scared to touch it. You don’t want to break it.
I know you want to use it. The desire is there. It’s just hard to get started!! Using these Cricut Maker hacks and common household items will help you become more comfortable with your Cricut machine.
So the bug is still in its box. It is time to take it out!! I understand that you are a little hesitant. That is okay. I wrote a whole book to help you feel more confident when it comes to playing with that expensive machine!
Get Your Copy of the Cricut Guidebook:
After you have been using your Cricut machine (Cricut Maker, Cricut Explore Air 2, or even a Cricut Joy) or Silhouette for a while (yes…most of these hacks will work for both) you start to find tips and tricks that make it even more functional.
Or some hacks to save you time and money. That’s always an added bonus, right?!
If you are a seasoned Cricut or Silhouette user, you may still find a few golden nuggets. There is always something new to learn and try. Especially in the crafting world.
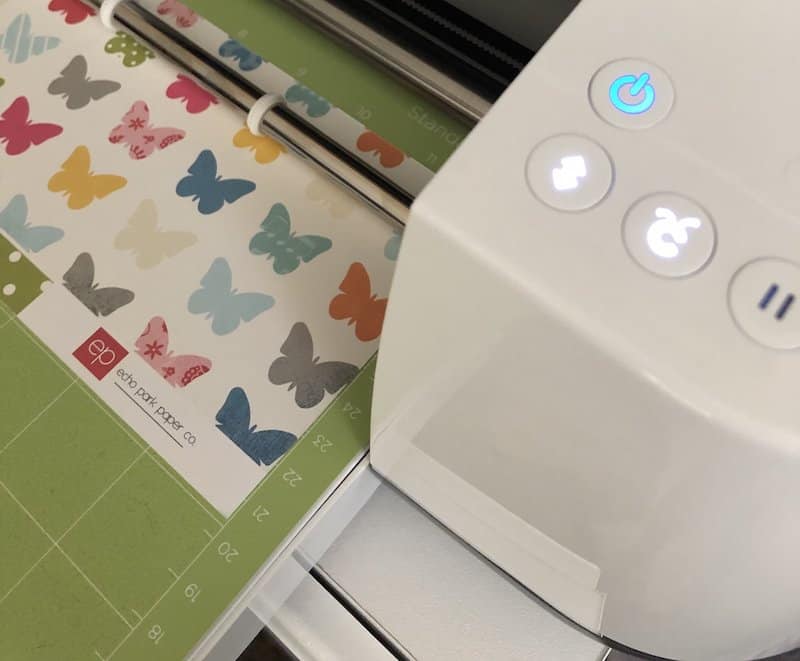
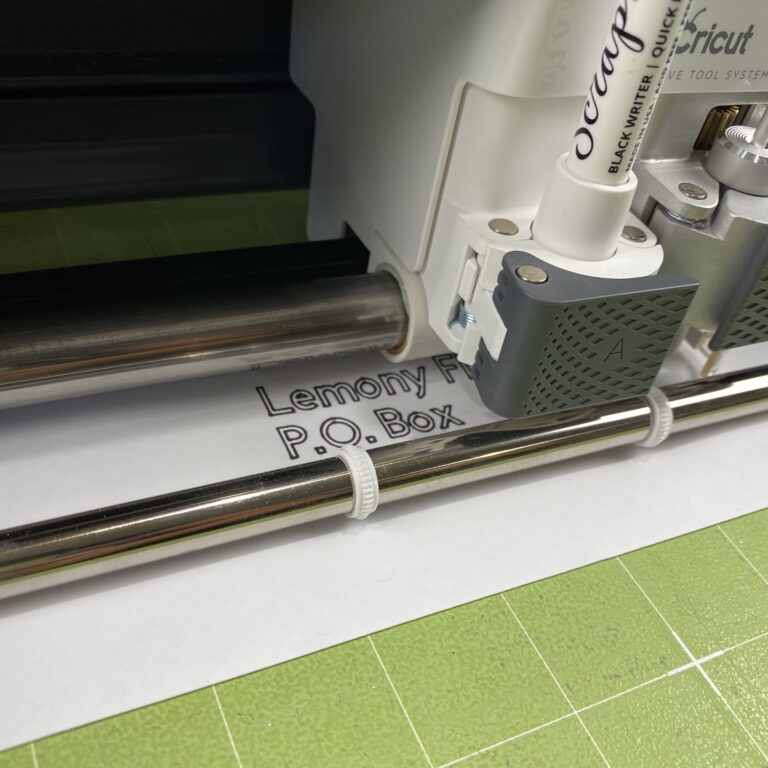
Removing Paper or Stickers from the Mat
The first thing you want to do after cutting out a design in cardstock or paper is to start pulling your design off the mat.
It makes sense to just start lifting the paper off in the opposite way that you put it down.
Try this instead.
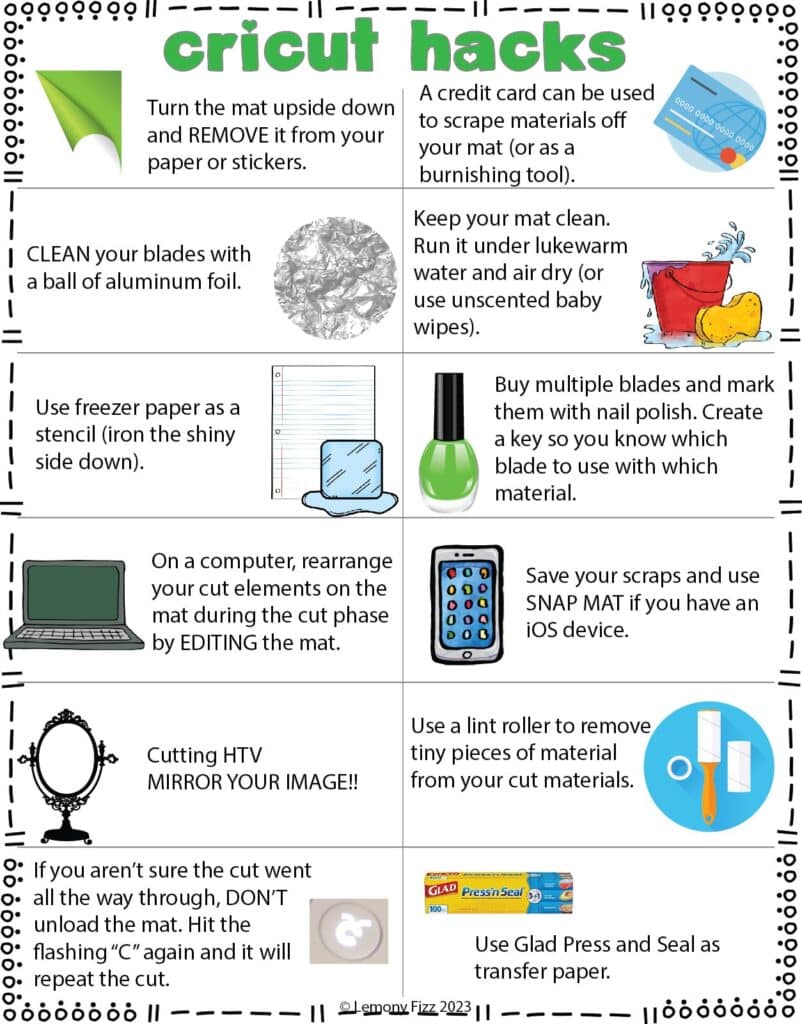
Turn the mat upside down. Remove the mat from the paper. Curl the mat away from your design while it lays flat on your work surface.
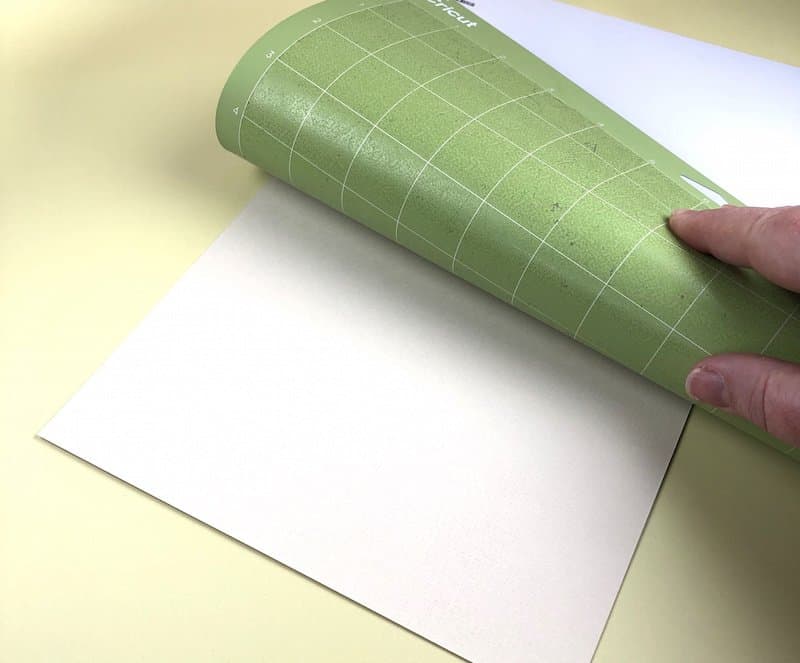
Go ahead and try it. I’ll wait right here.
It seems completely opposite of what you should do. But the magic is that your paper doesn’t curl. Instead of bending your paper away from the mat, you are bending the mat away from your paper.
Paper and dust will get stuck to your mat. Read this post to learn how to clean your Cricut Cutting Mats and which color to use with which materials!
Get More Life Out of Your Cricut Blade
Before Cricuts and Silhouettes, there were paper punches. And the best way to keep them from eating your paper was to keep them sharp.
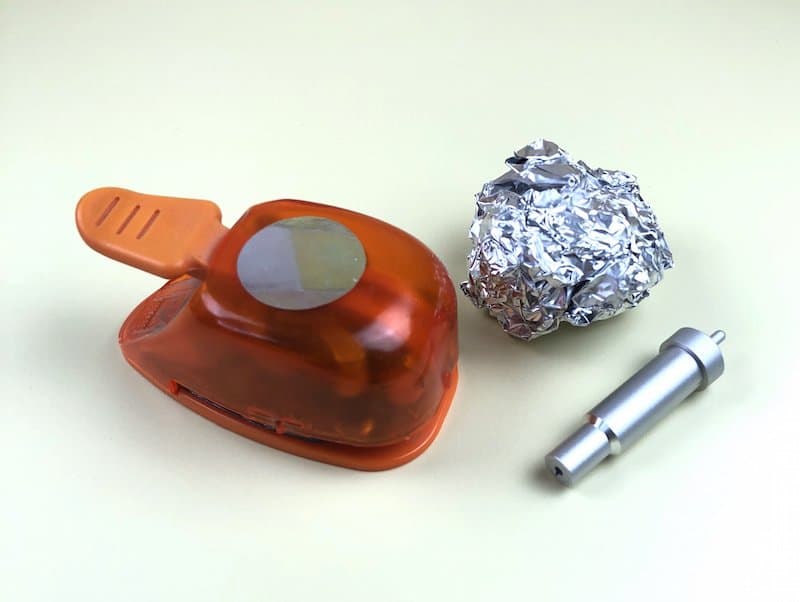
Someone came up with the idea to punch a piece of aluminum foil. It sharpened the edge of the punch and kept it fresh.
You can do the same thing with your machine’s cutting blade. (Keep this in mind though: the blade is German carbide steel…you are NOT really sharpening the blade with tinfoil. Not possible.
It is cleaning the blade off. Removing mat adhesive or bits of paper that are stuck to it. This makes your blade perform like it is supposed to again. Once it is dull…its dull. Time to buy a new one!)
Wad up a piece of aluminum foil and then poke the blade in and out of the foil a few times. Keeps it cutting nicely for a long while!
(NOTE: only a tiny portion of your blade is showing in the housing. PUSH the plunger (the little knobby part on the top) to poke your blade out more!)
Bonus Cricut Hack: If you have the money to spend, you can buy multiple blades and then mark them for different materials. You can add nail polish or acrylic paint to identify each blade and what it is used for. Make a key and keep it with your extra blades.
Store Your Blades in Your Cricut
Storing blades safely and efficiently can be a challenge for Cricut users. Luckily, there’s a simple hack that can help you keep them organized and dust-free. You can actually store your blades and small tools right inside your Cricut machine! This not only saves space but also ensures your blades are easily accessible whenever you need them. Now, let’s look at some additional tips to help you manage your Cricut blades:
- Store spare blades in their original packaging: This will protect them from damage and prevent them from getting lost in your craft room. Plus, keeping them sealed will further prevent exposure to dust and debris.
- Keep a sharpie or label maker nearby: Properly labeling your blades with their type and usage will help you quickly identify them when needed, avoiding confusion and saving time.
- Use a magnet strip or a dedicated holder: If you don’t feel like storing your blades inside your Cricut machine, consider attaching a magnet strip inside a drawer or purchasing a specific holder for your blades.
- Clean your blades regularly: A well-maintained Cricut blade will ensure smoother cuts and prolong its life. Remember to clean it with a soft brush or cloth, removing any built-up debris that may affect its performance.
How Do I Cut This?
Depending on what you are cutting, there is a way you should be placing it on the mat. For the most part, you will cut things face up.
The only time you turn it upside down is when you cut Heat Transfer Vinyl. This is when you put the material upside down and the MIRROR then image.
You can learn more about this (and other Design Space hacks) in my Cricut Guidebook. It is printable or digital so you can reference it any time you need to!
Pro Cricut Hack: repeat to yourself that you need to MIRROR the image when you turn your material front-side-down. I’ve ruined a few pieces of HTV by forgetting that step!
Keep it Clean
Your mat is going to get little pieces of paper and fabric that stick to it. If you have a pet it is going to collect hair and fuzz (or your own hair).
It basically acts like a toddler and picks up all the things it isn’t supposed to!
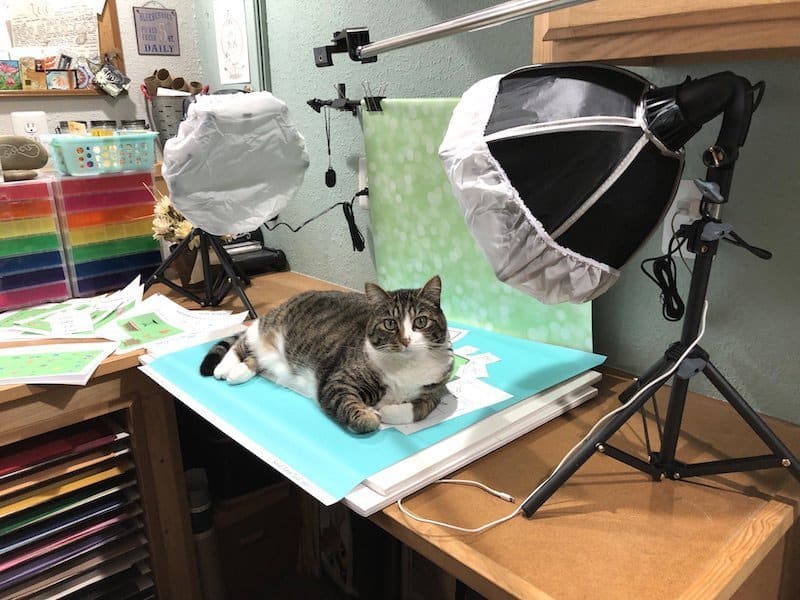
Keep your plastic cover as clean as you can and replace it as soon as you remove your project from the mat. If you don’t…the cat is sure to come along and lay right in the middle of your sticky mat.
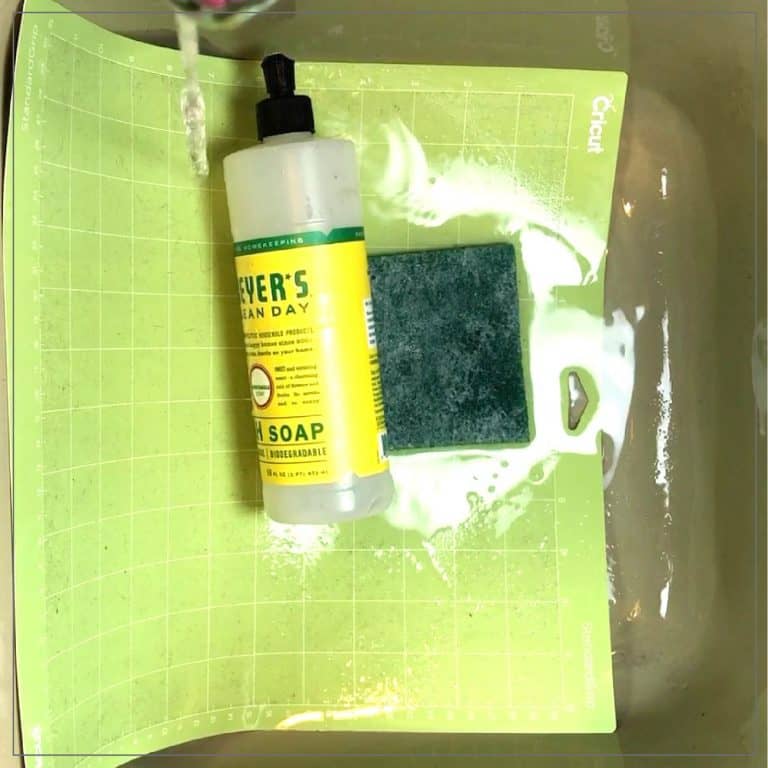
When your mat is getting a little grimy, you can clean it. Just run it under lukewarm water and gently rub all the debris away. This works really well after cutting wool felt. (Click here to read the post on the different mat colors, the materials they are used for, and how to keep them clean).
Let it hang to air dry (away from the kids and pets).
You can also use unscented baby wipes to clean them when they are just slightly dirty.
Clean your mat with baby wipes
For less severe dirtiness, unscented baby wipes come in handy for quick cleaning of your mat. Using baby wipes helps remove minor dust, lint, and pet hair that accumulate over time.
Pro Cricut Hack: There are loads of suggestions on how to “restickify” your mat. The problem with these ideas is that some of that adhesive might come off in your machine if it isn’t done right or quality. A new mat is always going to be cheaper than a new machine!! Somethings you shouldn’t try to “hack”.
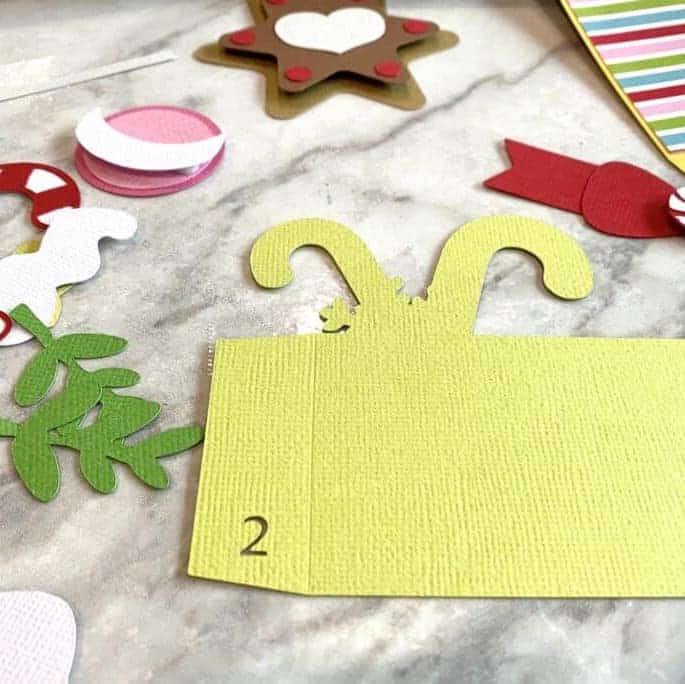
Save Your Scraps (Can You Say Craft Hoarder) and Use Them
Most of us start crafting and trying to be frugal at the same time. I don’t know about you, but I have saved some crazy things because “I might need it for scrapbooking”.
I also save any paper scrap that is over 2 x 2 inches. You just never know if you can use it later without having to cut a full sheet.
Rubbermaid drawers work great for storing smaller pieces of cardstock, pattern paper, vinyl, and HTV. Dig through your scraps before you cut into a big fresh piece of material.
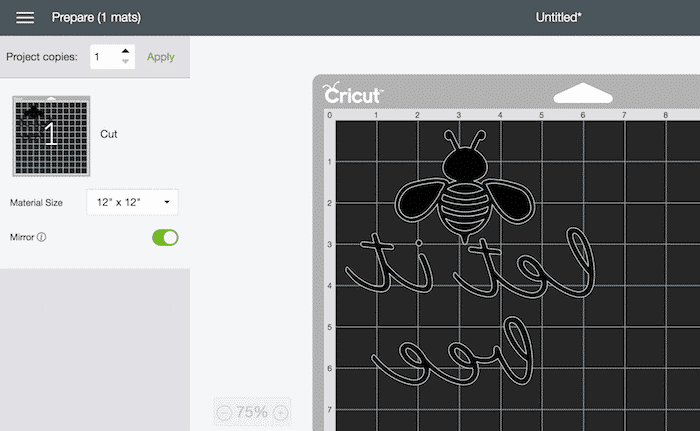
PRO TIP: When you are at the “cut” stage of your project on a computer, you can EDIT your mat and move elements around to specific areas of your mat. This works the same way as a “snap mat” feature. Just use the grid coordinates to place your objects where your scrap pieces of paper are located on the cut mat. Then click the flashing “C”.
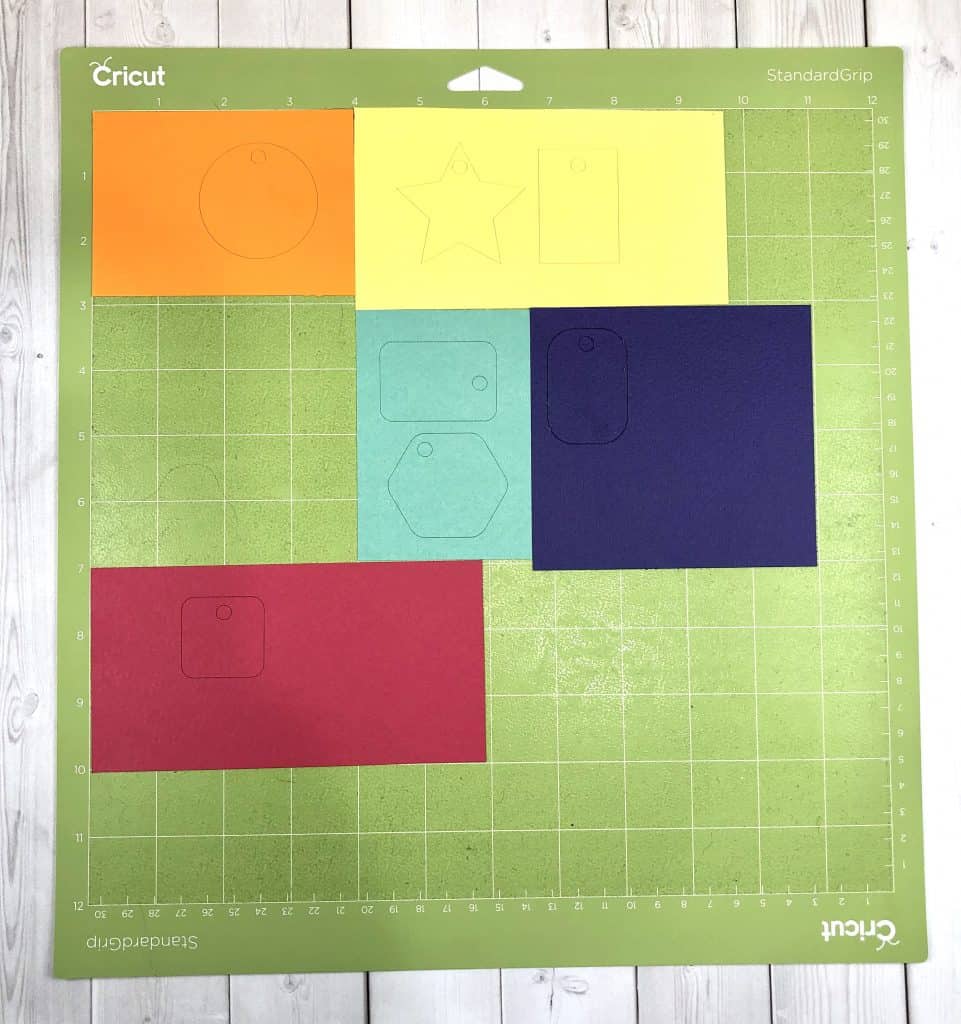
Bonus Cricut Hack: Do you use the iOS app for Design Space? Ever wonder what that “Snap Mat” feature is in the corner? It takes a picture of your mat and the material that is on it. Try filling up your mat with scraps.
Click on Snap Mat and it will show you all the material laid out on the mat in your design space. Now you can place different cut designs on your mat so it will be cut out in that area. It’s a great way to use scraps!!
Household Materials You Can Use
There are a number of random household items that you can use when you are crafting. Most of the time they work just as well (or better) than their crafty counterparts.
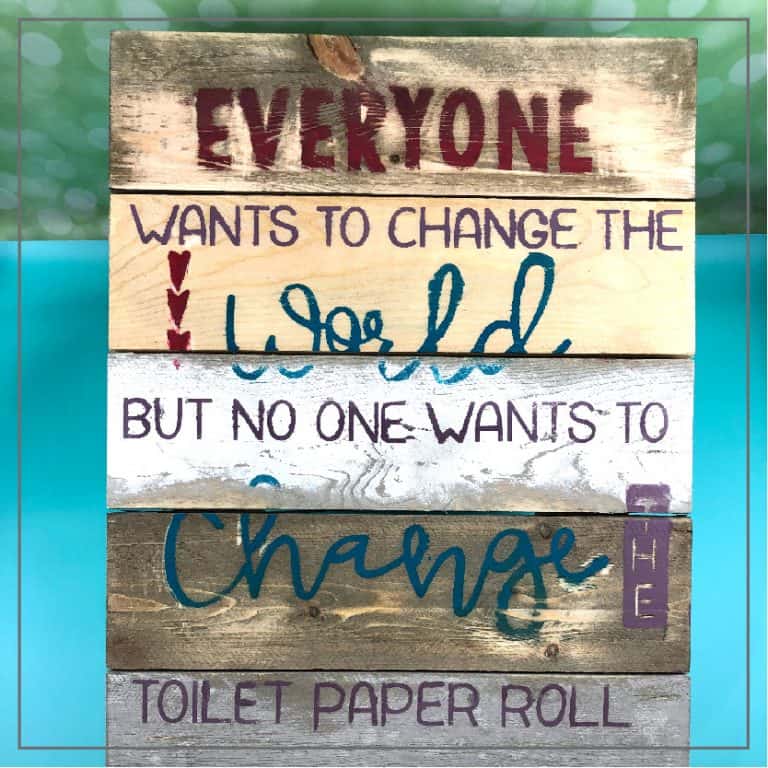
Freezer paper works like a stencil. You can iron it onto a porous surface just like HTV and use it as a stencil. The benefit is that it is removable.
Iron it on with the shiny side down. Paint the open or negative spaces. Then remove the freezer paper (similar to weeding vinyl). It’s great for creating wooden signs and not having your letters bleed.
Have an expired credit card? It can be used as a scraper to burnish materials and remove scraps from your cutting mat.
Glad Press and Seal. Use it in place of transfer paper or tape. Works great as a budget-friendly substitute.
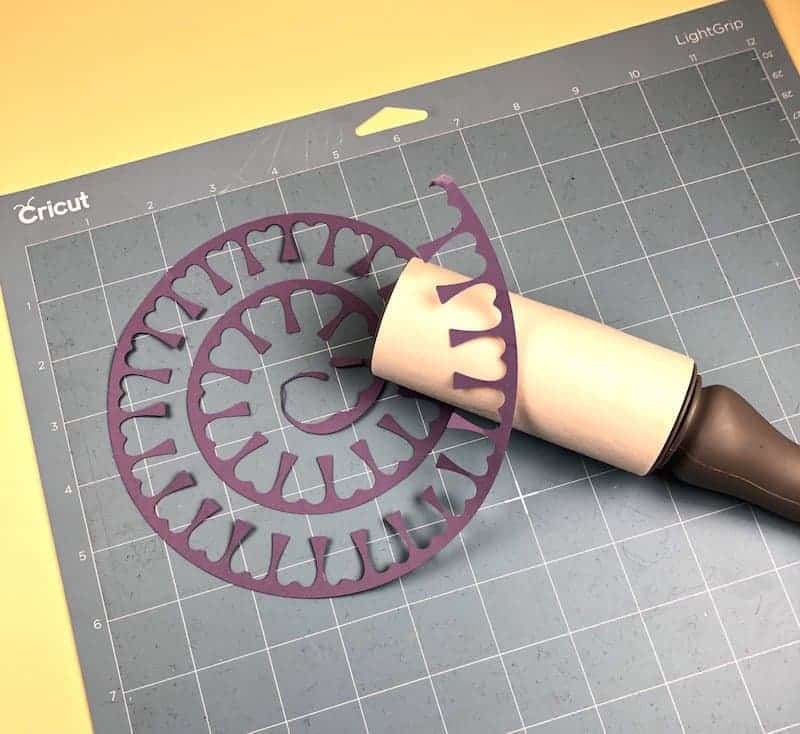
Remove tiny pieces of your cutouts with a lint roller. Run it across the mat or your design once you have removed it from the mat and it will pick up all those “hanging chads”.
Everyday Lint Rollers
Not just for your clothes! I love using these to get small pieces of craft material off my Cricut mats.
Don’t Give Up on That Project
Sometimes, a cut doesn’t go all the way through the material. If you can determine this BEFORE you remove the mat from the machine you can save the project.
This Cricut hack will save your sanity and your craft budget. Less ruined materials mean more projects with what you already have on hand.
Don’t unload the mat until you know your cut has made it all the way through the material. If it didn’t cut you can recut by pressing the “Go” or flashing “C” button again. Your machine will recut the design in the exact same place.
This doesn’t work if you have removed the mat from the machine. You can be off by a millimeter when you reload the mat and then you won’t get a clean precise cut.
This is one of the great Cricut hacks to save money. If you throw away a project that could be salvaged you are using twice the materials (or even more if you mess up more than once…because…who doesn’t once in awhile!)
Use Press and Seal to Hold Paper Pieces in Place
When working on your Cricut projects, it’s essential to keep your paper pieces in place. A handy hack to make your crafting experience smoother is using Press and Seal. Its adhesive qualities make it perfect for securing your paper pieces, ensuring accurate cuts, and easy transfer. Here’s how you can use Press and Seal during your Cricut projects:
- Cut your design – Create your design using your Cricut machine and cut it onto your chosen material.
- Place Press and Seal – Cut a piece of Press and Seal slightly larger than your design and place it over your cut paper pieces.
- Smooth it out – Gently press on the Press and Seal, making sure it sticks to your paper pieces evenly. Be careful not to press too hard to avoid damaging the delicate cutouts.
- Lift and transfer – Carefully lift your design with the Press and Seal, and transfer it to your final project surface. The Press and Seal will hold the tiny paper pieces intact, making it easier to apply them to your project.
- Remove Press and Seal – Once your design is securely in place, slowly remove the Press and Seal, and enjoy your finished masterpiece!
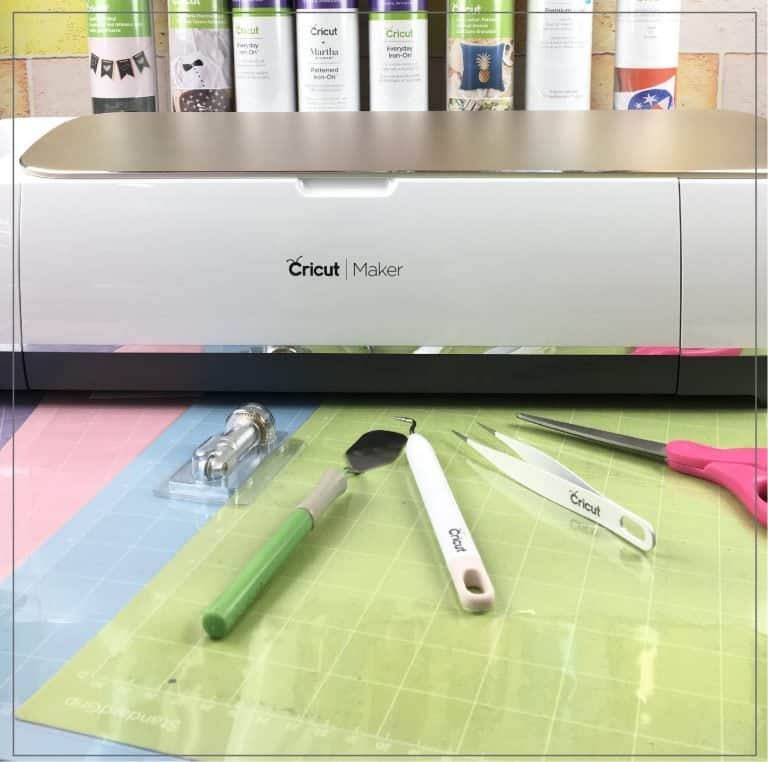
Cricut Scoring Stylus Hack
If you have a Cricut Maker you don’t have to buy the specific scoring stylus blade for scoring your materials (check out this post on Cricut blades if you need to know more.)
You can drop a stylus tool in the 2nd tool holder on your machine and (the same way you would on the Cricut Explore Air 2) and use it to score any lines you want.

Stylus Scoring Blade
You don’t have to use a Maker to take advantage of the scoreline function in Design Space. You can use this Cricut scoring tool hack to use the regular stylus tool in your machine.
Bonus Hacks
Use this post to learn how to hack your Print and Cut Cricut feature. Learn how to use your machine to print and cut or how to use it with colored paper or larger prints.
This one is great if you don’t have a Cricut machine that has the Print the Cut feature. The last tip will walk you through how to cut out shapes with your Cricut and get your design to print with your regular printer.
Cricut Hacks Cheatsheet
[convertkit form=5621781]
Learn to Make Your Own SVG Cut Files
It’s great that you’re exploring Cricut hacks to improve your crafting skills! One incredible way to supercharge your projects is by creating your own SVG cut files. Making your own designs opens up endless possibilities for personalizing and enhancing your crafts.
Here are a few essential tips to help you get started:
- Familiarize yourself with SVG files: They are Scalable Vector Graphics that cutting machines use to determine the blade’s direction. These files provide precise lines and sharp designs, perfect for Cricut projects.
- Explore software options: There are several programs available for creating SVG files. Investigate popular options like Adobe Illustrator, Inkscape, and Cricut Design Space to find the one that works best for you.
- Learn from tutorials: Search for online resources and video tutorials that demonstrate how to create SVG files in various software. This will help you build your skills and gain confidence in your designs.
By learning to make your own SVG cut files, you’ll be able to bring your unique vision to life and impress your friends and family with stunning, personalized projects.
Use a Pegboard to Store all Your Cricut Supplies
A pegboard is a fantastic way to keep your Cricut supplies organized and easily accessible. Following are some tips to help you set up a pegboard for your Cricut supplies:
- Choose the right size pegboard: Depending on your space and the amount of supplies you have, determine the best size for your pegboard. Ensure there’s enough room for growth as your collection expands.
- Determine the location: Find a suitable place in your workspace where you can easily access your supplies while working on projects. Mount your pegboard on a wall near your Cricut machine for convenience.
- Gather hooks and organizers: Select a variety of hooks, wire baskets, and small containers that are compatible with your pegboard to hold different supplies like Cricut mats, vinyl rolls, tools, and pens.
- Layout your supplies: Plan a layout that suits your workflow and makes the most efficient use of the space on your pegboard. Consider arranging items by size, frequency of use, or type.
Here’s an example setup:
| Supplies | Storage Solution |
|---|---|
| Cricut Mats | Command hooks for hanging |
| Vinyl Rolls | DIY vinyl roll holder |
| Tools | Pegboard hooks and baskets |
| Pens and Markers | Small containers |
- Label your supplies: To further improve organization, label containers and storage areas on the pegboard. This will help you quickly locate items and maintain your organization system.
Use Storage Carts for Materials and Machines
Need a practical and stylish way to store your Cricut machine and materials? Storage carts are a brilliant solution for keeping everything organized and within reach. Here’s what you can do with carts:
- Choose a cart with multiple shelves or compartments to hold your Cricut machine, tools, and materials. The Honey Can Do Cart is a popular choice with wide, easy-to-slide drawers for storing various materials and a spacious top for placing your machines.
- Consider a rolling cart for added mobility, so you can easily move your supplies around your crafting area. A DIY Rolling Cricut Craft Cart can be customized to fit your space and personal preferences, ensuring everything has its place and is easily accessible.
- Look for carts with special features like rods or hooks designed for holding rolls of vinyl, cardstock, or HTV. These make it easy to keep your materials organized and uncluttered, while also ensuring they’re ready for use whenever you need them.
- Utilize wall-mounted storage options like IKEA’s plastic bag holders to keep your vinyl rolls organized vertically. This frees up space on your cart and enables better visibility of each roll’s color and pattern.
With the right storage cart and clever organization hacks, your Cricut materials and tools will be easy to find and within reach – making your crafting sessions even more effective.
Organize Your Cardstock and Paper Scraps
Use 12 x 12 Storage for Cardstock and Pattern Paper
One efficient way to store your cardstock and pattern paper is by using 12 x 12 storage solutions specifically designed for crafting supplies. These storage solutions can be found in various styles like clear plastic boxes or stackable shelves that keep your papers organized and easily visible.
- Plastic containers: Clear plastic containers will protect your cardstock and paper from dust, moisture, and fading while allowing you to see the colors and patterns of your papers.
- Stackable shelves: These shelves allow you to store various types and sizes of paper on separate levels, making it easier for you to locate and access your desired cardstock or pattern paper.
Store Paper in 12 x 12 Accordion File Folders by Color
Another organization hack for your Cricut cardstock and paper scraps is to store your papers in 12 x 12 accordion file folders. Organizing them by color helps you easily locate and access the specific paper you need for your crafting projects. Here are some tips for using accordion file folders:
- Color-label tabs: Create labeled tabs for each color category in your file folder, making it simple for you to flip through and find the right cardstock or pattern paper.
- Dividers for different paper types: If you have various types of papers, such as cardstocks, patterned papers, or vellum, consider using separate dividers within the file folder to keep them organized and easily distinguishable.
- Portability: Accordion file folders are portable, making it convenient for you to carry them along and work on your Cricut projects on the go, at craft workshops, or during visits with friends who share your crafting interests.
Organize Your Vinyl and Vinyl Scraps
Use IKEA Plastic Bag Storage for Vinyl
Keep your vinyl rolls organized and easily accessible with an IKEA plastic bag storage. These are affordable and perfect for storing a variety of vinyl sizes.
Use a Nail Polish Holder for Vinyl Scraps
Don’t let your vinyl scraps go to waste. Store them in a nail polish holder so they’re always easy to find and use when needed. Plus, it looks nice on your craft desk!
Use Slap Bracelets to Keep Vinyl Rolls Tight
Keep your vinyl rolls from unraveling by using slap bracelets to secure them in place. Simply wrap a slap bracelet around each roll, keeping the edges tight and tidy.
Organize Your Vinyl by Type in Wood Bins
To stay organized, sort your vinyl rolls by type (such as adhesive, heat transfer, or stencil) in separate wood bins. This makes it easier to find the right material when you’re working on a project.
Store Vinyl Scraps in a Magazine Holder
Store your vinyl scraps in a magazine holder to keep them well-organized and out of the way. This convenient method ensures your scraps are available whenever you need them for smaller projects.
Use Painters Tape for Thicker Materials
When working with thicker materials on your Cricut machine, it can sometimes be challenging to keep them in place on the cutting mat. A simple and effective solution for this issue is to use painters tape. This friendly suggestion will provide you with more stability during cutting and prevent potential project mishaps. Here’s how to utilize painters tape with your Cricut machine:
- Secure the material: Place your thicker material on the cutting mat, ensuring it is properly aligned. If the mat has lost some of its stickiness, it may not hold the material in place securely.
- Apply painters tape: Take a strip of painters tape and position it along the edges of the material on the cutting mat. Make sure the tape is smooth and firmly pressed down to reduce any movement during cutting.
- Adjust Cricut settings: Confirm that your Cricut machine settings are appropriate for the material you are using. Thicker materials may require different cutting depths and speeds.
- Cut and remove: Proceed with cutting the design on your chosen material. Once finished, carefully remove the painters tape and the material from the cutting mat.
By using painters tape, you’ll ensure that your thicker materials stay in place on the cutting mat, leading to cleaner cuts and more successful Cricut projects. Give it a try and see how this simple hack can improve your crafting experience.
Use a Straight Edge to Trim Vinyl to Avoid Uneven Edges
When working with your Cricut machine, creating clean and even edges on your vinyl is essential for professional-looking projects. Having a straight edge to trim your vinyl can be a real game-changer. Here’s how you can achieve those neat edges:
- Cut with precision: Use a straight-edge cutter or a ruler and a craft knife to cut your vinyl. This will ensure that your cuts are aligned with the edges of your mat and help you avoid crooked or uneven lines.
- Maximize material usage: When trimming your vinyl, don’t be afraid to cut close to your design. This will not only give you a clean edge but also help you make the most of your materials.
- Get familiar with Cricut Design Space: This application can help you clean up any fuzzy edges on your designs, making it easier to cut with precision and achieve smooth lines.
Cut Slits in Your Transfer Tape When Applying Vinyl to Curved Surfaces
When working with Cricut vinyl on curved surfaces like mugs or ornaments, you might face some challenges with the transfer tape not lying flat or adhering properly to the surface. To overcome this issue and achieve a smooth, bubble-free application, try cutting slits in your transfer tape. Here’s a brief, step-by-step guide in a friendly, second-person point of view:
- Prepare your curved surface: Clean the surface using rubbing alcohol and a cotton ball, or give it a good hot wash. Let it dry completely before proceeding.
- Cut your design: Select a suitable design that works well on curved surfaces. Open designs are recommended as they allow flexibility for application.
- Cut slits in the transfer tape: Before applying the transfer tape to your vinyl design, make slits all around the tape, being careful not to cut into the design itself. This will help the tape conform to the curved surface.
- Apply the transfer tape to the vinyl: Carefully position and adhere the transfer tape to your vinyl design. Press firmly and evenly to remove air bubbles.
- Transfer the design: Align the vinyl and transfer tape on your curved surface. Press firmly, starting from the center and working outward. The slits in the transfer tape will allow it to lay flat on the curved surface.
- Remove the transfer tape: Gently and slowly peel off the transfer tape, leaving your smoothly-applied vinyl design on the curved surface.
One-click Convert an Image to SVG
Hey there! If you’re looking to quickly convert an image to an SVG for your Cricut project, you’re in luck. Here’s a simple and effective method to help you transform your image with just a single click:
- Visit Online-Convert.com – This website is a fantastic free tool for converting various file types, including JPG and PNG images, into SVG files. To get started, simply click here.
- Choose your image file – Once you’re on the page, find the section that says “Choose Files” or “Enter URL” depending on whether your image is saved locally or found online. Select the file or paste the URL that you’d like to convert.
- Convert and download – After uploading your image, click on the “Start conversion” button and wait for a few seconds as the magic happens. Once completed, your new SVG file will be ready for download.
Find Amazing SVG Freebies
Check Cricut Design Space for Freebies
Cricut Design Space is a fantastic place to find beautiful SVG freebies. There are often new designs added, so be sure to check back regularly to score some amazing SVG cut files for your projects. Having a variety of free SVG files on hand can make your crafting experience more enjoyable and help you create stunning pieces.
Download Free Fonts Online
Another great way to enhance your Cricut projects is by downloading free fonts online. Many websites offer a wide range of fonts that can be used with your cutting machine. When combined with your SVG freebies, these fonts can help you create unique designs and add a personal touch to your projects. Try exploring The BEST List for SVG Cut Files to find some fantastic free fonts to use in your next Cricut creation.
Use Font Character Maps to Import Specialty Designs to Design Space
As a Cricut crafter, you can easily add an extra touch of creativity to your projects by using font character maps to import special characters and designs into Cricut Design Space. These characters are often hidden within fonts and can provide a unique look on your designs.
First, follow these steps to access font character maps:
- Download and install a character map application, such as Character Map UWP, to your desktop.
- Launch the app and browse through the fonts to find the one with the glyphs you wish to use.
- Select the special characters or glyphs you want to include in your design, and copy them to your clipboard.
Now that you’ve discovered the extra font characters, let’s bring them into Cricut Design Space:
- Open Cricut Design Space on your computer.
- Create or import a project, and click on Add Text to insert a text box.
- Paste the copied special characters into the text box.
- Adjust the size, position, and layering of the text as needed to fit your project.
Use a Setting Guide Printable
As a Cricut enthusiast, you might find remembering all the different material settings or custom settings a bit overwhelming. Don’t worry! A Setting Guide Printable can be a life saver for you. With this handy guide, you’ll quickly become a Cricut master.
Here’s how to make the most of a printable guide:
- Download and print: Look for a reliable source like the Cricut Cheat Sheet to download your setting guide printable. Keep a copy near your Cricut machine for quick access.
- Organize by tools and materials: Keep an eye out for printables that cover essential Design Space functions, tools, and material settings. It’s helpful to have organized sections that make finding the right information a breeze.
- Keep it updated: As you become more experienced and try out new materials, update your setting guide to reflect any custom settings or tips you’ve discovered on your own.
- Make it personal: Feel free to modify and customize your setting guide to match your workflow and personal preferences. Use bright colors, bold texts, or even add your own doodles to make it a fun and efficient tool.
Remember, practice makes perfect. Refer to your printable guide often to master those settings and transform your ideas into reality with ease.
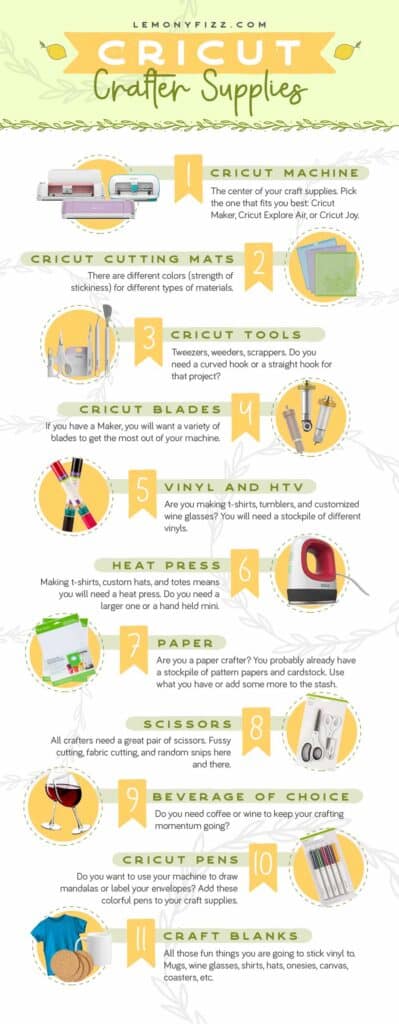
Know Where to Find the Best Materials
When it comes to Cricut hacks, knowing where to find the best materials is essential. It will not only save you time but also ensure that your projects look professional and last longer. Here are some tips on finding the best materials for your Cricut projects:
- Cardstock: Choosing the right cardstock for your Cricut project is crucial. There are different types of cardstocks available, such as Cricut cardstock, scrapbooking cardstock, or stationary cardstock. Make sure you pick the one that suits your needs the best.
- Vinyl: Vinyl projects can be a lot of fun to create with your Cricut machine. From wine glasses to coffee mugs and home decor items, there’s always a vinyl project idea waiting for you. Remember to choose a high-quality vinyl to ensure your designs last longer and look amazing.
- Craft blanks: One way to ensure that you always have the materials you need for a project is to keep a stash of craft blanks on hand. This way, whenever you have a few minutes and feel inspired to create something with your Cricut, you’ll be ready to go with the right materials for the job.
Explore different sources for your materials, such as local craft stores, online retailers, or even asking fellow Cricut users in forums for their recommendations. Don’t be afraid to experiment with different brands and materials to find the ones that work best with your Cricut machine and your unique creative vision.
So Many Cricut Tricks, So Little Time
Honestly, you are going to pick up more Cricut and Silhouette hacks than you can imagine. Little things will pop up when you are researching how to do something. They will stick in your memory and then magically “come back to you” when you least expect it.
Go with it. It’s all a part of being creative. You store ideas and thoughts and then use them when it’s time to implement some problem-solving. That is creativity at it’s finest!
I hope you find this list of Cricut tips and hacks useful. Leave a comment if there are any that I missed and you would like to share!
Frequently Asked Questions
What are some useful tips for Cricut beginners?
- Improve cuts by using aluminum foil
- Clean mats with baby wipes
- Store pens tip-down
- Use a scraper or card to remove little bits off the mat
How can I maximize efficiency in Cricut Design Space?
- Utilize keyboard shortcuts
- Enable SnapMat to quickly align materials
- Duplicate items by right-clicking the object and selecting ‘Duplicate’
- Organize designs using layers and groups
What are some inexpensive supplies for Cricut projects?
- Substitute transfer tape with clear contact paper
- Use store brand vinyl instead of Cricut brand
- Save money by repurposing household items, like painter’s tape and parchment paper
- Search for deals and bundles from online retailers
What unique projects can be created with a Cricut Joy?
- Custom labels for organizing
- Window decals
- Personalized greeting cards
- Adhesive vinyl stickers for phone cases and laptops
What are some easy projects to start with using a Cricut?
- Simple vinyl decals for water bottles or mugs
- Customized T-shirts with heat transfer vinyl
- Paper crafts such as greeting cards and bookmarks
- Stencil designs for home decor and DIY projects
How can I modify my Cricut Maker for maximum capabilities?
- Upgrade your blades and tools as needed
- Regularly update the firmware on your machine
- Keep the machine clean and free of debris
- Explore new materials and techniques to push the limits of your Cricut Maker
Thank you so much for taking your time to teach us these hacks. Very kind of you, Thanks!
It is my pleasure, Marsha! I’m hoping to add a few more to the list soon.
Thank you for the sweet comment!
Rhoda
Very nice of you. Thank you. I have not purchased yet. Wanting cricut maker. Any suggestions on that one? Once again thank u!
You are very welcome Melissa!
I would recommend the Maker over the other machines because they are designing the new types of blades for that machine in the future. It will be the best investment and use of your money.
Thank you for your great tips! I’ve never heard of many of the things you mentioned and I can’t wait to try it out.
Which Cricut machine would be best for making the leather earrings? I don’t have one yet, but thinking of buying one.
I would recommend the Cricut Maker if you want to cut leather and make earrings. You can check out this post if you want more info:
https://lemonyfizz.com/cricut-maker/
I’m interested in finding out which machine is best for cutting felt shapes. Anna Nelson
I would say you need the Maker. Felt is cut with the rotary blade and the pink fabric mat (which is only available with the Maker).
Maker post: https://lemonyfizz.com/cricut-maker/
Blades post: https://lemonyfizz.com/cricut-blades/
Thanks for the great Circut tips, and thanks for featuring some of my clip art on your cheat sheet! Keep on crafting 🙂
You are very welcome, Sarah.
Thanks for creating super cute clip art! I use your Dot Dudes on my TPT lessons frequently. They are some of my favorites!
Rhoda
Why when I cut a pattern it does not cut all the way through? Thanks
You might need to change the material (vinyl, heat transfer vinyl, etc), the pressure of the blade, or change out the blade.
Rhoda
Thanks for the great Circut tips, and thanks for featuring some of my clip art Keep on crafting
Thank you for tips, got to learn the basics and I can’t understand what I’m reading. Your tips have made more sense to me and I’m anxious to learn more. Going to look into your book.