Hand Lettering Alphabet Practice 101: Tips & Resources For Improving Your Skills
We may earn a small commission for purchases made through affiliate links in this post. For more information go to our Privacy Policy.
If you want to get better at hand lettering the alphabet, the only way to do that is through practice. So here’s my ultimate guide to hand lettering alphabet practice, including tips, the tools you need, and resources to guide you along the way.
Do you dream of beautiful hand lettering? That may seem like a slightly silly question, but given how prevalent (and amazing) hand-lettering is in our world these days, it’s not out of the realm of possibility!
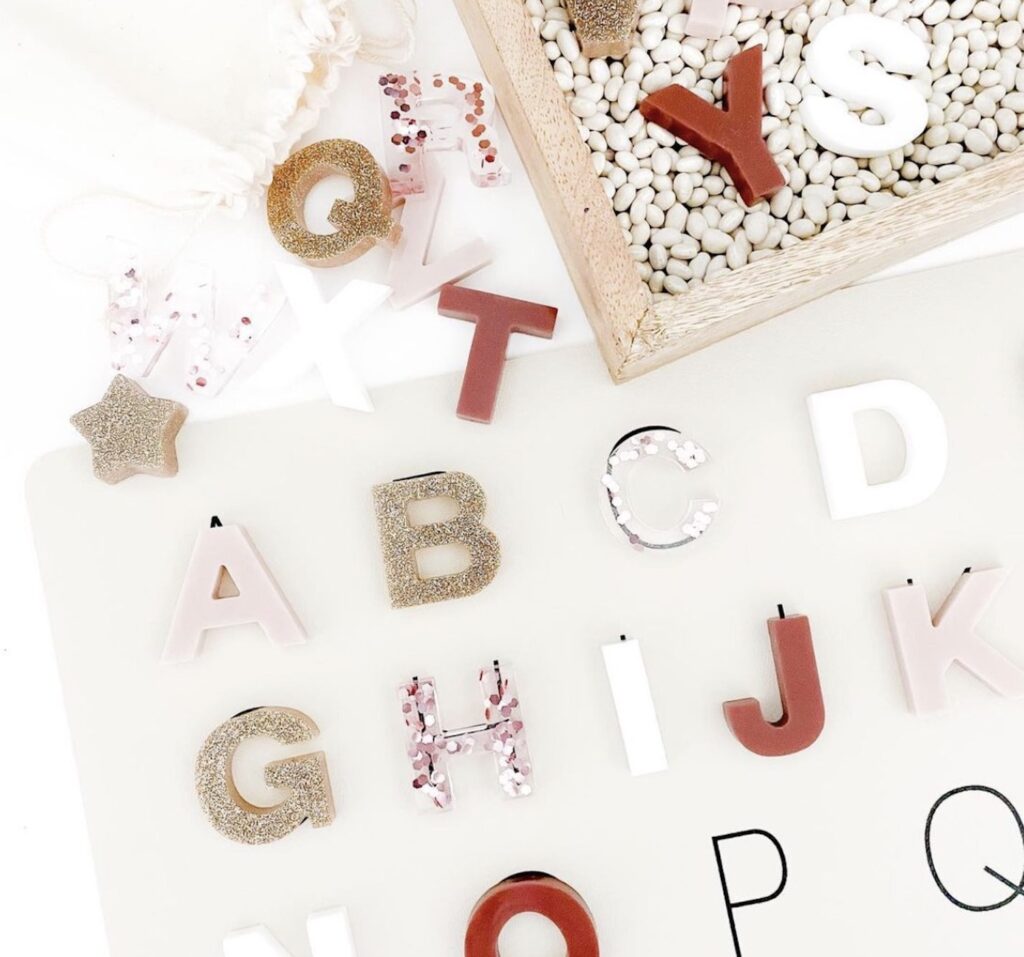
If you love planning, journaling, or being creative in some other capacity that involves lettering, I have no doubt that you’ve seen loads of hand lettering. You’ve probably even seen many different styles, whether you realized it or not.

This art form has exploded in popularity over the last few years because it’s beautiful, relaxing, and (with a little practice) anyone can do it!
Ok, so say you want to begin using a planner or bullet journaling and want to learn how to do hand lettering so that you can create some of the beautiful things you see online day in and day out. How do you improve your handwriting so that you can practice hand lettering?
First, I should mention that there’s more to hand lettering than simply buying some paper and brush pens and getting started.
As with all art forms, it takes time and practice to develop a skill and make it look easy and incredible.
But if you really do want to get better at hand lettering, I have some helpful info on how you can practice hand lettering the alphabet. I’m including tips, tricks, and resources in this all-inclusive guide.
Are you ready? Let’s get started!
What is hand lettering?
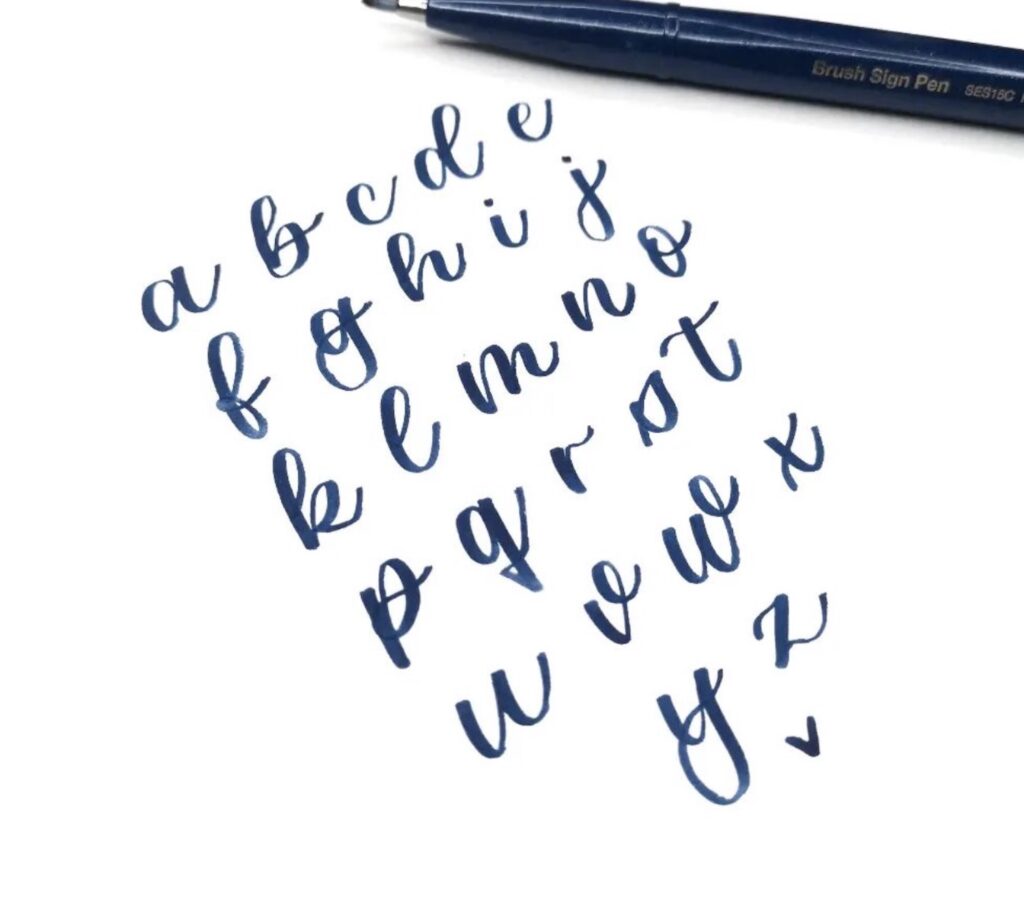
Hand lettering (also sometimes called lettering) is an art form of drawing letters in different styles. Another way to think of it is that it’s illustrating letters.
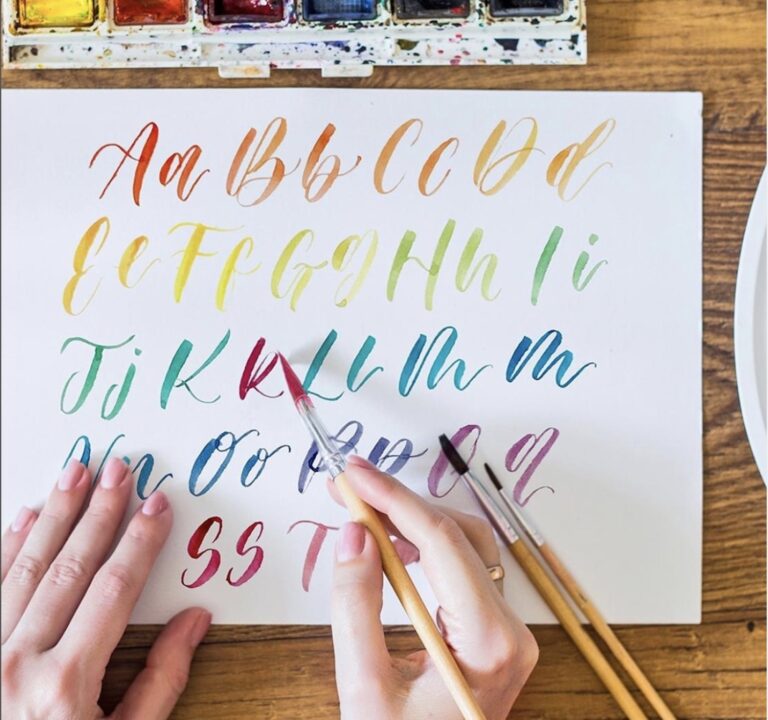
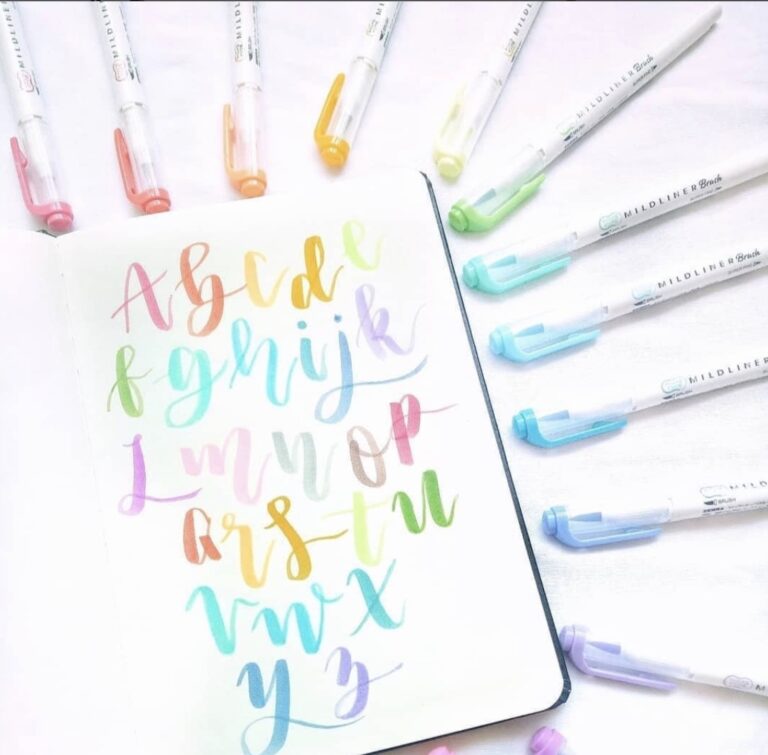
There are an infinite number of different hand lettering styles because each style can have subtle variances.
Many people associate script style (and all its variances) with hand lettering and even confuse it with calligraphy. But there are tons of different ways to do lettering so that it’s not limited to script styles.
What’s the difference between hand lettering and calligraphy?
Many people confuse hand lettering with calligraphy because, at times, both use a script style. To the untrained eye, they may look too similar to notice a difference. However, the differences will be obvious to someone familiar with hand lettering.
The difference between these two types of lettering lies in the method used to create them. Calligraphy is a form of writing that’s created by using a pressure-sensitive tool. The writer combines the tool with a standardized series of basic strokes to create beautiful script-style letters and words.
Hand lettering, on the other hand, is a form of drawing the letters individually. In other words, you’re drawing letters by hand. Instead of writing letter strokes, the artist draws out each letter’s basic form and then changes it through a series of small modifications until each letter has become an illustration that collectively forms words.
For this reason, the artist has more control over words in hand lettering than calligraphy offers.
Although script hand-lettering alphabet styles can appear very much like calligraphy, there are just as many (if not more) styles of lettering that can vary significantly from script styles.
At their foundations, these two art forms are different (no matter how similar they may look) because the processes for creating the letters and words are fundamentally different.
Hand Lettering Terms To Know
In order to be fully versed in the topic of hand lettering, there are a few terms that everyone should know. Knowing these terms will enable you to discuss all things lettering-related with anyone who shares a common interest.
Here are some of the common terms and what they are:
- Ascender – This is the part of tall lowercase letters that rise above the “x” height. An example would be the stem that rises above the rest in “b.”
- Descender – The descender is the part of the a lowercase letter that goes below the baseline. An example would be the hook in the letter “g.”
- Counter – These are spaces formed by the letters themselves and can be open or closed. Open counters are in letters “c” and “h,” while closed counters are in letters “o” and “p.”
- Stroke – Straight or curved lines that make up letters.
- Terminal – Terminals are the ends of each stroke and the places where you would see serifs (extra lines) on the letter.
- Spine – The spine is the main middle curve in the letter “s.”
- Stem – The stem is the main straight vertical stroke of a letter.
- Shoulder – The shoulder is the arch stroke in letters like “m.”
- Cross-stroke – This is the horizontal stroke that crosses over a vertical stroke in a letter like “t.”
- Flourish – Flourishes are the decorative swooshes and swirls you see to make hand lettering decorative.
- Swash – Also called flourishes or extended strokes, swashes are basically exaggerated serifs or terminals of a letter.

How can I learn hand lettering at home?
Learning the process for hand lettering is simple. There are tons of websites, videos, and tutorials showing you how to create different styles of letters. However, hand lettering is more art than science.
Even after you learn the processes artists employ, beautiful hand lettering requires lots of practice. Putting pen to paper cements the processes in your head and builds the muscle memory that’s necessary for consistency.
What kind of pens do you use for hand lettering?
The good news is that you don’t need anything fancy or expensive to begin hand lettering at home. In fact, if you have any Crayola markers, you have what you need to get started.
Crayola markers are great starter lettering tools because they will give you different width strokes when using different pressures.
Beyond Crayola markers, brush pens are the most popular tool for hand lettering. If you would like to invest in a brush pen, here are the ones I would recommend.
Tombow Fudenosuke Brush Pen
The tips of these pens are firm but flexible to provide precision when drawing strokes. With these pens, you get the look of a brush tip with the ability to create small, precise lettering.
Pentel Sign Pen Brush
These pens are terrific for beginners because the colors are rich and bold, the ink flows smoothly, and they give beautiful thick downstrokes and thin upstrokes.
Tombow Dual Brush Pen
These pens have two tips on them to make them the perfect all-around pen for hand lettering the alphabet in any style that you want. The flexible brush tip acts like a paintbrush to give you those bold variances in stroke width.
The fine tip is perfect for delivering the fine line that’s ideal for small details and embellishments.
Pentel Arts Pocket Brush Pen
This pen is best for people who have been lettering for a little bit of time. Although this pen isn’t ideal for beginners, it’s a terrific and sensitive brush pen that creates beautiful strokes, both thick and thin.
Tips For Hand Lettering Alphabet Practice To Improve Your Skills
When it comes to lettering, there are a few things that “the pros” know. To help reduce your learning curve, here are some tips that will help your lettering improve quickly, so you get the most out of your practice time.
1. Slow Down
One of the most common mistakes that beginners make is going too quickly. Going slowly is probably the most effective tool for improving your lettering because it will allow you to be more intentional with each stroke.
Remember, lettering isn’t writing – it’s drawing and illustrating. It’s art, and it takes time and patience to master. Rushing through it won’t produce the final results you want.
There are two things I want you to know about going slowly when lettering the alphabet:
First, if you’ve been watching hand lettering videos, keep in mind that the person on the video may seem like they’re going quickly, but the video is sped up. That’s because it takes time to transition from bold to thin strokes and back again. It also takes time to change your marker color. 😀
Second, with practice developing your skills, your hand will become more steady and sure, and your speed will naturally increase.
2. Use A 45-Degree Angle When Lettering
This angle helps to produce the varied brush strokes you crave in lettering and adds a touch of elegance to the entire product. It’s especially helpful when creating a script font because it mimics calligraphy.
3. Lift The Pen After Every Stroke
This is a big one, but it’s easy to forget or confuse with calligraphy. Although some styles may look as if they’re one continuous stroke, hand-lettering isn’t created that way.
Get into the habit of lifting your pen after every stroke you create. This will help your practice efforts because it will allow you to think ahead so you can plan where to place your next letter to get perfect spacing.
Making this one simple change can help you make fewer mistakes and make lettering easier (and, ironically, a little faster).
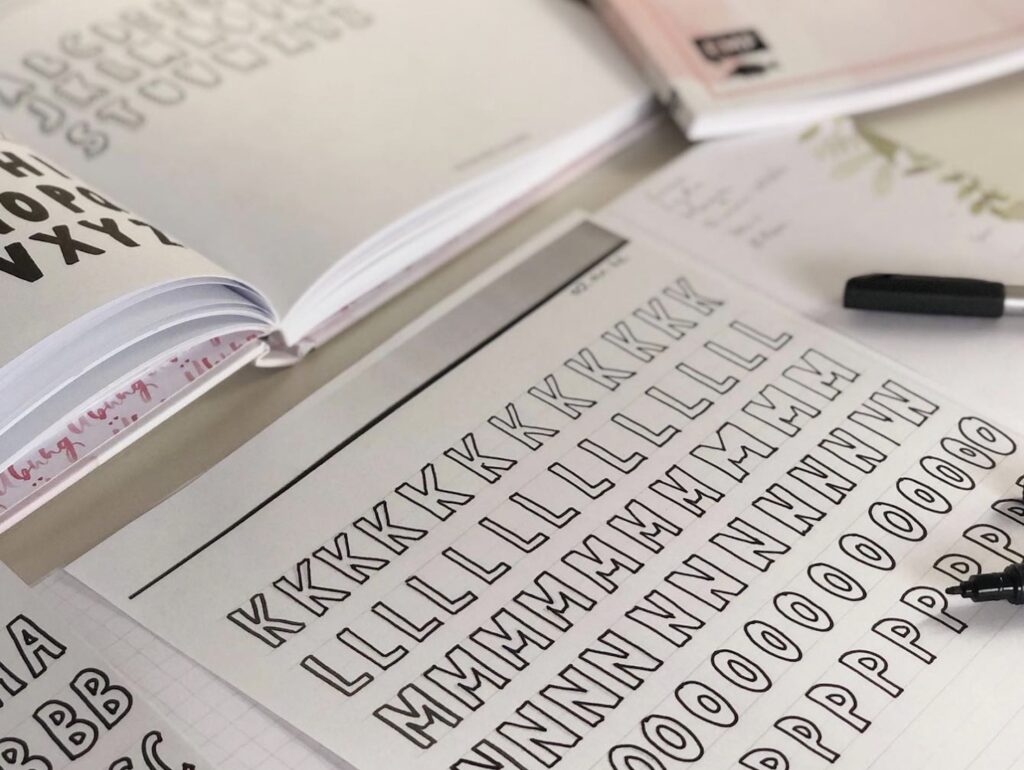
4. Tracing Can Help
You can absolutely benefit from tracing practice sheets. If you find hand lettering practice sheets in a style that you like, use them! They will help you build muscle memory and gain confidence in your new skill.
5. Use The Right Tools For The Job
One of the things I love the most about hand lettering alphabet practice is that you don’t need special tools to achieve beautiful results. Like I mentioned above, unlike calligraphy, which requires certain types of pens, you can hand letter with something as simple as Crayola markers!
Of course, there are hand lettering-specific pens you can buy. And they will help you create beautiful art, for sure. But they aren’t necessary to get started with hand lettering.
When it comes to supplies needed for hand lettering, all you really need are:
- Pen, brush, marker, or writing instrument or choice
- Practice Paper (or practice sheets, if you’re using them)
If you want to buy a pen, I recommend going with one of the ones I mentioned above.
When it comes to paper, I’ve had good results with HP Printer Paper when I’ve printed practice worksheets.
However, if you want a pad, I recommend getting either a Rhodia pad or a Strathmore Bristol pad because the pages are smoother and thicker. This type of paper will help your brush pens last longer and better support the ink from your pen or marker.
6. Don’t Compare Your Results With Others’ Results
It can be easy to look at your work, then look at someone else’s work and be disappointed with your own. Nothing good comes from comparing your work with someone who has been hand lettering for years and thinking yours is “less than.”
And the truth is that there’s no right or wrong when it comes to hand lettering. It’s all really a matter of preference – which gives you so much freedom!
Instead of measuring your work or effort against someone else’s, try to use others’ work as inspiration. You can find it everywhere, including on Instagram and other social media platforms.
When you look at someone else’s hand lettering, think about what elements of their style you like and work on those things.
Feel free to copy their style or the elements you like as you practice your skills. But don’t feel like their style is the “only right” way to do it. Play around with it as you practice!
Ultimately, hand lettering is about letting your creative side out and developing your own style rather than strictly mimicking someone else’s style. Plus, it’s more fun when you let yourself be free to come up with your own style! 😃
7. Practice As Much As You Can
As with any other skill, the only way to get better is to practice often. Make it part of your daily routine so that you’re working on your skills consistently. Regular practice will help you improve and get better as fast as possible.
But, if possible, don’t worry about how quickly you improve or develop skills. Trust in and enjoy the process because it’s part of your hand lettering journey!
Do you feel like you’re too short on time to add hand lettering practice to your day? Check out these tips below for finding ways to squeeze in some practice (and fun!) no matter how much time you have.
How To Practice Hand Lettering The Alphabet (Even When You’re Short On Time)
I get it. You want to learn a new skill such as hand lettering but have no idea how to squeeze in time for one more thing in your day. Don’t worry, I’ve got you covered!
Here’s how to practice hand lettering the alphabet when you’ve got 100 other things going on too:
1. Prioritize Time For Hand Lettering Alphabet Practice
Life is busy. Work, family, and other commitments can eat up our time. And even though we may enjoy many of the things we do, it can be easy to devote all of our time to our various commitments and not leave enough time for ourselves.
I believe that prioritizing time for ourselves and our own interests and hobbies is important for replenishing ourselves through self-love. But it might not be easy to add in something for yourself when your time is already thin.
At some point, most of us realize that in order to do the things we want to do, we have to prioritize them. Make time for those things by scheduling them into your day (with your planner!).
Hand lettering is no different. The only way to get better is through practice, so prioritizing even just a few minutes a day for hand lettering alphabet practice is essential.
2. Make Alphabet Lettering Practice Part Of Your Routine
When we work to incorporate new tasks into our routine, we are prioritizing them. Take that a step further, and they become a habit.
By making hand lettering alphabet practice a habit, you do it regularly. That regular practice (even if it’s only 10 minutes a day!) will help you make consistent progress, so you get better.
And making it a part of your daily routine will make it far less likely that you’ll skip a day (or a week!) when you don’t feel motivated to do it.
If you want to get better at hand lettering, make it part of your daily routine.
3. Stick With A Favorite Pen
You probably won’t know which one is your favorite at first – or maybe even for a while, and that’s ok.
I believe in the guiding principle of “practice the way you’ll actually do it.” This could apply to sports or any other activity the same way it applies to hand lettering the alphabet.
What do I mean by that? Well, instead of changing up your pen every time you want to practice hand lettering, find one that feels comfortable and writes the way you want it to, and stick with it (for the most part).
Do the vast majority of your practicing with that pen (or brush) so that you feel comfortable, always know where it is (and don’t waste time searching for supplies), and keep progressing your skills.
You may change your pens a lot right at first until you figure out what feels comfortable to you. But, once you find one that fits you well, stick with it. Then after you are more proficient with your lettering skills, you can play around with changing things up to see how that impacts your final results!
4. Practice Everywhere You Can
Your routine may be that you get up in the morning and practice hand lettering. Or maybe you make it a habit to squeeze in a few minutes to help you wind down at night before bed.
It doesn’t matter when you do it each day…it only matters that you do it!
But I love to recommend putting some paper (or a notebook) and one of your favorite pens in your purse or bag and bringing it with you when you go out.
That way, if you’re waiting in a waiting room, in traffic, or in line at school pick up, you can pull out your supplies and enjoy a few extra minutes of lettering that day.
The ability to practice this form of art anywhere and with only a couple of supplies are two reasons why I love hand lettering so much.
5. Make A Plan
What do you want to work on? What aspect of hand lettering the alphabet are you looking to improve?
Making a plan will help you stay focused as you continue to build your skills. Maybe you plan to focus on a single letter for a day, or you decide to practice swirls and swooshes. You could decide to work on getting comfortable with a different style of lettering.
It doesn’t matter what your plan is – just have one so you aren’t feeling lost and unsure of what to do when you sit down for alphabet lettering practice.
Resources To Help Make Hand Lettering Alphabet Practice Easier
Any time you learn a new skill, you need to learn about the skill and then practice doing the skill to master it.
That definitely applies to the skill of hand lettering (which is a form of art). As a beginner, you have to learn about the kinds of elements you like and don’t like. Then you have to learn how to hold and handle your brush pen to achieve the desired look to your style.
Don’t expect to know how to do any of it at first, or you may find yourself very discouraged. When you need some help and inspiration, check out this list of resources below.
I scoured the internet to find a variety of helpful resources that you can use to teach you technique and style. You’ll find everything from practice sheets and challenges to videos and courses to help you learn and build on your skills.
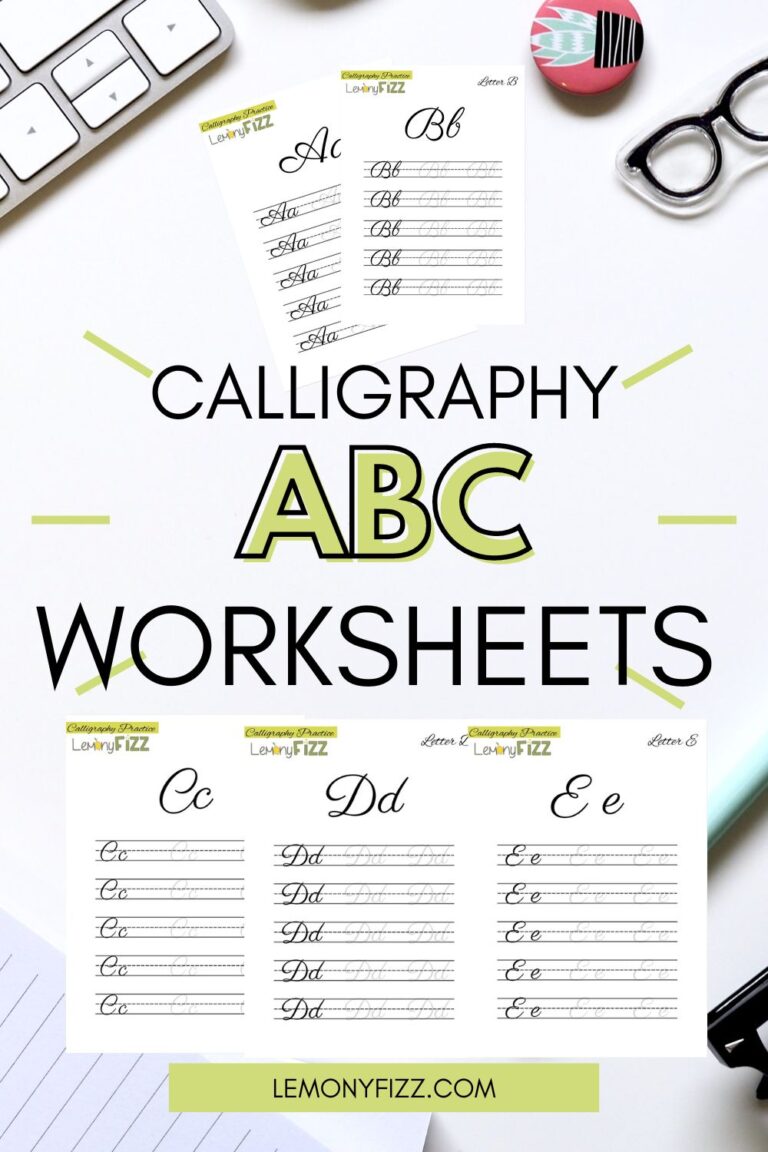
Hand Lettering Alphabet Practice Sheets
I love using practice sheets because most of them are designed to help you learn in stages. For example, they might break down the parts of a letter and then put them together, so you see the process. And they give you the chance to trace over the letter before encouraging you to practice drawing them on your own.
Here are a few great hand lettering practice sheets you can grab to get started right away:
- Awesome Alice has a great set of printable practice sheets that you can grab for free. They cover uppercase and lowercase versions of each letter.
- These free practice sheets from Liz On Call break down the process of drawing each letter so you can see the best way to do it.
- Amy Latta Creations has a huge selection of printable practice sheets. Whether you want to focus on a specific letter, a specific style, or learn how to add flourishes, she has you covered!
- By Dawn Nicole has a great variety of practice sheets. Many of hers even contain words (such as the days of the week) or common phrases (like “thinking of you”) in different font styles so that you can practice putting letters together to form a word and spacing them correctly.
Hand Lettering Alphabet Challenges
Do you need a little accountability to help make practicing your hand lettering a daily habit? A lettering challenge is a great way to help motivate you and add a little instruction too!
Check out these great challenges – I’ve listed a couple that I like, but there are plenty more out there waiting to be discovered.
- Could you take 30 days to improve your skills? The 30 Days of Lettering with Sakura Daily Challenge provides instruction on different styles of hand lettering. You’ll be amazed at what you have learned after 30 days is over!
- The weekly #HOMwork challenge from HomSweetHom provides you with a different lettering prompt each week by email. They vary greatly from week to week so that you’re always interested and coming back for more.
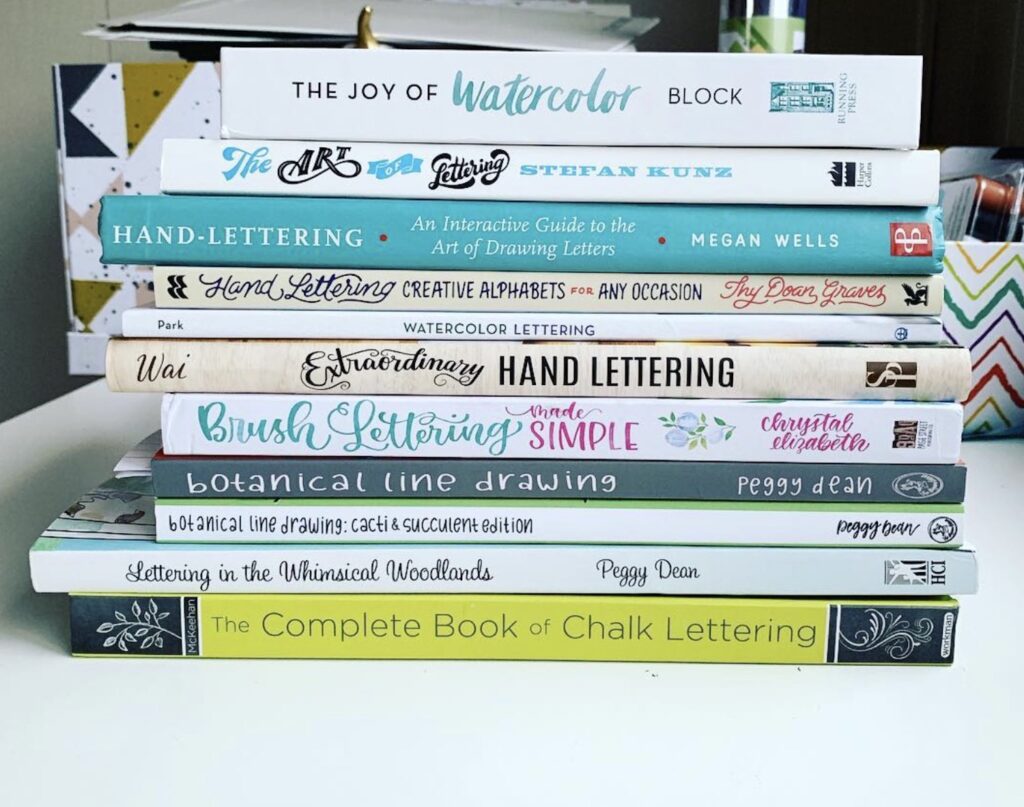
Hand Lettering Books
When it comes to books, you can find options that run the whole gamut of possibilities, from informational books to instructional workbooks. Here are a few of my favorites:
- The Ultimate Guide To Modern Calligraphy & Hand Lettering For Beginners
This workbook is basically the ultimate guide. It gives you tips and techniques as well as practice worksheets for different styles and even projects you can do! - The Hand Lettering Workbook
This workbook is another comprehensive guide that takes you from beginner to advanced and covers a range of styles and techniques. - Lettering And Modern Calligraphy: A Beginner’s Guide
This is a great overall resource on hand lettering. Although it’s more of a book than a workbook, it does provide some space to practice what you learn. And it’s a must-have for reference as you’re learning how to hand-letter.
Hand Lettering Alphabet Video Tutorials
If you’re anything like me, it helps to learn a new skill by seeing it in action before trying it myself. That’s why I love video tutorials.
YouTube is a great resource for free lettering videos, and here are a few of my favorite instructors and some of their most helpful videos for beginners.
- Amy Latta has a bunch of great video tutorials including this Hand Lettering For Beginners workshop. Here’s another basic workshop too where she covers a little more if you’ve already seen the shorter version.
- How To Hand Letter shares a great tutorial on how to do hand lettering using basic Crayola markers. If you aren’t ready to invest in brush pens or other hand lettering-specific tools, check out this video.
- Ensign Insights offers a terrific video tutorial on how to hold your brush pen. If you’re struggling with getting that ideal 45-degree angle with your pen, check out this tutorial.
- Most people think of script fonts when they think about hand lettering. But if you want to change things up, learn how to make beautiful block letters with this tutorial from The Happy Ever Crafter!
- If you are feeling more comfortable with basic hand lettering and script fonts and want to add some pizazz to your projects with bounce lettering, learn all about bounce lettering in this tutorial from KellyCreates.
Helpful Hand Lettering Courses
If you want more in-depth instruction, courses can be helpful since they often contain more detailed guidance and multiple videos. Here are a couple of great places to find a variety of courses to help you on your hand lettering journey.
- LinkedIn Learning has a large selection of courses on calligraphy and lettering that will help you as you work to improve your skills.
- Skillshare is a website that offers online classes covering a wide range of creative topics. There are plenty of offerings for anyone interested in calligraphy, hand lettering, and illustration.
Hand Lettering Alphabet Practice Final Thoughts
I hope this guide on how to practice lettering the alphabet has been helpful to you! As a beginner, it can be easy to feel overwhelmed when learning an entirely new skill. Rest assured that when it comes to hand lettering, there is no right or wrong – it’s all about the process and developing your skills based on what you like!
Once you get the basics down and have some practice under your belt, try putting your hard work to good use with these hand lettered quotes!