How to Turn Your Cricut into a Label Maker for Custom Organization
We may earn a small commission for purchases made through affiliate links in this post. For more information go to our Privacy Policy.
Learn how to use your Cricut as a label maker and create vinyl labels. Once you master how to make labels with Cricut, you can easily make custom, beautiful labels to create the most organized and gorgeous spaces.
Maybe it’s the organization-obsessed part of me, but when I finally tackle an area that’s, shall we say… unorganized, I want to get it put together. Know what I’m sayin’?
I want a home for everything, and I want every single item in said home.
Take it one step further, and once things are put away, I want them to STAY put away. In other words, I don’t want other household members pulling them out and not remembering where to put them back.
Cricut Labels For Organization
For that reason, I love to use labels. They can be super chic and cute while also helping the entire household stay organized and tidy. I love having labels for ALL the things!
Even if your crafting area, pantry, or playroom is functioning relatively well, it could probably use a little sprucing up. This can be easily done with some time spent purging, sorting, and labeling. 😉
I used to buy labels and chalkboard markers – and those work. But ever since I invested in my Cricut machine, my life has changed and evolved in the most amazing way. Things that I used to do by hand, I now do with my Cricut.
And that includes making labels! Did you know that your Cricut could make labels? Believe it or not, many Cricut owners don’t use their machines to create labels (or stickers).
If that’s you, you have been seriously missing out and that’s about to change. Today I’m showing you just how easy it is to use the Cricut label maker technique.

Which Cricut Machine Makes Labels?
If you’re familiar with the Cricut family of machines, you know that there are 3 different machines to choose from. So which one is the Cricut label maker? I can give you a short and sweet answer: they all are!
But just like families, each member has slightly different abilities. I’m going to quickly go over the differences between them here.
Cricut Maker
This machine is the king of Cricut machines for a reason, and it can tackle labels without batting an eye. The Cricut Maker has the ability to turn a crafter’s dreams into reality through drawing, cutting, and engraving. When it comes to acting as a Cricut label maker, it can make anything you want (including paper and vinyl labels).
Cricut Explore Air 2
The Cricut Explore Air 2 is a terrific label maker that can perform complicated projects easily while delivering high-quality results. Because it can cut both paper and vinyl, you can make either type of label with this Cricut label maker.
Cricut Joy
If you want the benefits of having a Cricut without the major investment, it’s time to introduce you to the newest member of the Cricut family. Meet Joy…Cricut Joy, that is. This compact vinyl cutting machine has new Cricut materials to make label-making faster and easier than it has ever been.
This little machine really stands out when it comes to label-making thanks to Cricut Joy Smart Label. It’s a white vinyl like no other that feeds directly into the Cricut Joy without the need for a mat.
Oh, and it’s designed so that Cricut Joy pens can write and draw directly on the Cricut Joy Smart Label! No smearing, fading, or smudging – pretty amazing, right?
How To Choose The Best Cricut Label Maker
So what is the BEST Cricut machine for making labels? It depends on the type of labels you want to use. For simple labels you can make quickly and use to label, say, the foods in your pantry, the Cricut Joy will meet your needs – and then some!
Wanting to make more complex, cut-out vinyl labels? You’ll want to stick with using the Explore Air 2 or the Maker as your Cricut label maker of choice.
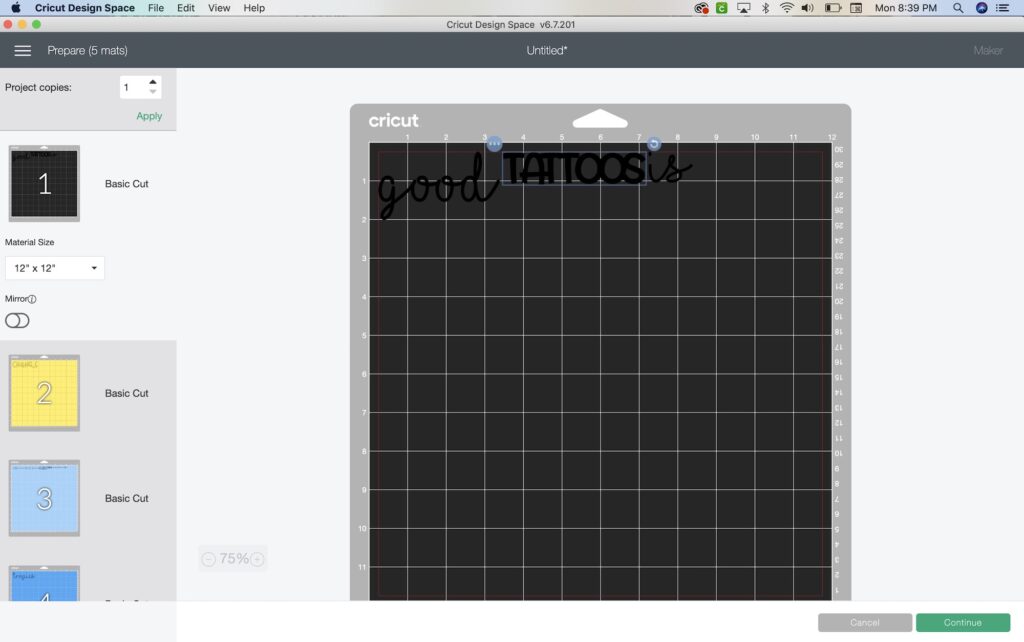
How To Design Custom Labels In Design Space
Before I talk about how to make labels on each type of Cricut machine, you need to know how to design your labels. This is done in the Design Space app and the process applies to all three machines. If you haven’t mastered it yet, learn how to use Design Space here!
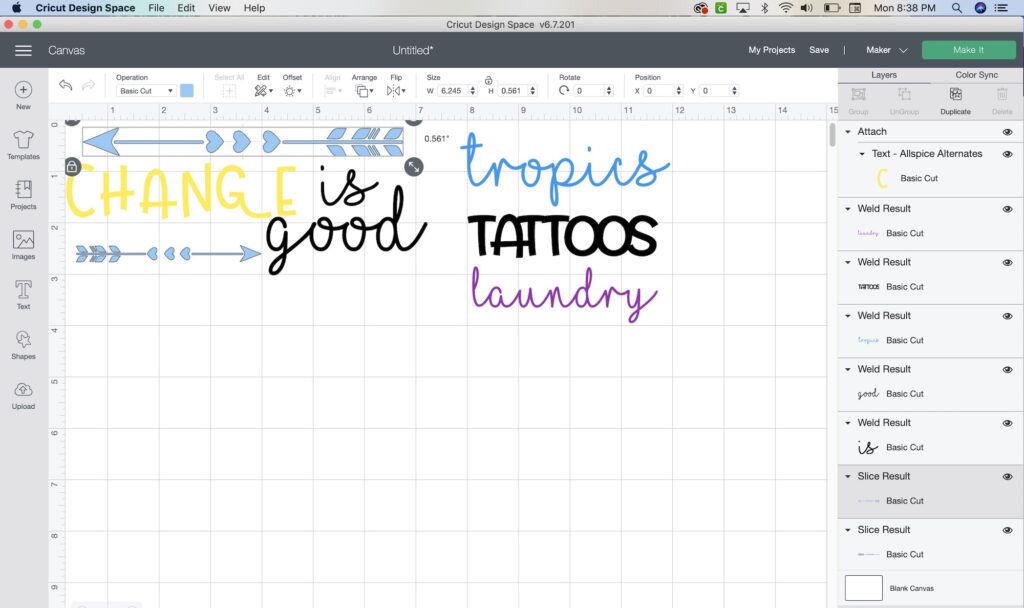
Simply follow these steps:
- Open the Design Space app and choose the shape you want for your label from the Image Library. Place your chosen shape on your canvas and choose “cut” in the layers menu on the right.
- Use the Text tool (in the tool panel on the left side) to insert text onto your canvas. Adjust your font, alignment, and text size until it looks the way you want it to. Select the pen color you want to use and set text to “draw”.
- Add your text to the label shape.
- Center your label and words using the Alignments tool if desired.
- Use the “attach” button to attach the text to the label. The software uses the attach feature to know to keep certain pieces together.
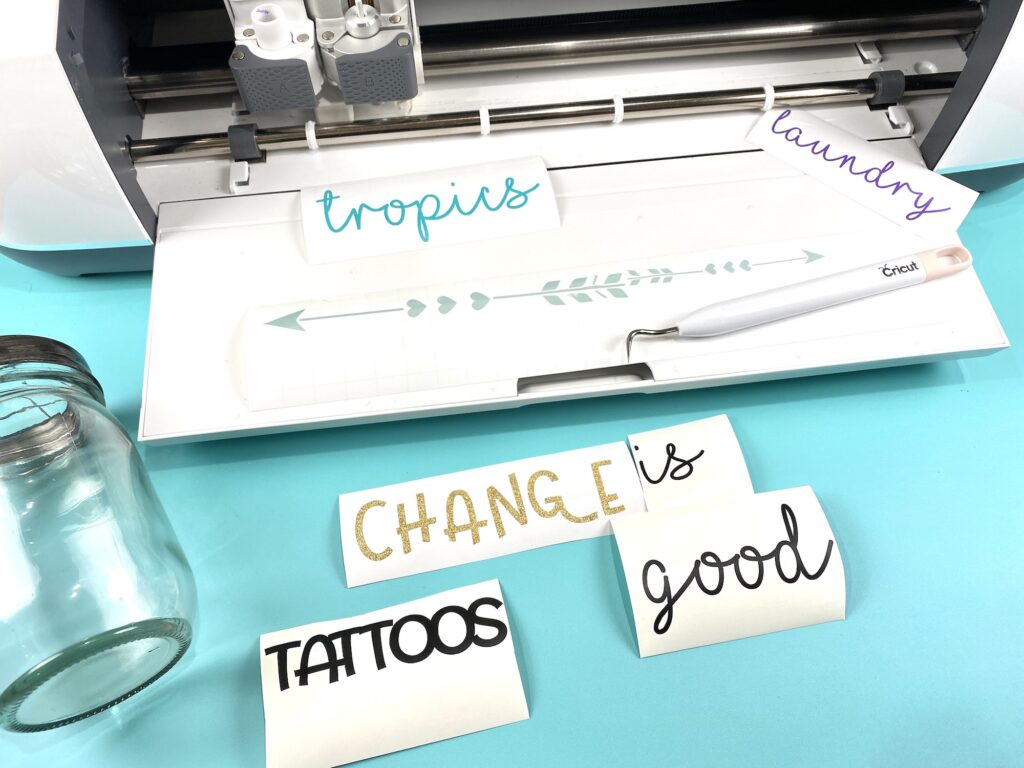
How to Make Cricut Labels With Cricut Maker and Explore Air 2
The process may take a little time to get used to if you are new to using your Cricut. But, rest assured, once you do it once or twice, it’ll seem much easier.
Supplies You’ll Need
- Cricut Machine
- Label Project In Cricut Design Space
- Cutting Mat
- Cricut Premium Vinyl
- Weeder And Scraper Tools
- Transfer Paper
Label-Making Process
Once you design your labels in Cricut Design Space, make sure you’re satisfied with how everything looks. Then, just follow these basic steps to cut and use your labels on your Cricut Maker or Explore Air 2.
- It’s time to cut your project. The Design Space software will walk you through selecting the right settings for your project.
- Load the mat with your material on it, press cut and let your Cricut machine work its magic.
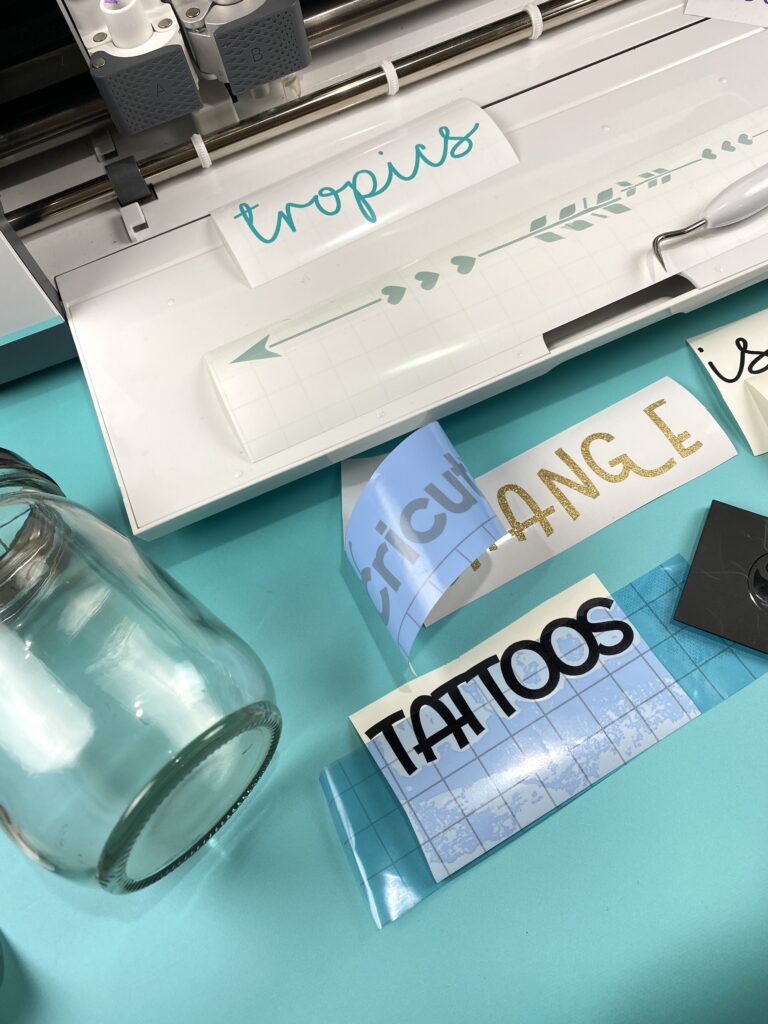
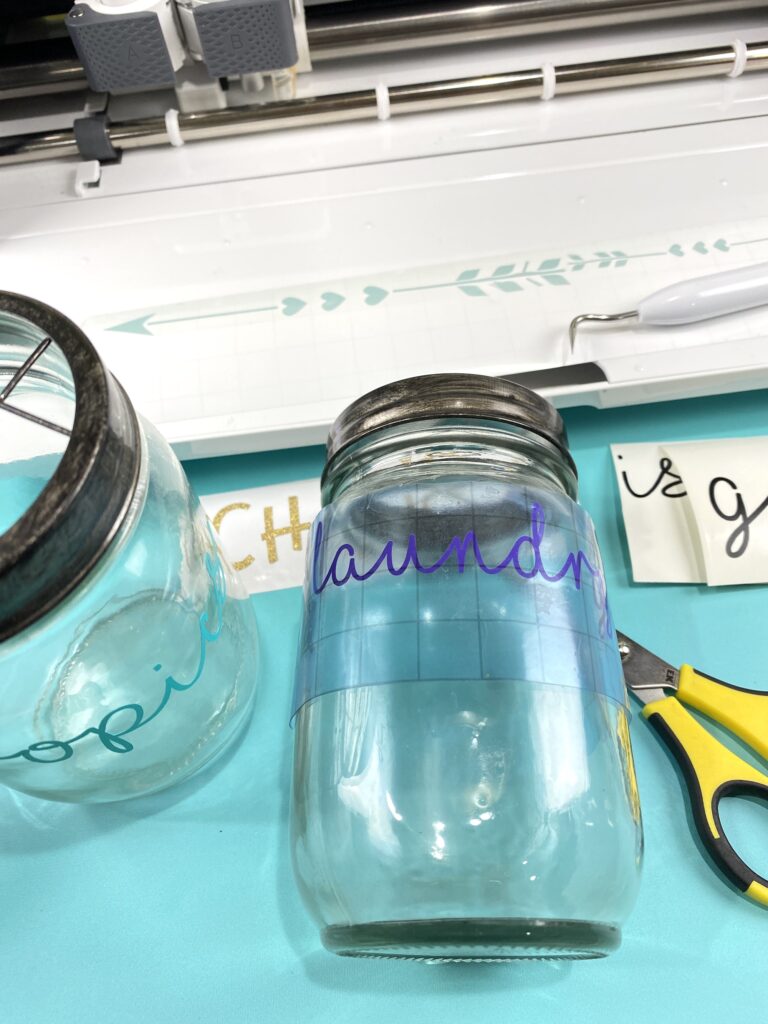
- After the machine is done cutting your labels, use the weeding tool to remove any and all excess vinyl pieces.
- Next, you’ll need to cut a piece of transfer tape to the same size as your project. (learn how to use transfer paper)
- Adhere the vinyl to the transfer tape by pressing down firmly. Then peel the paper backing off leaving just the transfer tape (one side will be sticky) and your cut design.
- Align your label on your item and press firmly to make sure the vinyl attaches to your item. You can also use the scraper tool to press down for this step.
- Slowly peel off the transfer tape from the top left corner towards the bottom right corner to finish the process and “unveil” your finished project.
Using Your Cricut Joy Like A Cricut Label Maker
Using the Cricut Joy machine as a label maker is slightly different thanks to the Cricut Joy Smart Label. With the Cricut Joy machine, you’ll still design your label using the process through Design Space.
Then use your Cricut Joy to write it and cut it. Here’s where the major difference happens: you don’t need to use transfer paper to attach your label to your item. All you have to do is peel and stick like a sticker!
Tip: I recommend removing any excess vinyl before peeling and attaching your label to your container.
Now that you can use your Cricut label maker, your Cricut machine will become a very useful tool for getting organized. Enjoy the simplicity and ease with which you can create beautiful, custom labels for all your organizing needs!