How To Make and Cut Custom Planner Tabs With Cricut
We may earn a small commission for purchases made through affiliate links in this post. For more information go to our Privacy Policy.
Today I’m combining two of my favorite topics into one: Cricut machines and planners. Can you guess how? I’m showing you how to use your Cricut to make and cut planner tabs for your planners!
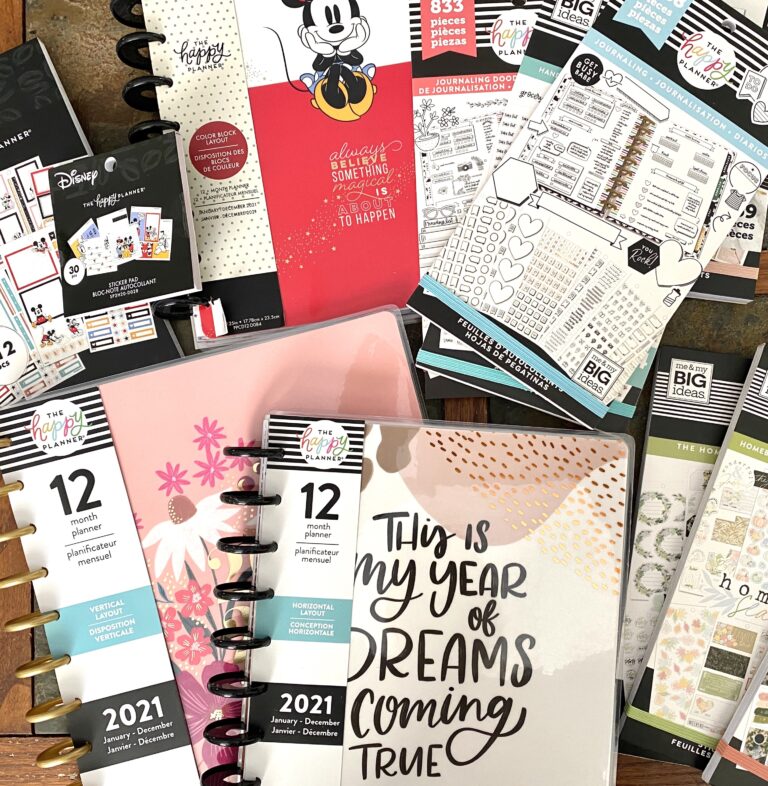
With this handy trick, you can make your own DIY planner dividers for your Happy Planner or your Frankenplanner. I love this little hack because it definitely saves money. And, it allows you to create EXACTLY what you want at the same time. 😉
If you love planners, have a Cricut, and find yourself wondering, “How do I make Cricut planner tabs?” – you are NOT going to want to miss this tutorial!
What You’ll Need To Get Started
Before we dive into the process of designing and cutting planner dividers, it’s important to have your supplies on hand. Make sure to grab:
- Cricut machine
- Cricut Design Space
- Colored cardstock
- Regular grip mat
- Laminator (if desired)
How Do You Make Cricut Planner Tabs?
You’re going to be amazed at how EASY it is to make your own DIY tabs. The only challenging part is learning a few tricks for designing them in Design Space.

But, I’m taking care of that by showing you all of the tips and tricks you need to be successful.
If you follow these steps, your Cricut will do the hard work. Then, all you’ll have to do is pop your new planner divider tabs off your mats and start using them!
Using Design Space to Make Tabs for Your Planner
1. Create Divider Page Shape
Open Design Space and make a rectangle. Adjust the dimensions to the size you need.
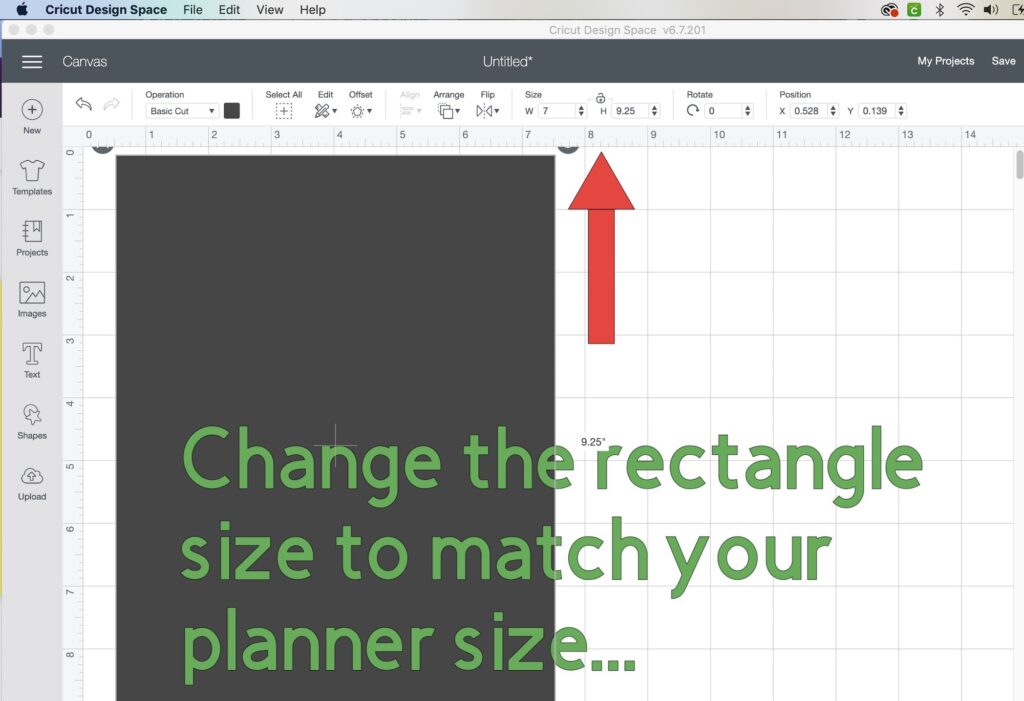
Tip: You can type in the size of your planner divider pages to easily get the rectangle the right size. It works better than playing the guessing game as you drag to enlarge.
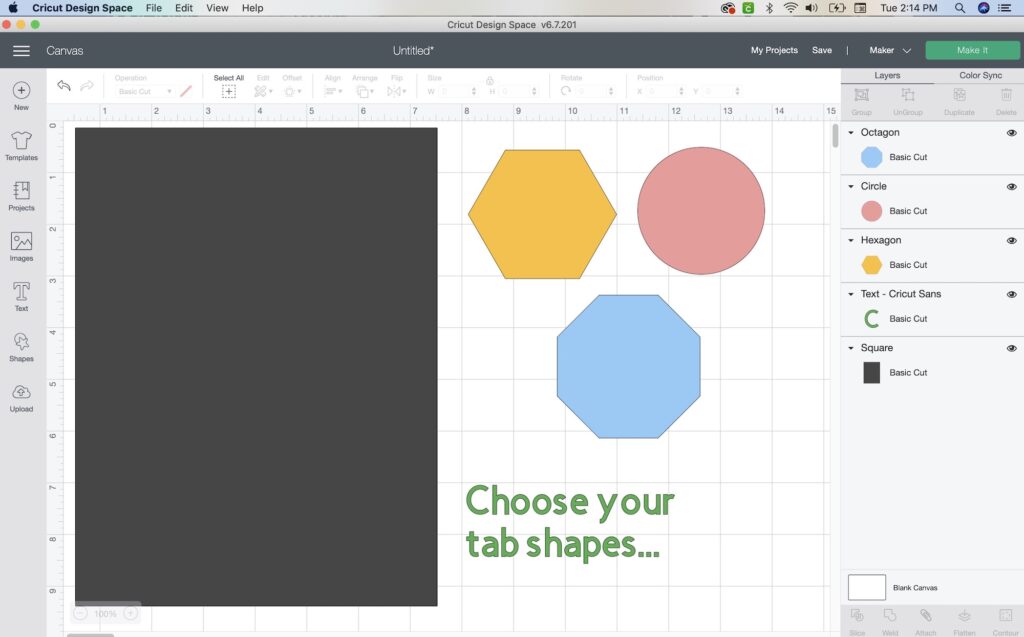
2. Choose the Object Shape For Your Tabs
Choose the shape from Cricut Images that you want to use for your tabs (heart, octagon, square, etc) and change its orientation if you want to create the tab. Adjust the size as needed.
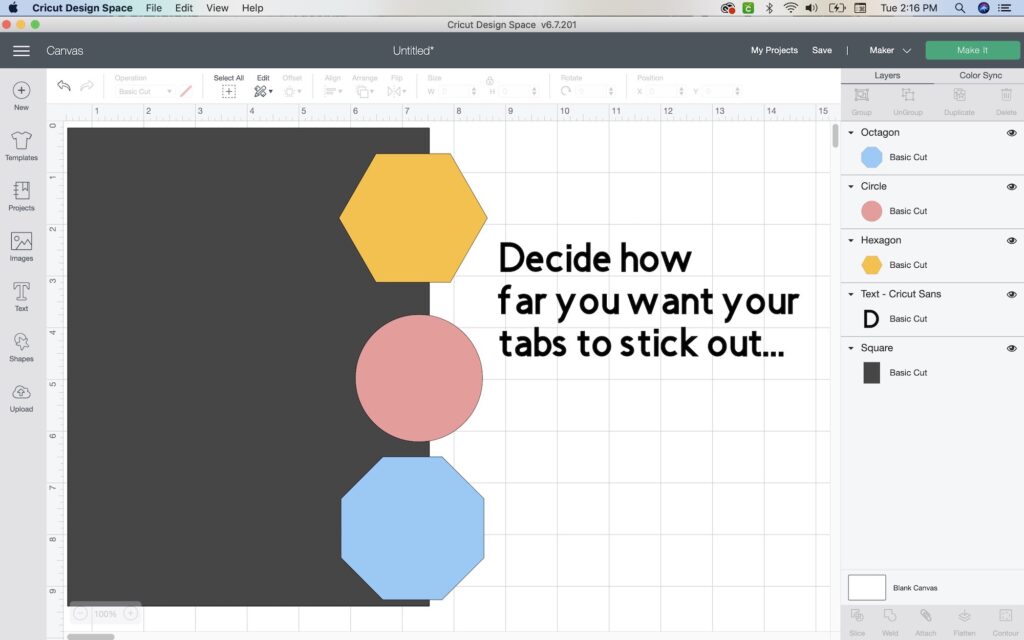
Tip: You can eyeball how far the tab sticks out as you position it on the large rectangle that will be your divider page. You don’t want it to stick out too far or too shallow.
3. Create More Planner Tabs
Copy and paste your tab shape as many times as you want according to what’s needed for your project. Be sure to move your tab shapes around just a little so they don’t overlap too much. You’ll want to be able to see all of them at any given time.
4. Align the Top Tab
To create your first divider page, select both your dark rectangle and the tab. Hold your mouse over the shape and right-click. Select “align top” so that the tab is flush at the top with the dark rectangle.
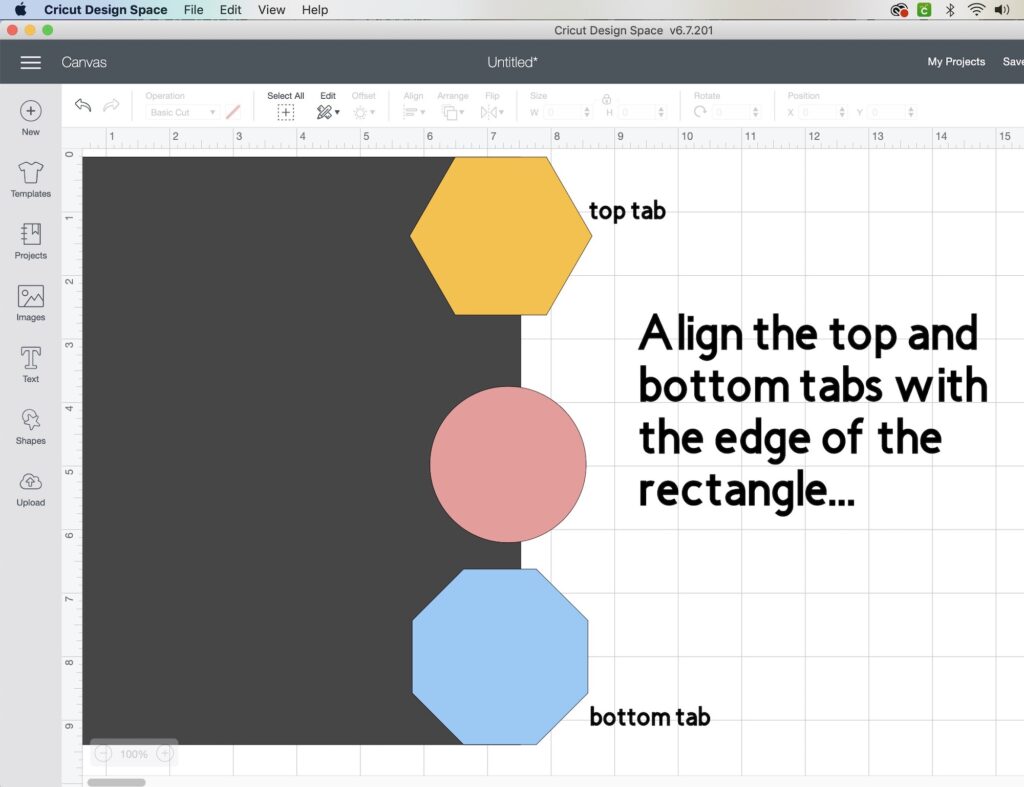
5. Align the Bottom Tab
Go to your bottom tab and repeat a similar process for aligning the tab flush with the bottom edge of the dark rectangle.
6. Align All Tabs
Select all your tabs, right-click, then select “align left.” This will make all the tabs stick out as far from the divider page rectangle as the top (or first) tab.
7. Distribute Tabs Vertically
You can manually distribute (or spread out) your tabs between the top tab and the bottom tab. However, another way to do this is to select all your tabs, right-click, and select “distribute vertically.”
Note: The manual method works best if you want your tabs to overlap each other a little. However, this method works if you want your tabs distributed evenly across the vertical axis.
8. Copy Your Large Rectangle to Your Clipboard
Select your large rectangle, right-click and select “copy” and just leave it on the clipboard. You’ll be using it in the following steps.
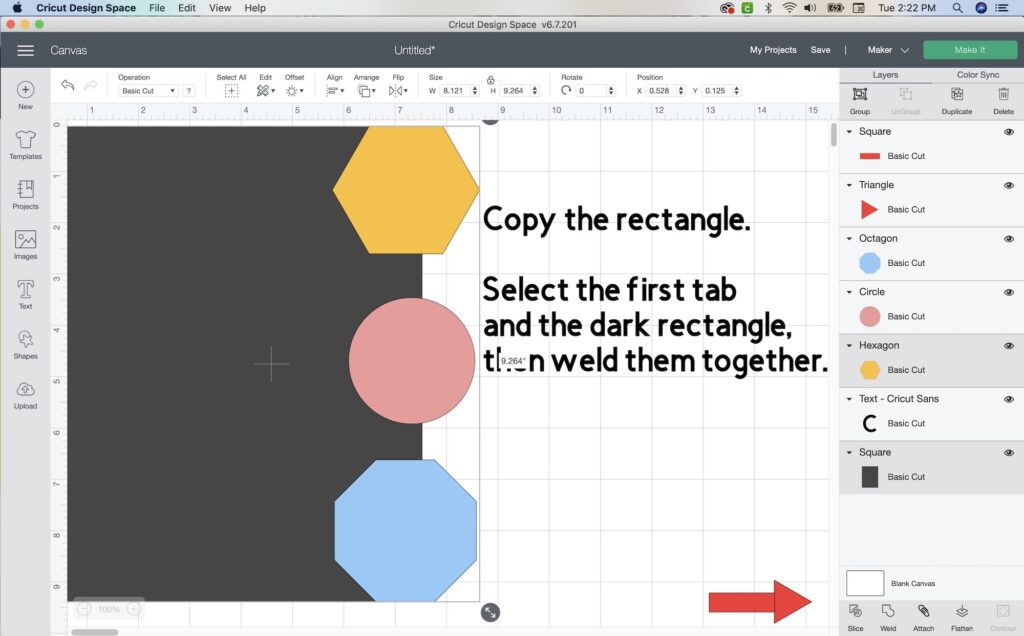
9. Weld the First Divider Page and Tab Together
Select the large gray rectangle, hold the shift key down, and also select the first (or top) tab. Right-click and select “weld” to make the two shapes into one single shape and create your first planner tab page.
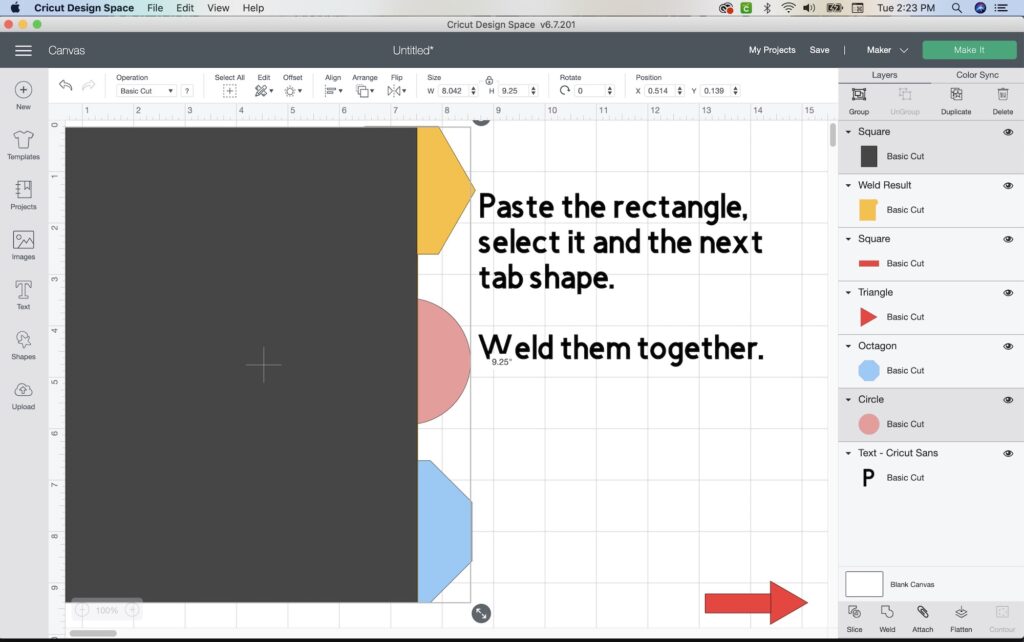
10. Paste Another Divider Page Rectangle
It’s time to add more divider page rectangles. Right-click on your canvas and select “paste”. Another dark rectangle will appear on your canvas.
Hold the shift key to select both the dark rectangle and the first completed divider tab. Right-click and select “align top,” then, right-click again and select “align left.” This gets your newest dark rectangle in the same position as the original so you can make another divider tab page.
11. Hide Your Completed DIY Tab Page
Click the first completed planner tab (the welded image) and hide it by clicking the eyeball in the layers pane. Now you can work on welding the next tab page.
12. Weld the Next Planner Tab
Next, select the dark gray rectangle and hold the shift key to also select the second tab from the top. Click “weld” in the layers pane to weld the two images together.

13. Repeat the Last Three Steps
Keep repeating the previous three steps until you create and weld all of the planner tab pages in your project.
14. Unhide Your Pages
Once they’re all complete, you can unclick all the eyeball icons in the layers pane on the right. Now you can see all the divider pages you have created.
15. Create a Design Pattern for Your Cricut Planner Tabs
One optional thing you can do is to choose the color you want for each planner tab and create a pattern. Keep following the steps below so that your Cricut machine will cut out the tabs in the pattern order that you want them.
Isn’t this machine amazing?!
16. Hide the Pages You Don’t Want to Cut First
You can use multiple colors of paper for the machine to cut. However, you’ll want to print out all the dividers of the same color at the same time.
To do this, hide all the planner tabs you don’t want to print. Just click the eyeball in the layers pane next to each page you don’t want to be printed.
That way, when you cut your divider tabs, your machine will only cut the tabs you didn’t hide.
Cutting Out the Planner Tabs on Your Cricut
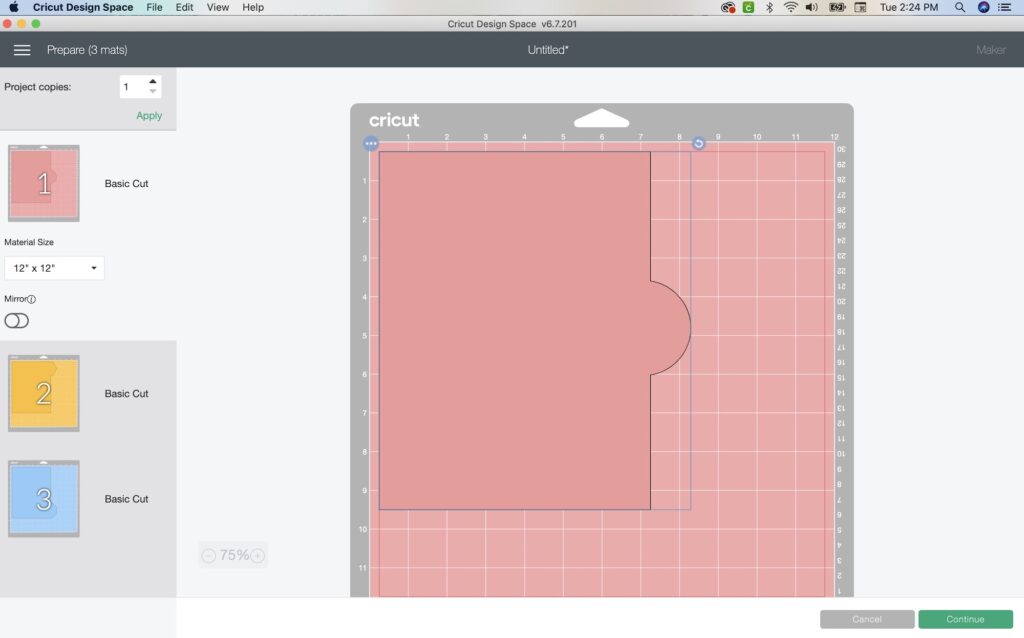
1. Follow the Prompts on the Machine to Cut
Click “go” and follow the prompts on the machine to load your mat and begin cutting. Once the machine has finished cutting, you can pull those dividers off the mat – and exclaim, “Look, how pretty!”
2. Repeat Until All DIY Tabs are Cut
Next, repeat the process of selecting the tabs you want to print on your next mat and hiding all the others. Repeat the cutting process and remove the divider tabs from your mat. Continue until you have cut all your divider tabs.
3. Label Your Tabs
Use a pen or stickers to label your tabs. You could even use your Cricut machine to print out labels too!
Note: If you use another machine brand, the process will likely vary just a little. I recommend checking out YouTube videos specific to your brand to get the answers to any of your questions.
And you’re done! The process for making DIY planner tabs is very super easy, right?
DIY Tab Final Tips and Tricks
In the guide above, I covered how to make tabs in any shape that you want and how to create a pattern of colored pages. But here are a couple more tips I want to share to make this project even better:
- You can design your pages so that your Cricut cuts holes in them too. But, that’s totally optional because a planner hole punch is really just as easy.
- Laminate your tabs if you’re using cardstock and want to make your planner tabs even sturdier. Simply run your cut pages through your laminator – easy peasy!
I hope this step-by-step guide makes the process super easy to follow. I know it looks long and scary but I just wanted to provide as much detail as I could. Hopefully, it will eliminate confusion the first time you walk through the steps.
I’m confident that you’ll only have to do it once before you feel comfortable making your very own DIY planner tabs. They will be so fun to use in your custom Frankenplanner, Happy Planner, or whatever else you use them for!
Then, once you learn how to make planner tabs, you can easily generalize the process to make tabs for any notebook, journal, etc. The possibilities are truly endless!