
DIY Gift Card Holder: Panel Fun Fold Card
We may earn a small commission for purchases made through affiliate links in this post. For more information go to our Privacy Policy.
Essentials of DIY Gift Card Holders
There are so many creative DIY gift card holders you can make. This panel fun fold card is a simple yet beautiful variation. The important thing to remember is that besides giving someone a gift card, you are giving them a piece of your creativity and heart. Whether you choose to make a quick and easy card or something more complex.

Materials and Tools Required
CLICK HERE: If the video isn’t loading, you can watch it on YouTube.
To create a DIY gift card holder, you will need a few basic materials and tools:
- SVG Template File: You can download this panel fun fold card here.
- Cardstock and Scrapbooking Paper: Choose double-sided, holiday-themed or patterned sheets to add extra flair to your design.
- Digital Cutting Machine: you can make this card using a Cricut, Silhouette, Brother ScanNCut, etc. If you don’t have one of these machines, you can use the template as a pattern and still be able to follow along.
- Adhesive: Tape runner and/or liquid glue
- Embellishments: die cuts, stamped images, stickers, ribbons, brads, etc.
Step-by-Step Instructions for Panel Fun Fold Cards
Step 1: Gather your materials. You will need:
- Cardstock to match your pattern paper
- Pattern paper to fit the holiday or occasion
- adhesive
- embellishments
Step 2: Cut the card base and pattern papers with your machine (or by hand) as well as the little frame. This template makes an A2 card (4.25 in x 5.5 in).
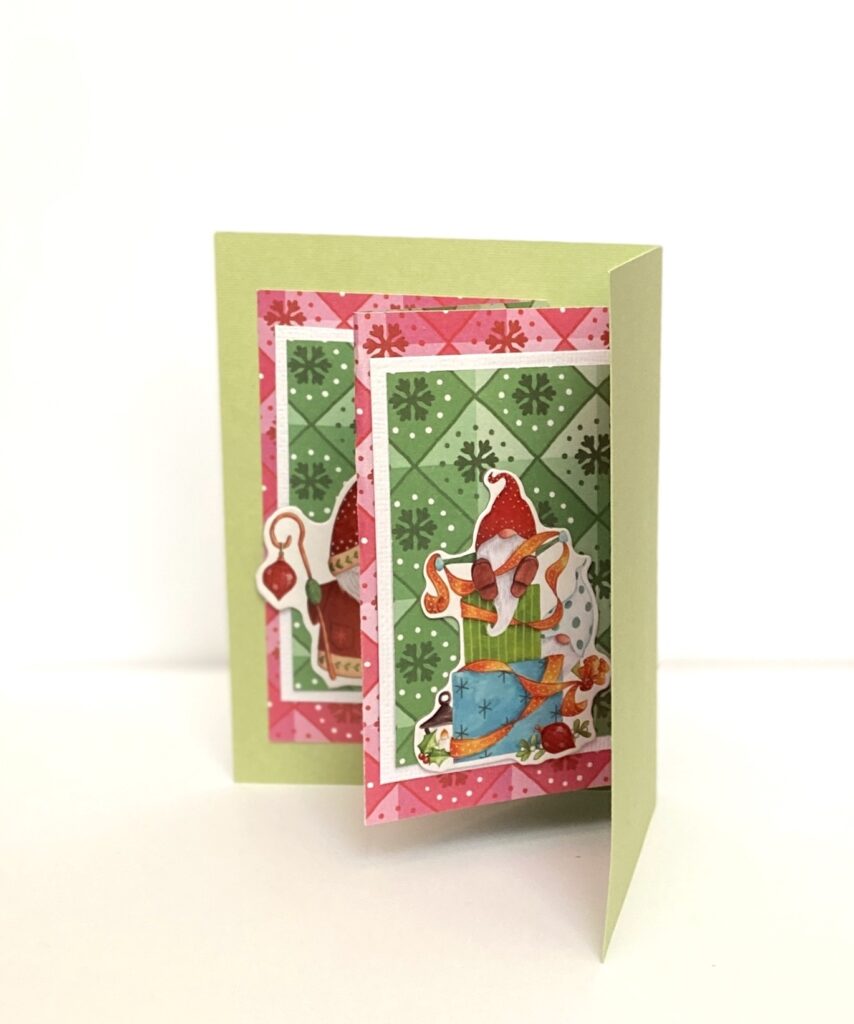
Step 3: Fold your card base in half. Then fold your long pattern paper accordion style.
NOTE: A gift card measures 3.375“ x 2.125“. If you don’t have a gift card on hand yet, you can use a credit card, or Costco membership card, or cut a piece of cardstock to use as a guide.
Step 4: Glue the back panel into your card, leaving a “pocket” for your gift card. Do not place your pattern paper right up to the outside edge of your card base. Tuck it in at least 1/4 of an inch.
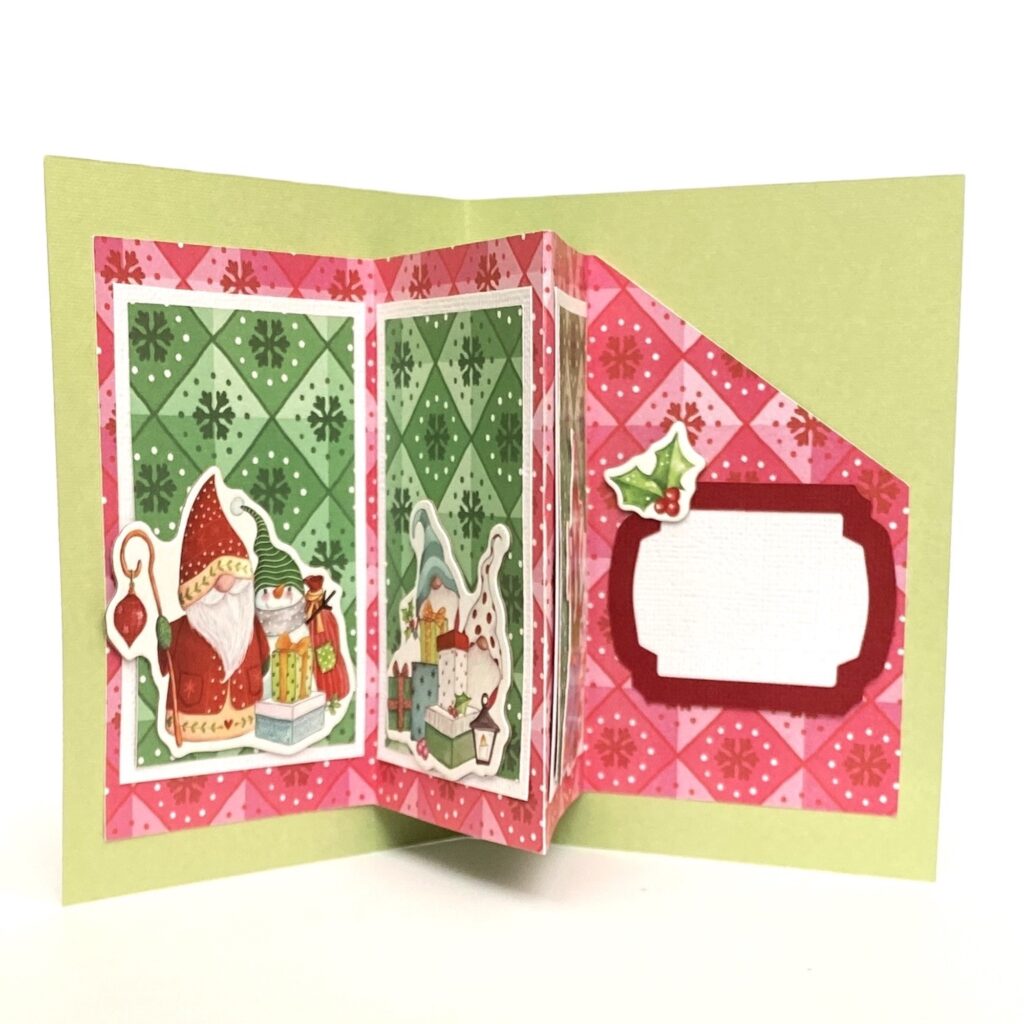
Step 5: Once you have your right panel glued down, you can decorate your front panels while they are easy to lay flat. The first three panels will have a piece of cardstock and a pattern paper mat. The fourth panel that is cut at an angle is your gift card panel and will have the frame.
Step 6: Decorate your panels with die cuts, stamped images, stickers, brads, flowers, etc.
Step 7: Add the larger pattern paper square to the front of the card along with your greeting, die cut, etc.
Now, your DIY gift card holder is ready. Slide the gift card into the pocket, and your thoughtful, handmade gift is complete.
Omg this card is super cute. Thank you for sharing it. As soon as I can make time I am going to sit down and make a few.